
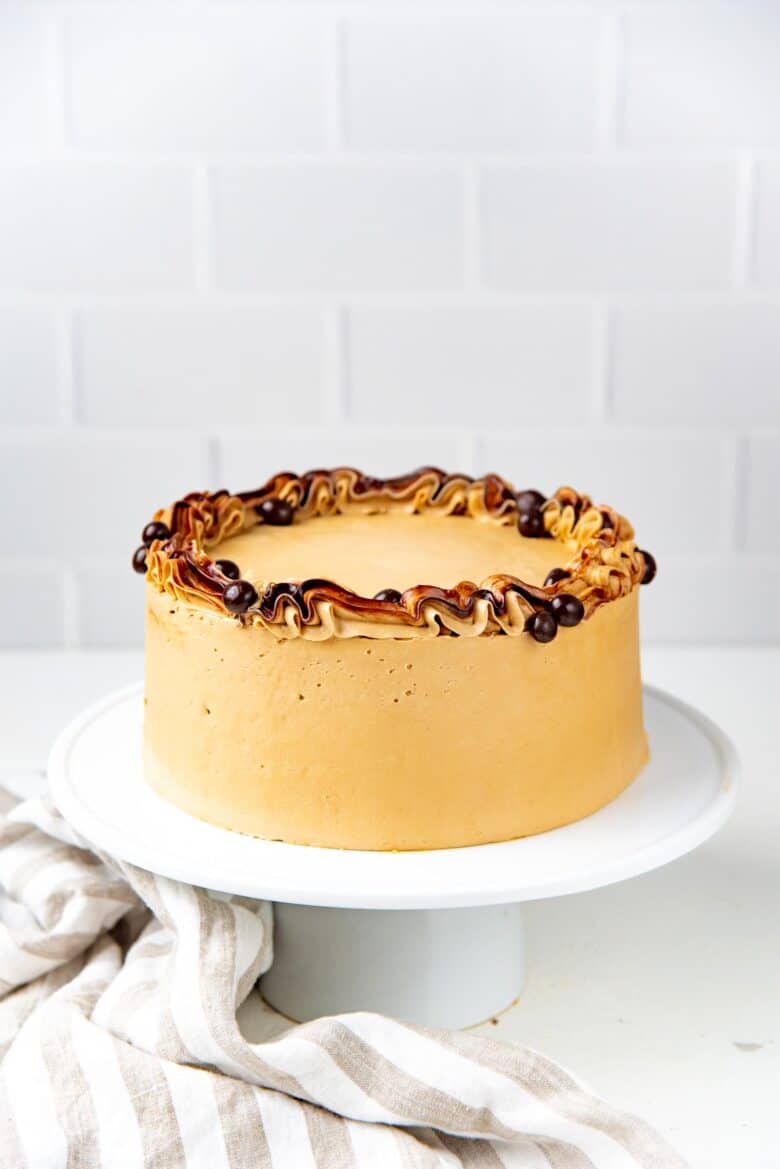
A Coffee Layer Cake with soft, coffee flavored cake layers, and light and fluffy coffee buttercream! A classic coffee flavored cake that’s perfect for any occasion, and easy to make!
Soft coffee cake layers filled and frosted with a creamy, fluffy coffee buttercream! Perfectly sweet, with a delicious coffee flavor!
As a kid, I did NOT like coffee cake. And I don’t mean “coffee cake” that is cinnamon flavored or some other type of sweet cake that is eaten with coffee. I’m talking about actual coffee cake, i.e. coffee flavored cake.
This type of coffee cake was popular in Sri Lankan bakeries, and were often served when entertaining guests. I didn’t truly appreciate coffee flavored desserts (coffee flan, coffee panna cotta, and coffee popsicles likely being the only exceptions) until I was older. Now, I make my own coffee flavored layer cake, and it’s absolutely glorious!
Coffee layer cake components
There are only two components to this cake, with another optional component.
- Coffee flavored cake layers
- Coffee buttercream
- Hot fudge sauce (optional)
How to make espresso cake (coffee layer cake)
Coffee flavored cake layers
These cake layers are EASY. The base of this espresso cake is my easy vanilla cake recipe, with the addition of instant coffee.
I use instant coffee in this coffee layer cake because it’s easier to find, and the flavor of coffee can be easily adjusted without impacting the final cake and buttercream texture.
Just make sure that you use an instant coffee brand that you like! Personally, I’m partial to Nescafe, but only because it’s what I grew up with, and it makes amazing iced coffee too.
How to make the cake layers
The base of this cake is my vanilla cake. The method is the same, so if you like, you can read my classic vanilla cake post for a more detailed step by step description of the process. The difference here is the addition of coffee (dissolved in milk).
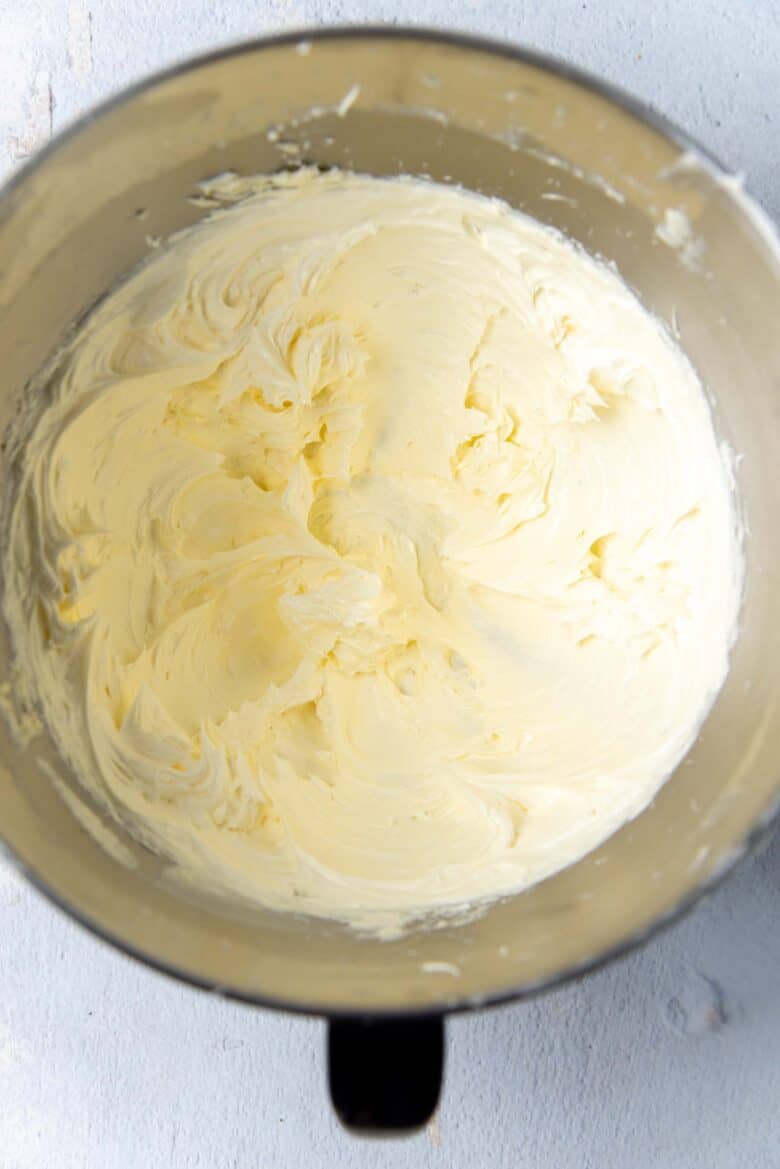
- Cream the butter, oil, and sugar until fluffy and creamy.
- Add the eggs and mix.
- Dissolve the coffee in the wet ingredients, and sift the dry ingredients.
- Fold the dry ingredients and the milk mixture together, alternating the addition of the two.
- Divide the batter into the cake pans.
- Bake the cake layers.
- Let the cakes cool until they are ready to be used.

Tips on how to get perfect cake layers for this espresso cake
- Have all the ingredients at room temperature.
- Make sure you cream the butter and oil together very well before adding other ingredients. The combination of butter and oil gives the cake a buttery taste and a light crumb!
- Don’t overbeat the eggs into the cake batter. Beat them only until the eggs are mixed in.
- Fold in the dry ingredients without overmixing. Overmixing can lead to a tough and/or gluey cake.
- For flatter cake surfaces, you can use a bake even strip to insulate the cake pans. But this is optional.

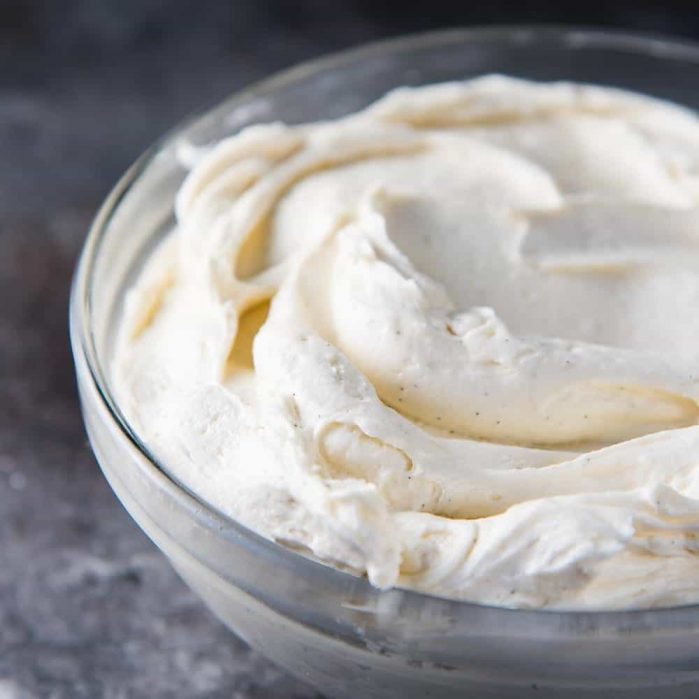
How to make coffee flavored buttercream
You can make coffee buttercream in two ways. Either make Coffee Swiss Meringue Buttercream OR American Coffee Buttercream.
Since the coffee layer cake I grew up with used American buttercream frosting, that is what I am using here as well. (But you can also check out my classic Swiss meringue buttercream, and the easy Swiss meringue buttercream for a cheat’s version.)
Tips for making perfect American Coffee Buttercream
- Use room temperature butter.
- Whisk the butter in the mixer until light and fluffy. This can take as long as 10 minutes, so be patient.
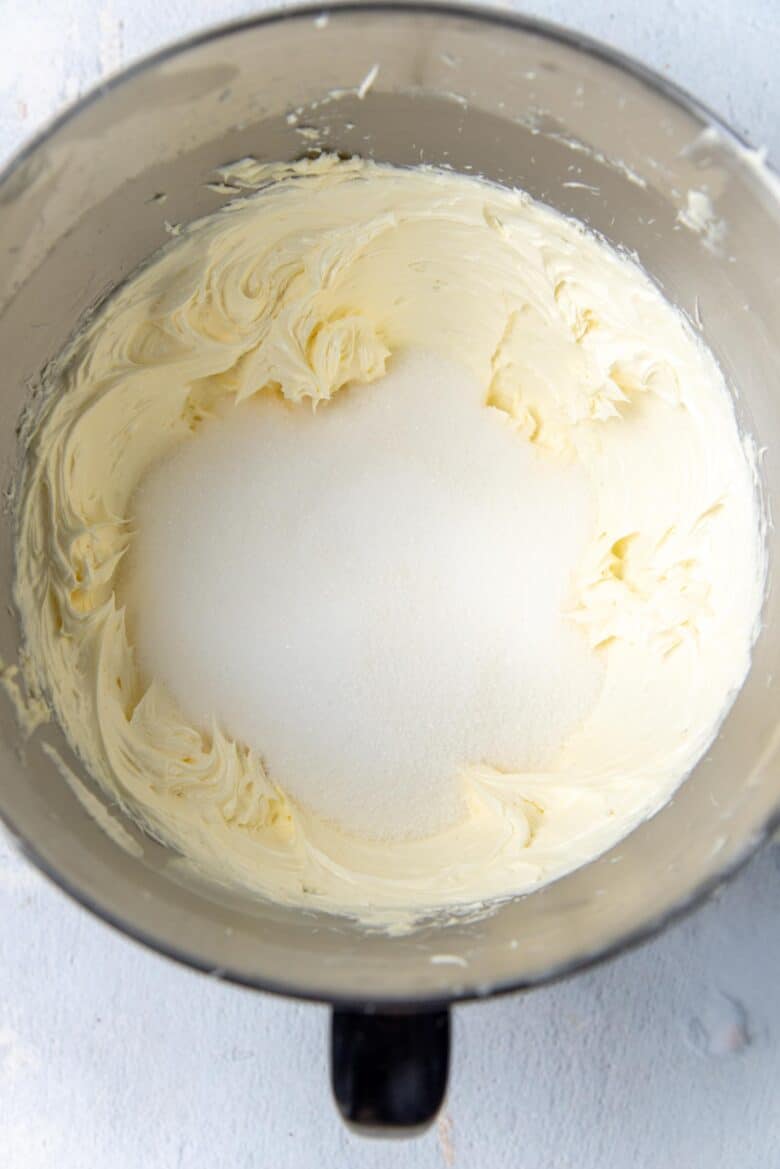
- Whisk in the confectioner’s sugar ONLY after the butter is light and fluffy.
- Dissolve the instant coffee in the heavy cream and add it to the buttercream.
- Don’t forget to add salt and vanilla, which will help balance and bring out all the flavor of the buttercream.
If the butter hasn’t been whisked properly, you risk ending up with a pasty buttercream with the fatty mouthfeel of solid butter. Your coffee layer cake will have heavy, gummy buttercream if that happens.
If the buttercream sets (this happens especially in the winter), simply re-whip it to bring it back to the correct consistency.

How to assemble the coffee layer cake
This coffee cake is very easy to assemble. You can go rustic and just assemble the cake with a layer of buttercream in the middle, and frost the outside of the cake.
But if you’re going for something a little fancier, then take extra care to make the cake layer flat on top, and to evenly spread the buttercream as a filling. The cake layers should also look even, and not lopsided. Here are some tips.
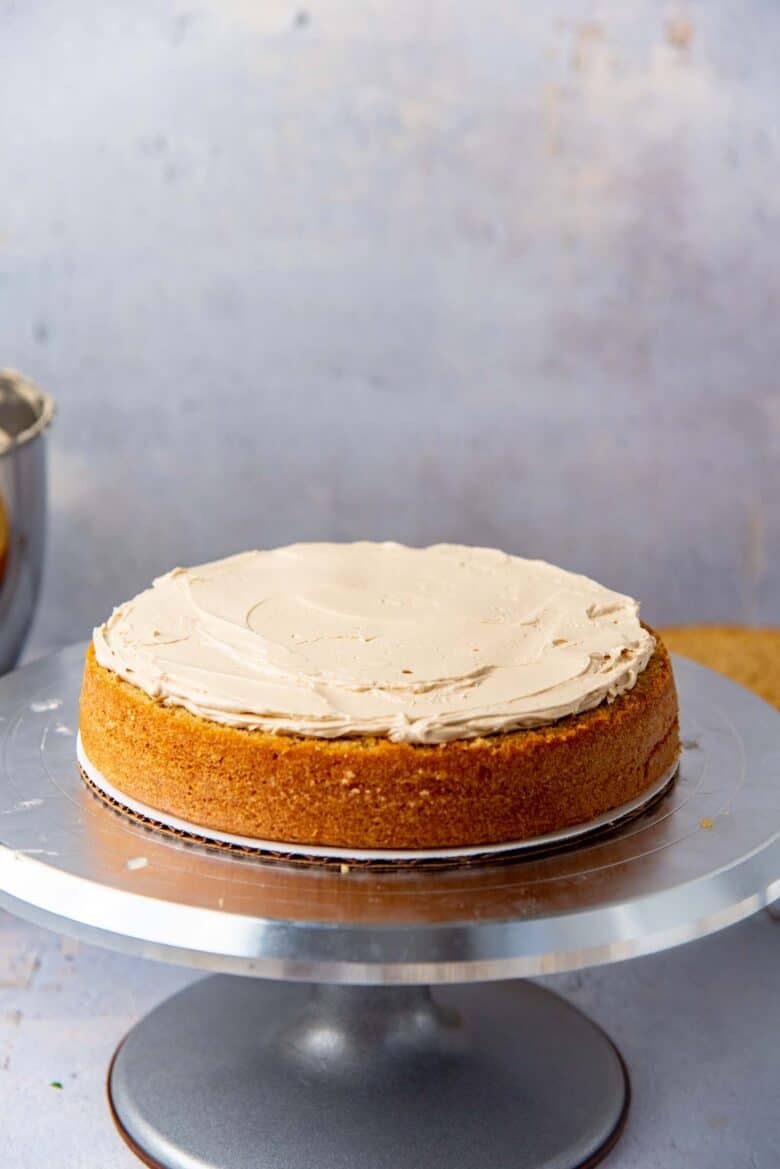
- Make the surface of the cake layers nice and even (i.e. slice off any domed tops).
- Place the first cake layer on the tray (the bottom of the cake layer facing down).
- Spread an even layer of buttercream frosting.
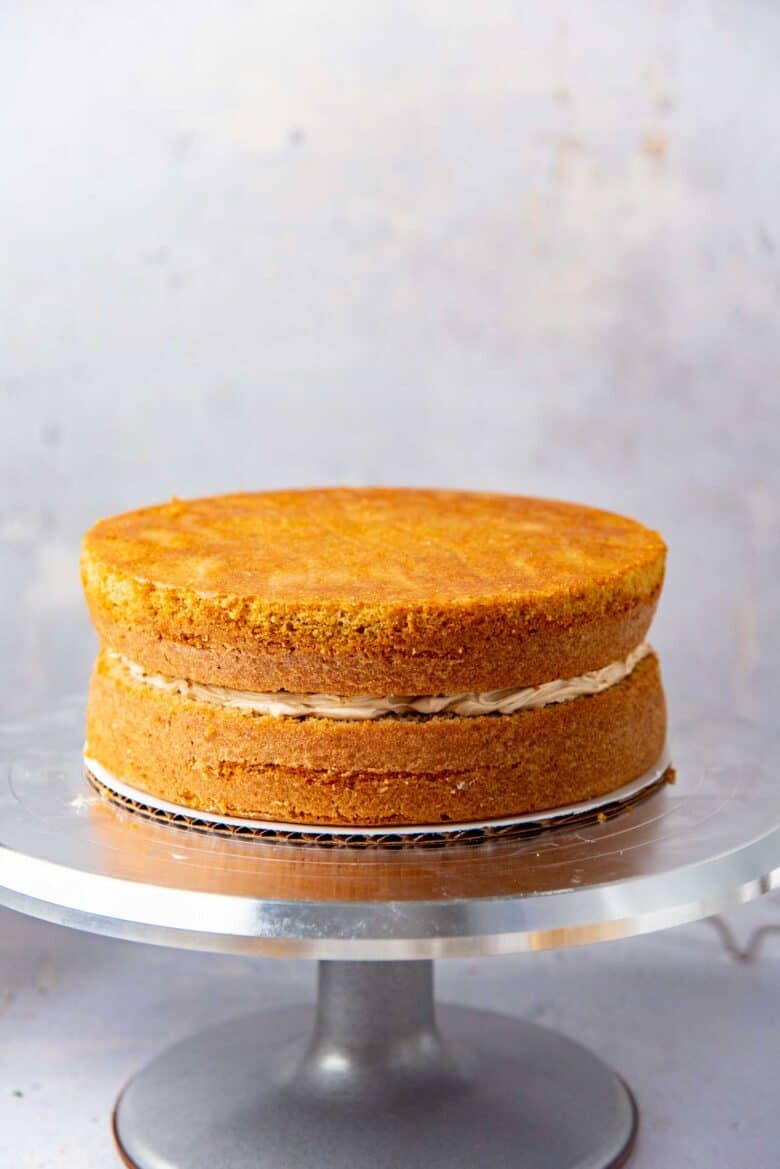
- Place the second cake layer on top (the bottom of the cake layer facing up this time).
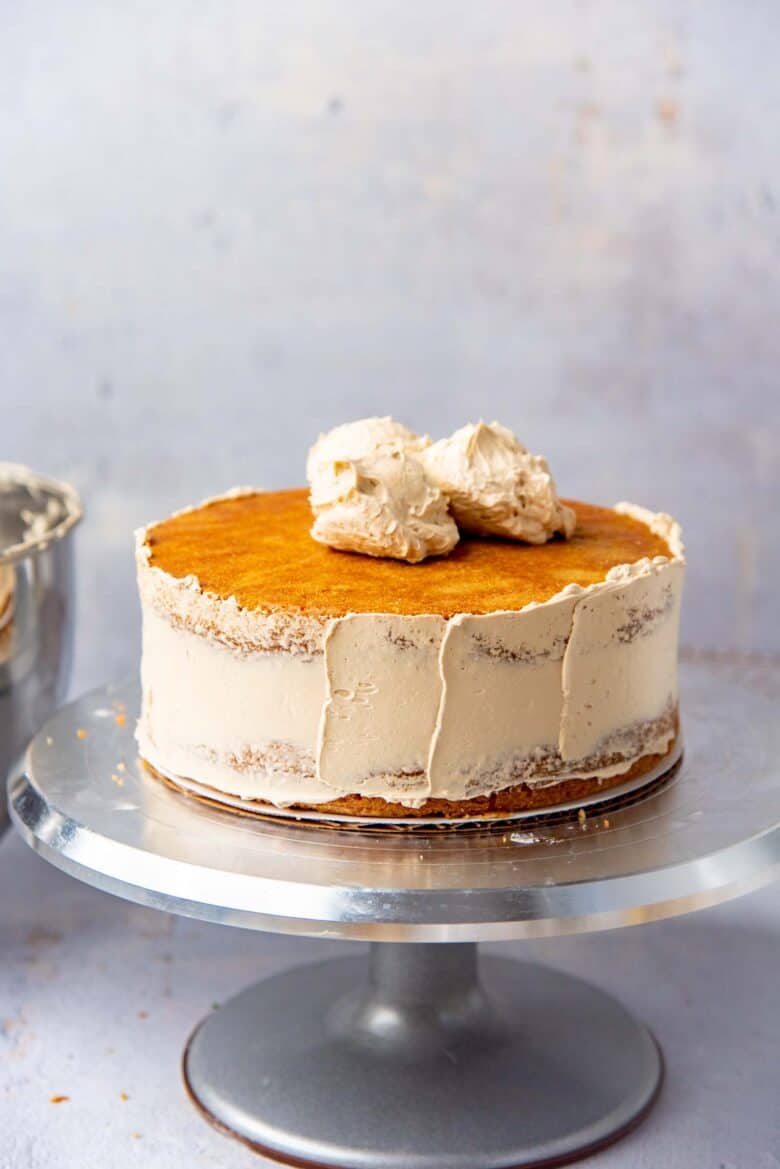
- Apply a thin layer of frosting as the crumb coat and let it set (in the fridge or a cool place).
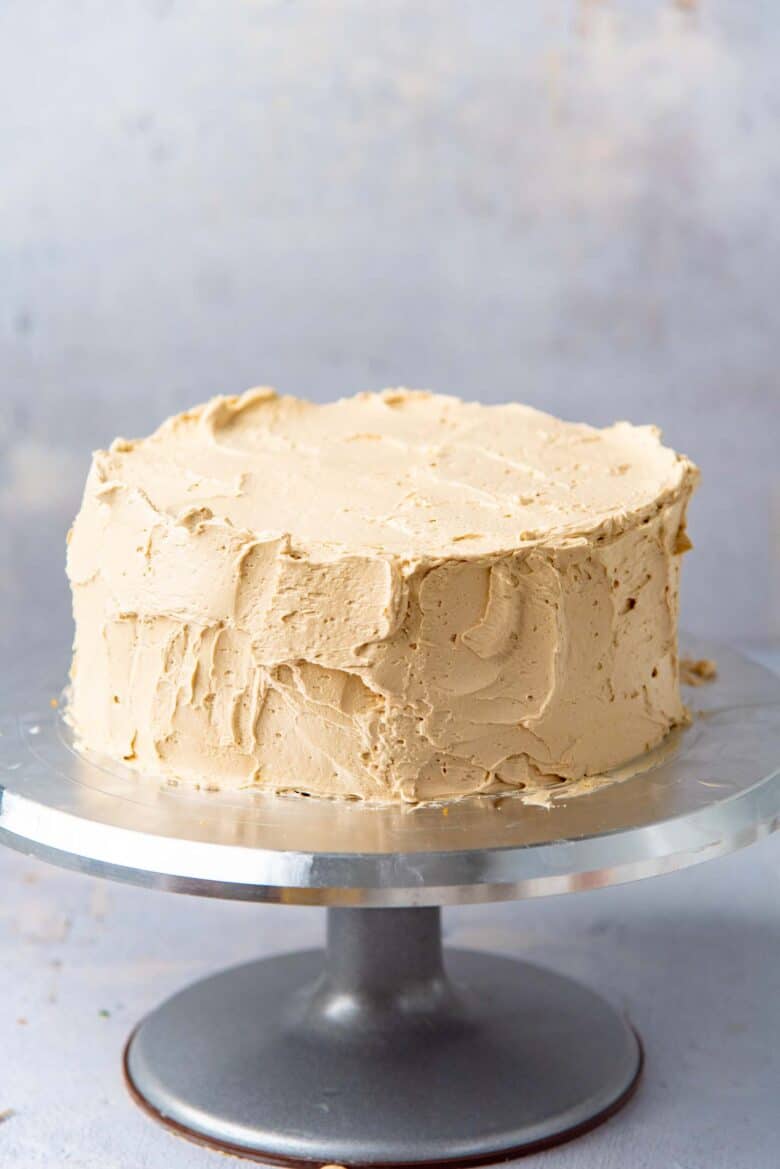
- Frost the cake (rustic or clean look) with the coffee buttercream, and decorate.


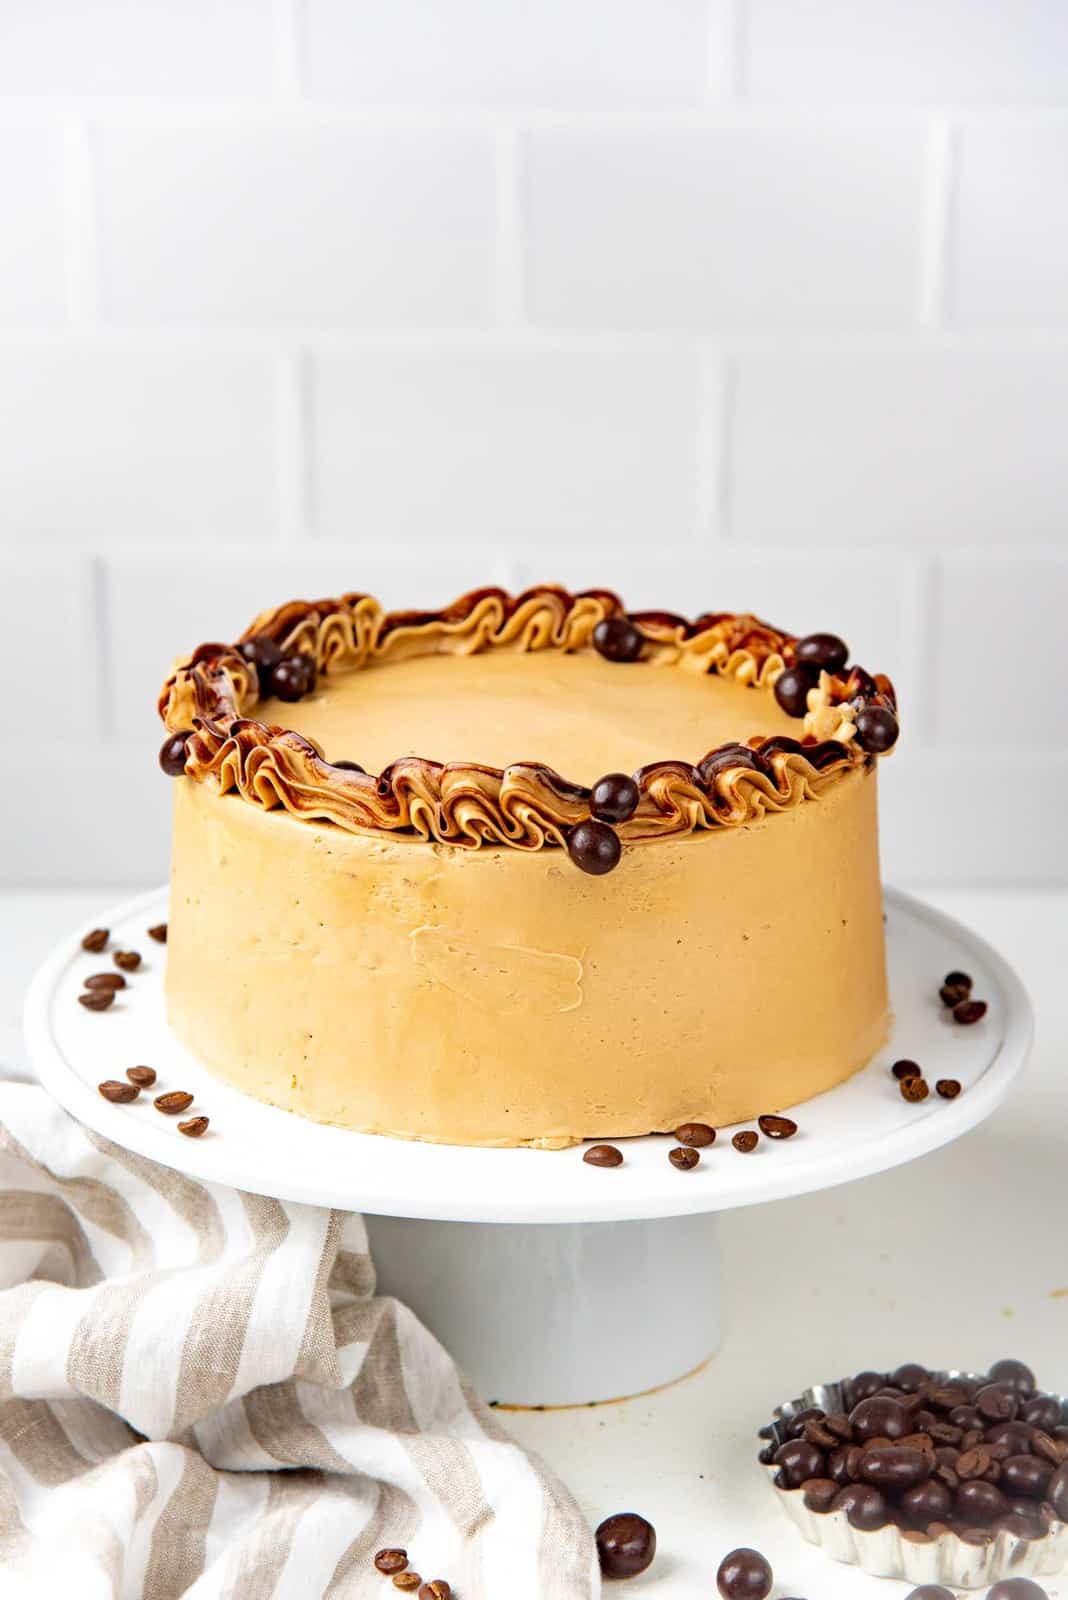
Decorating the espresso cake
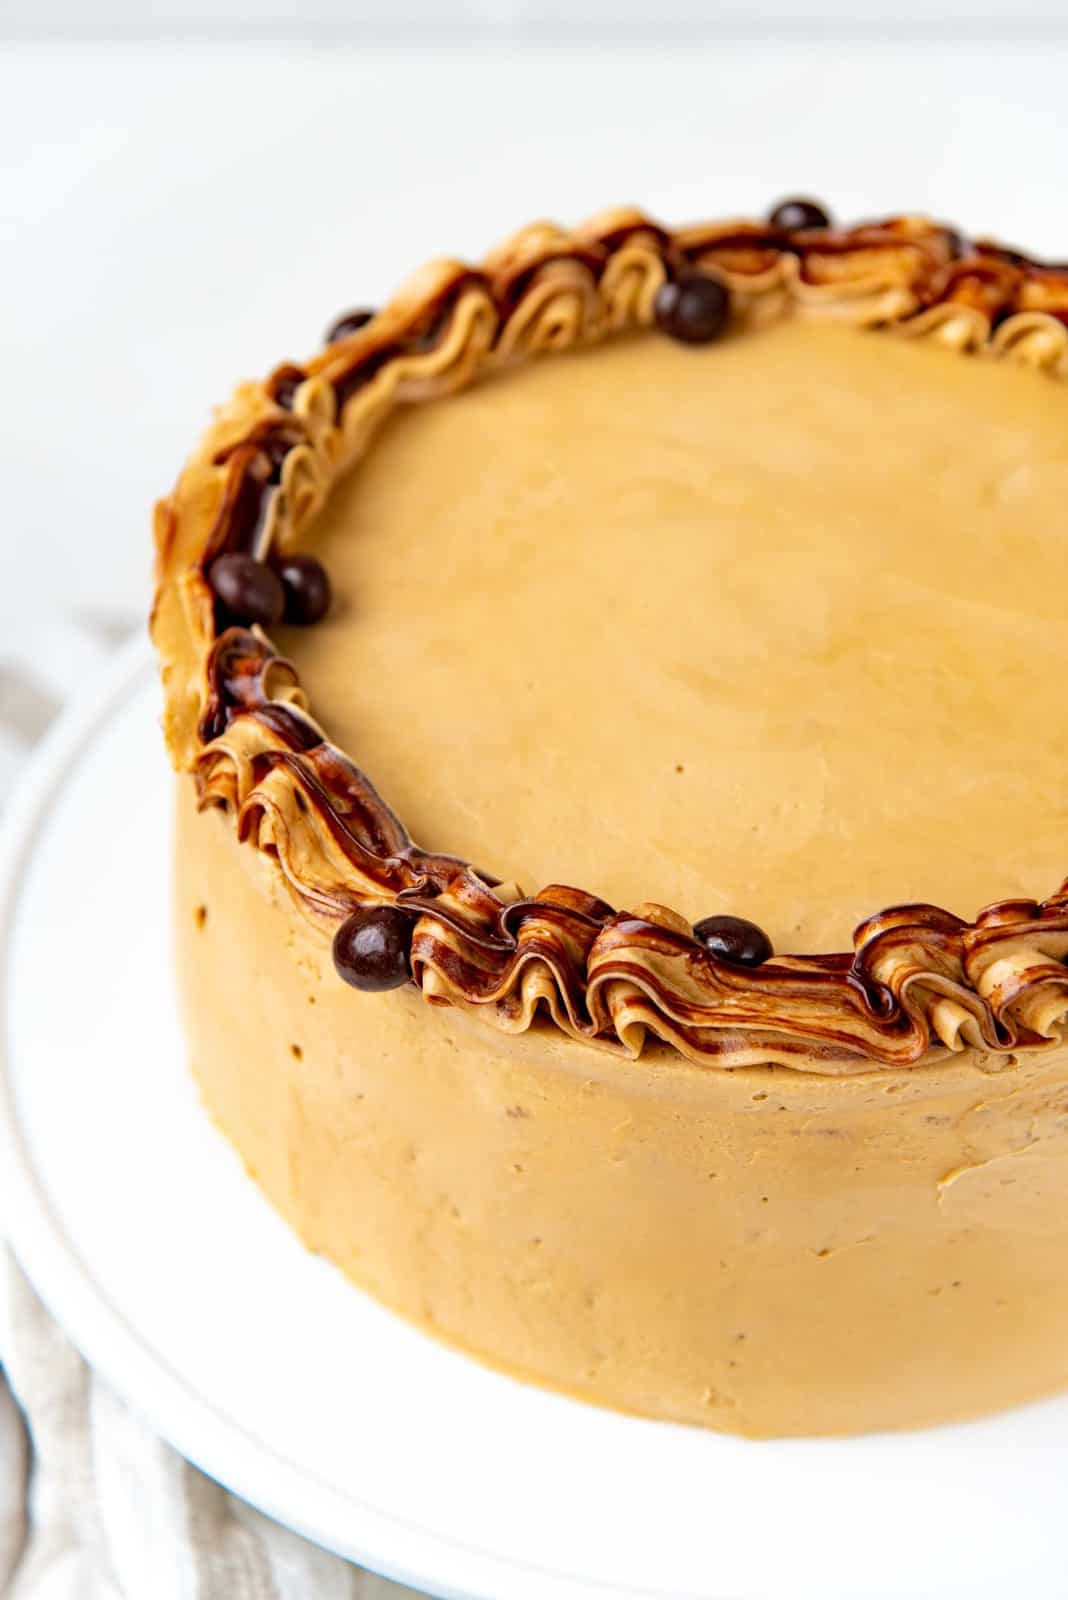
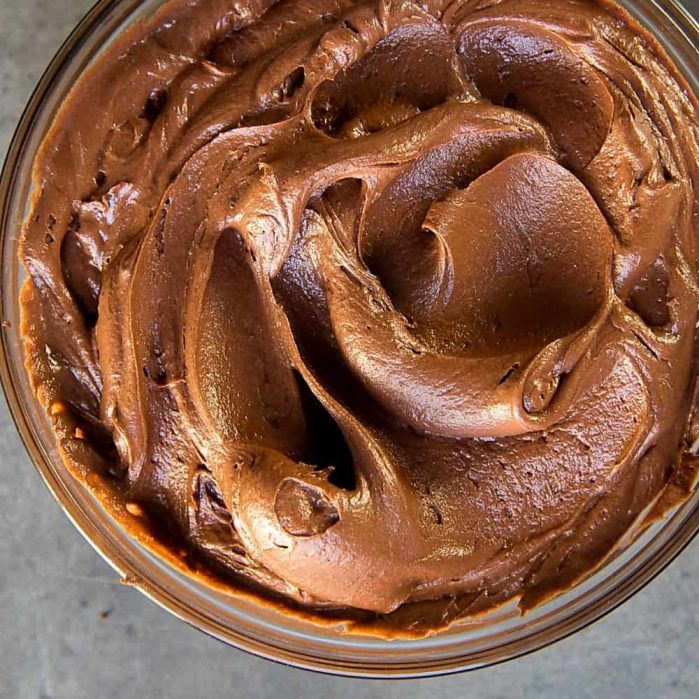
To decorate this coffee cake (espresso cake), I added a piped border of coffee buttercream on top. But I created a marble effect with chocolate fudge sauce. This was because Sri Lankan coffee cakes are always decorated with a little chocolate, and I just felt a little nostalgic! 😀
To do this, I made my chocolate fudge sauce in advance and let it cool. You won’t be using all of it, so make sure to refrigerate the rest of it so you can use it top ice cream, waffles, pancakes, or even make chocolate milk with it!
Take about 3 – 4 tbsp of the fudge sauce and place it in the bowl. Usually my fudge sauce is pretty stiff at room temperature. To loosen the sauce a little, I add about 1 – 2 tsp of water and mix it in until it has slightly softened, but not runny in consistency.
Then take a pastry bag, and place the tip of your choice in the bag (with the end of the bag snipped off). Spread a line (1 – 2 inches in width) of the chocolate sauce inside the pastry bag, on one side, starting from the tip, and up to about half-way up the pastry bag. Just one slightly thick strip of chocolate sauce on one side of the pastry bag.
Now place the coffee buttercream inside the bag. When you pipe the buttercream, you will now get a streak of the chocolate fudge sauce in the buttercream too (see picture below).
For a more simple decoration idea for your coffee layer cake, you can sprinkle the cake with chocolate sprinkles, or a drizzle of chocolate sauce or roasted nuts on top.
Storing the cake
To store the coffee cake layers (without frosting);
Cool down the cake layers to room temperature. Wrap each layer separately with plastic wrap and then foil. Then freeze for up to 3 months, and thaw them out in the fridge before using.
You can also wrap them with plastic wrap and leave them at room temperature overnight.
If you have frosted the cake, the cake will stay at room temperature for about 3 days, provided the cake was stored in an air-tight container. Exposed edges will dry out.
You can also keep the cake in the fridge. Let the cake thaw out at room temperature before serving, because that soft buttercream and the moist cake taste best at room temperature.

Why I love this recipe
If you’re looking for a coffee flavored cake with a wonderfully balanced coffee flavor and sweetness, THIS is the recipe!
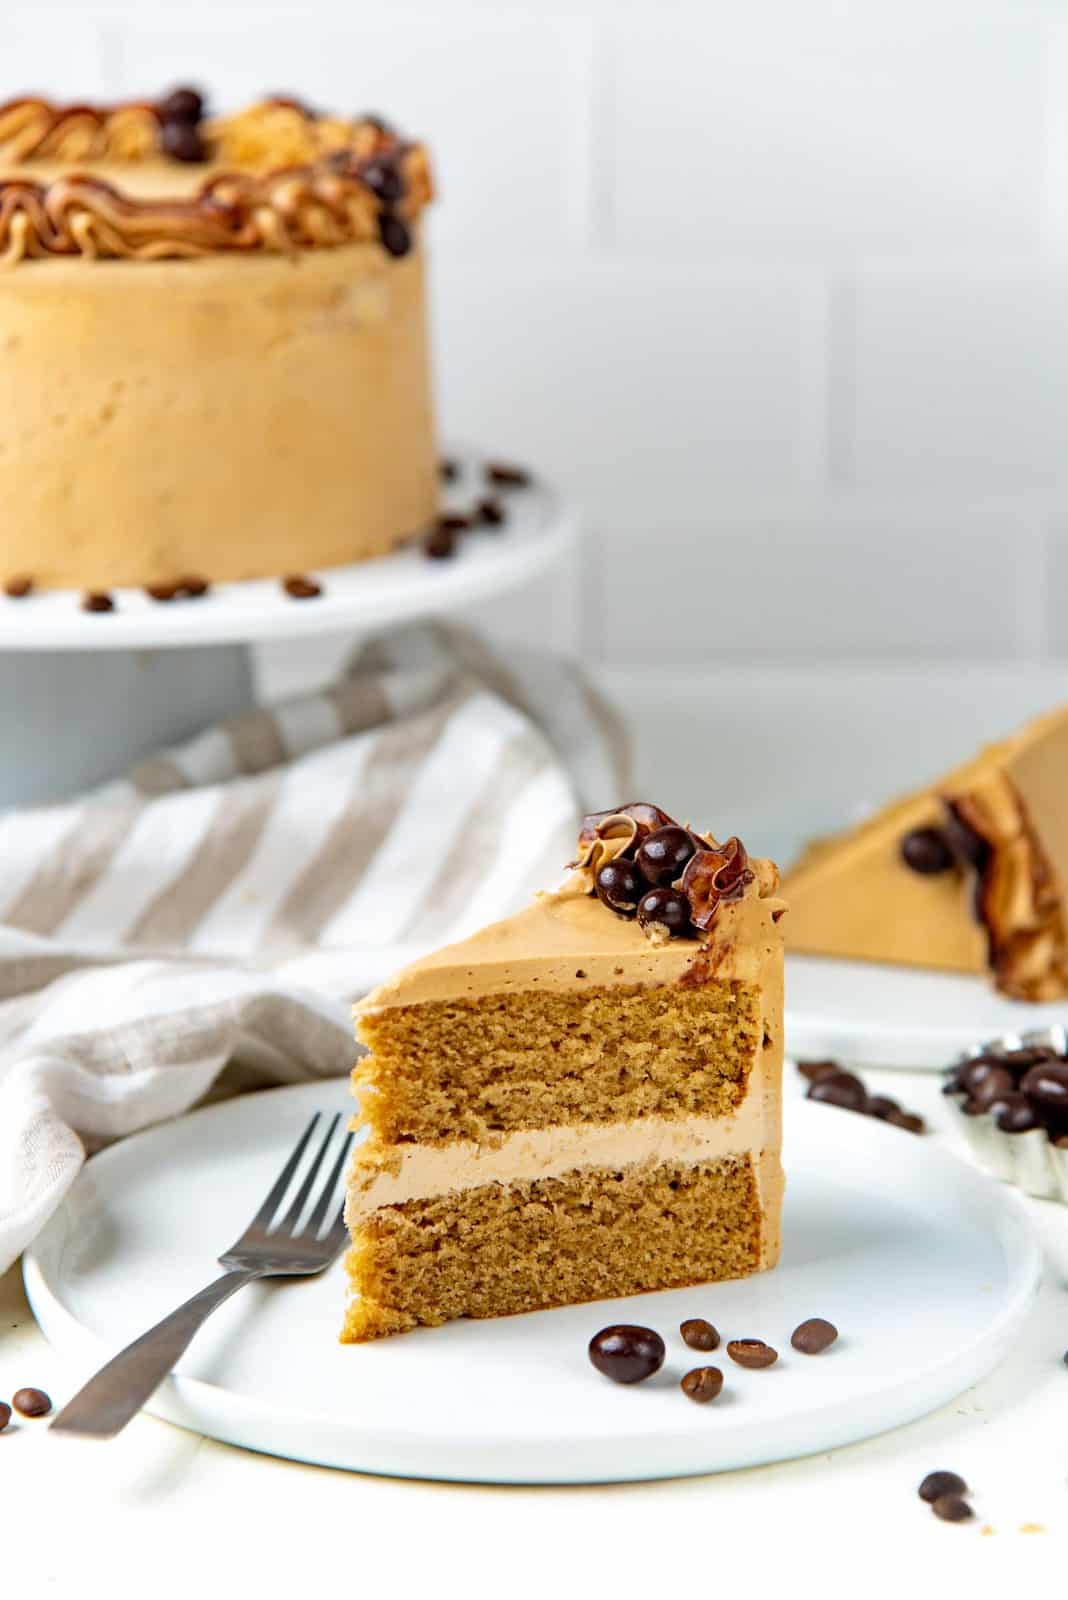
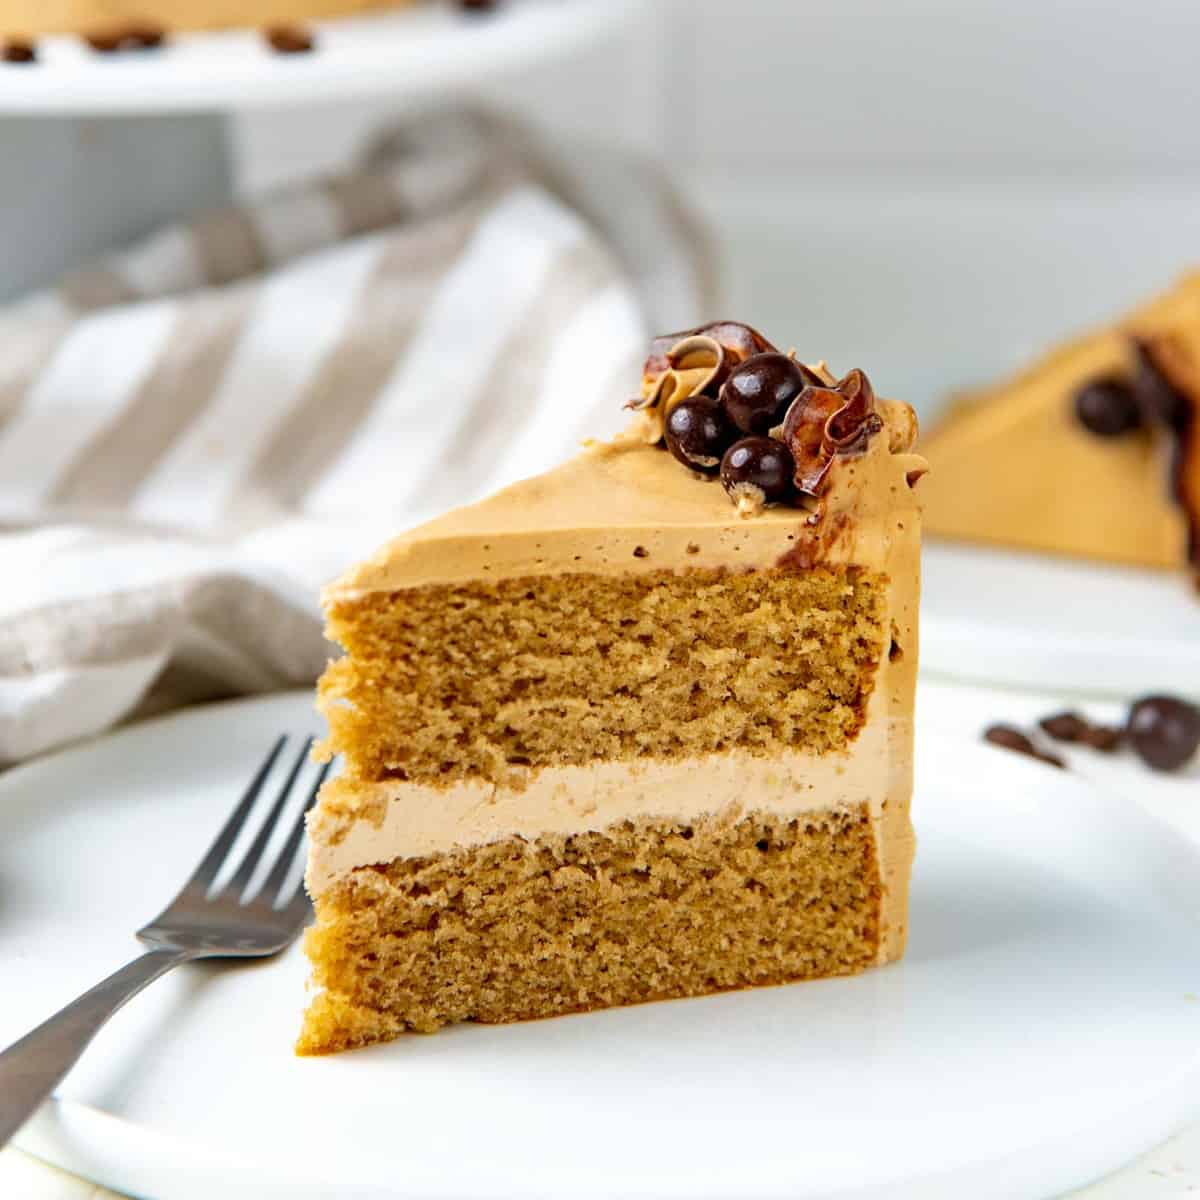
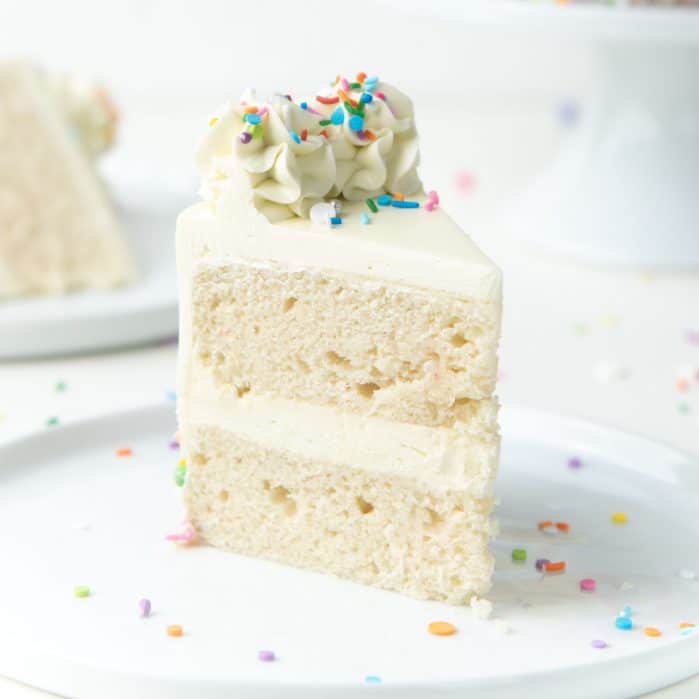
The cake layers are soft, with the perfect crumb and perfect sweetness! The coffee flavor is prominent, but not overwhelming.
The base of the coffee buttercream is my vanilla buttercream frosting, which is well-loved by my readers! It’s not too sweet and ridiculously creamy. I’ve used it for my vanilla cupcakes, vanilla Swiss roll cake, vanilla chai cake, Sri Lankan butter cake, white coconut cake (winter cake), classic white cake, and so many other cakes! Add a little coffee to it, and it’s even more irresistible.
The combination of the coffee cake layers and the coffee buttercream is any coffee lover’s dream dessert! If you know someone who loves coffee, and they have a birthday coming up, this will make for a fantastic coffee flavored birthday cake! 🙂

Looking for more recipes?Sign up for my free recipe newsletter to get new recipes in your inbox each week! Find me sharing more inspiration on Pinterest and Instagram.
Coffee Layer Cake
Ingredients:
Coffee cake layers
- 226 g unsalted butter 2 sticks, softened at room temperature. Replace half of the butter with oil ( ½ cup / 100 g) for a softer cake crumb.
- ½ tsp salt
- 300 g white sugar 1 ½ cups
- 4 large eggs at room temperature
- ¾ cup milk
- 4 tsp instant coffee granules I used Nescafe
- 2 tsp vanilla extract
- 315 g AP flour 2 ½ cups, measured by spoon and level method
- 2 ½ tsp baking powder
Coffee buttercream
- 455 g unsalted butter 4 sticks (cool but not cold; about 70°F)
- ½ tsp salt or ¾ tsp
- 80 mL cold whipping cream ⅓ cup
- 4 – 6 tsp instant coffee granules use 6 if you want a robust coffee flavor
- 1 tbsp vanilla extract
- 500 – 567 g confectioner’s sugar 4 – 5 cups (measured by spoon and level method)
To decorate (optional)
- Chocolate fudge sauce
- Chocolate covered coffee beans
- Chocolate sprinkles
- Speculoos cookies crushed
Instructions:
Coffee Cake layers
- For best results, make sure all the ingredients are at room temperature.
- Preheat the oven to 325°F. Line the bottom of two 8 inch pans with parchment paper, and butter and flour the sides. Set aside.
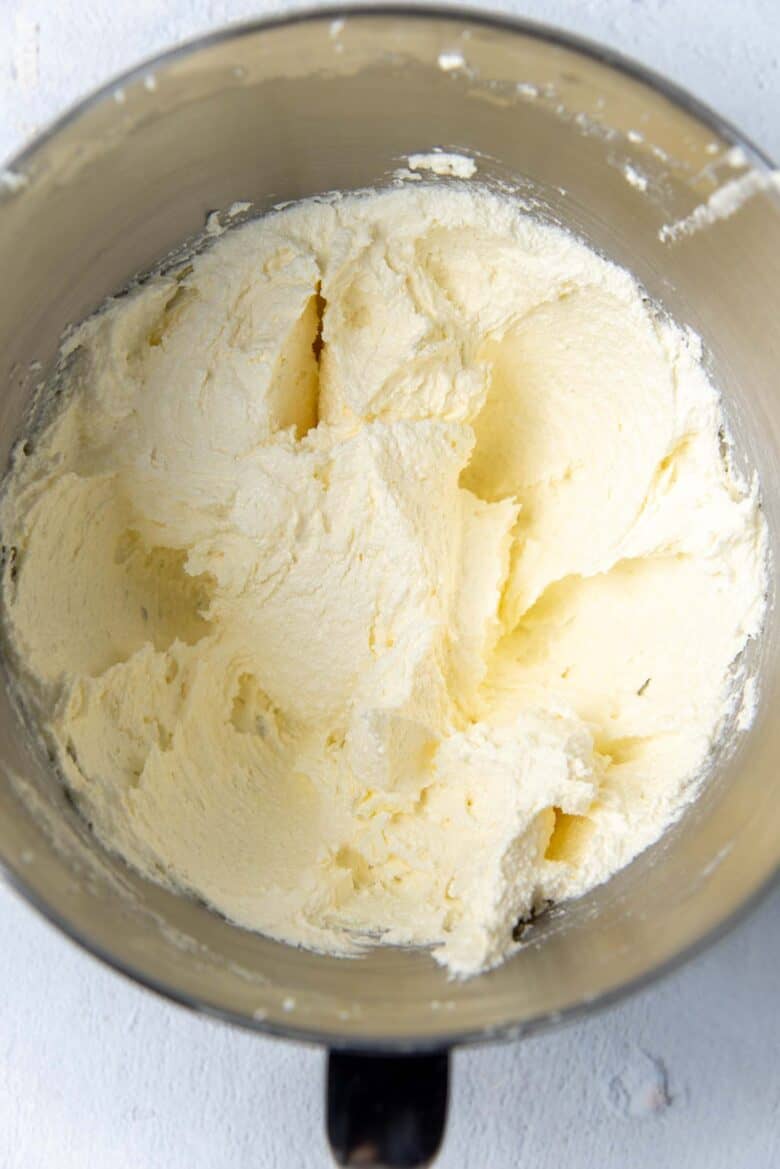
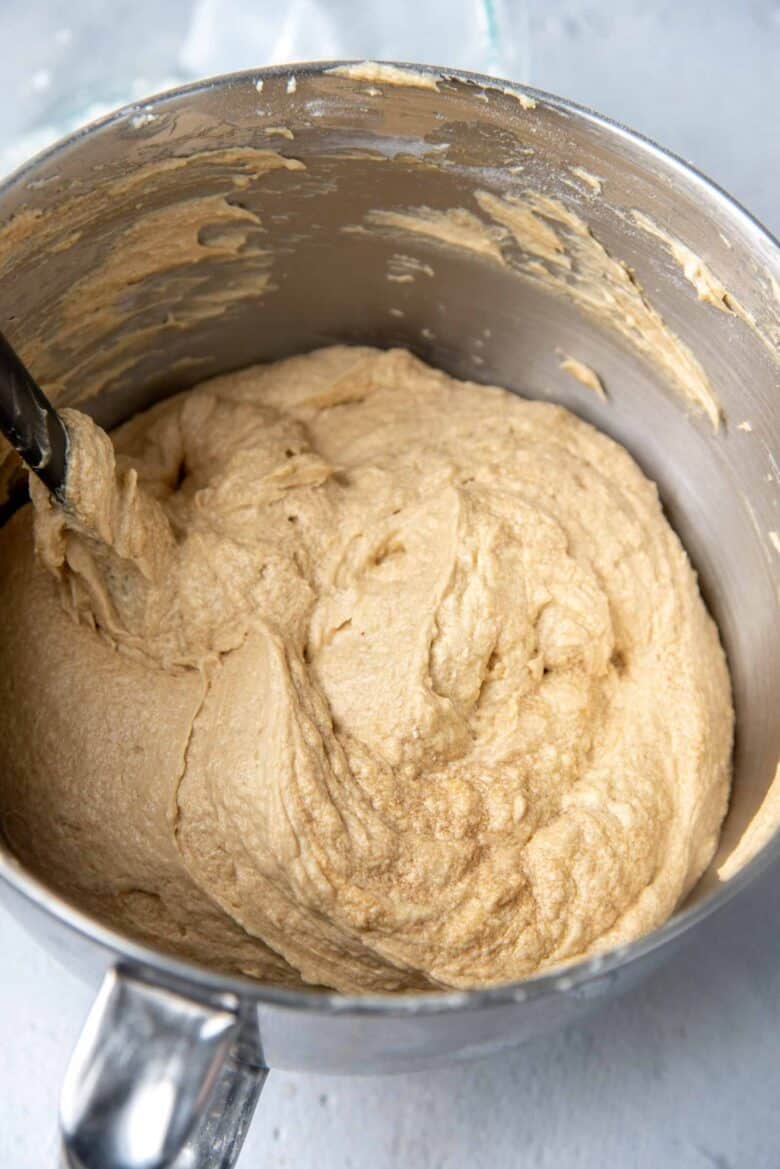
- Cream the softened butter until the mix is creamy and fluffy. This can take about 5 – 10 minutes with a stand mixer, depending on how soft the butter is.226 g unsalted butter
- Add the sugar and salt, and cream the butter and sugar further until the mixture is creamy and fluffy.300 g white sugar, ½ tsp salt
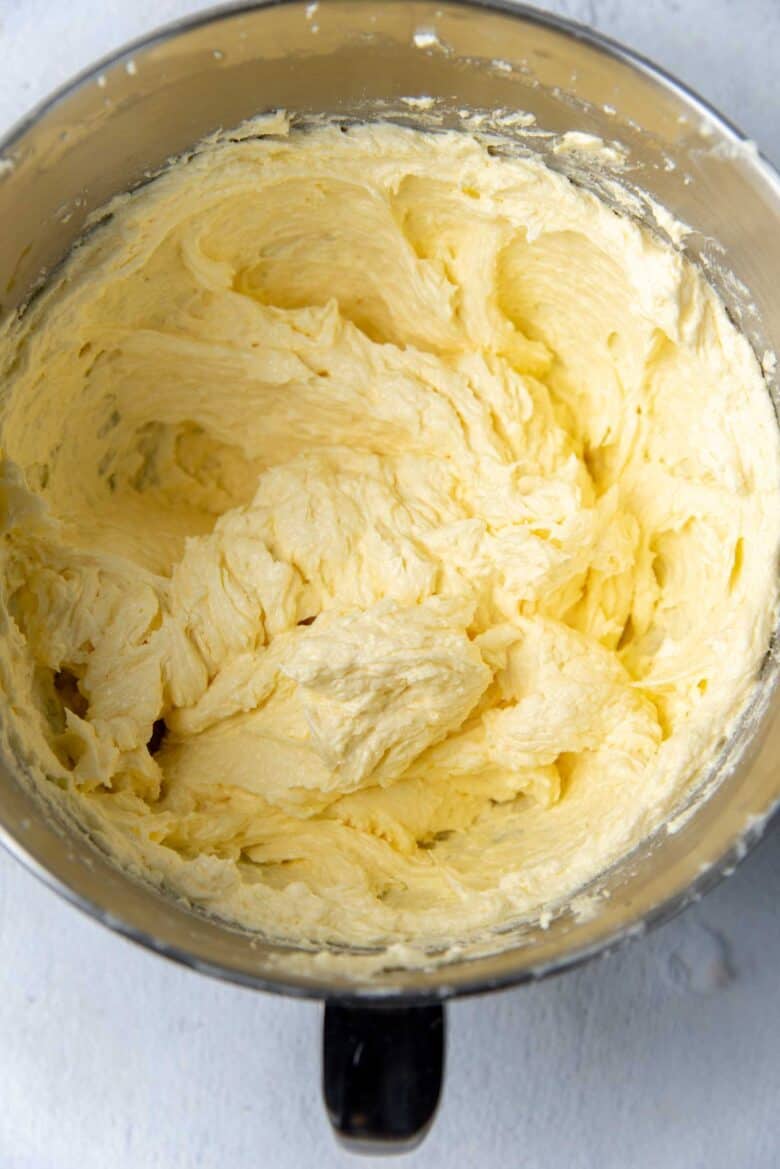
- Add the eggs, one at a time, mixing well between each addition.4 large eggs
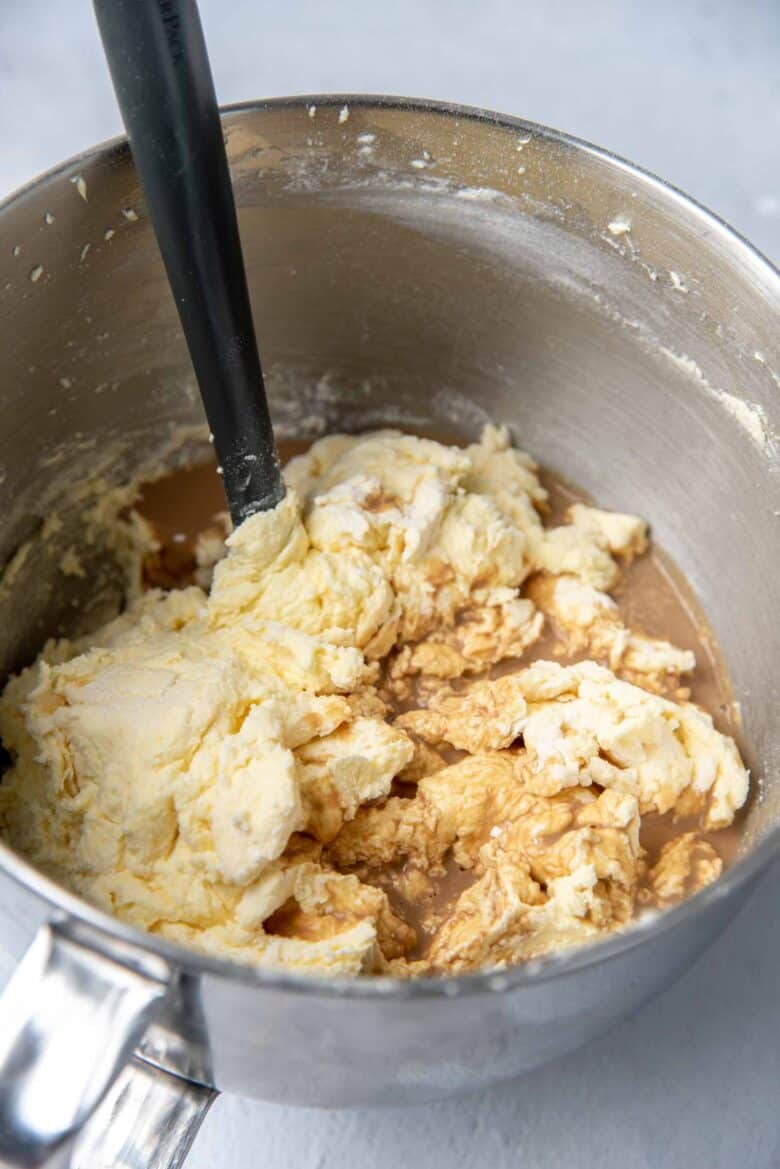
- Dissolve the instant coffee granules in the milk, and stir in the vanilla. Set it aside until needed.¾ cup milk, 4 tsp instant coffee granules, 2 tsp vanilla extract
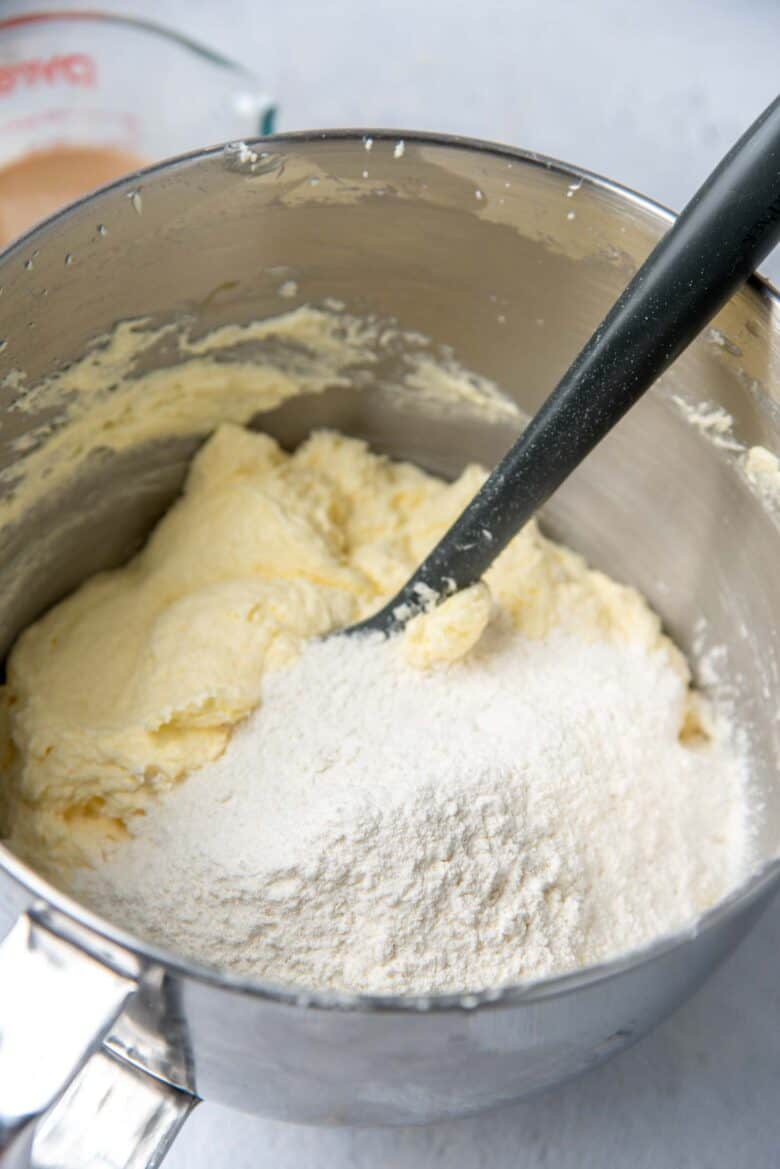
- In a separate bowl, sift the flour and baking powder together and whisk to combine.315 g AP flour, 2 ½ tsp baking powder
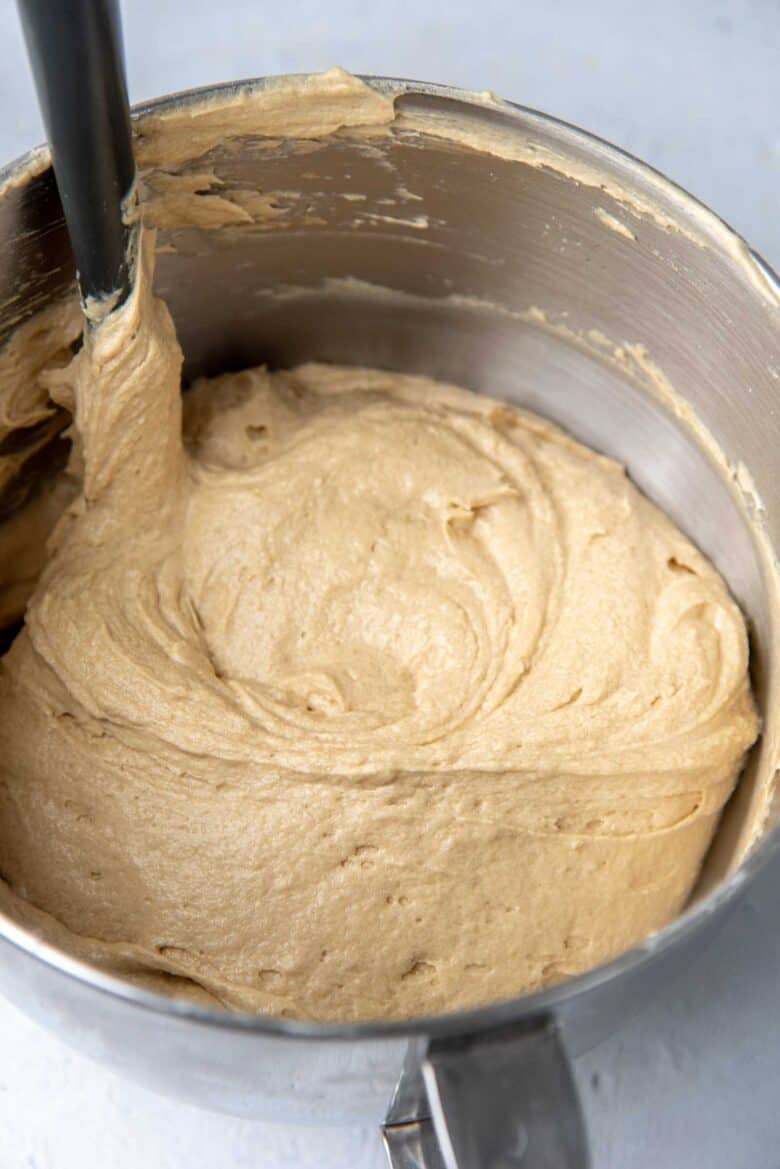
- Fold the dry ingredients into the cake batter in 3 – 4 additions, while alternating with the coffee-milk mixture. The dry ingredients should be added first and last. Fold in the dry ingredients until just combined.4 tsp instant coffee granules, 315 g AP flour
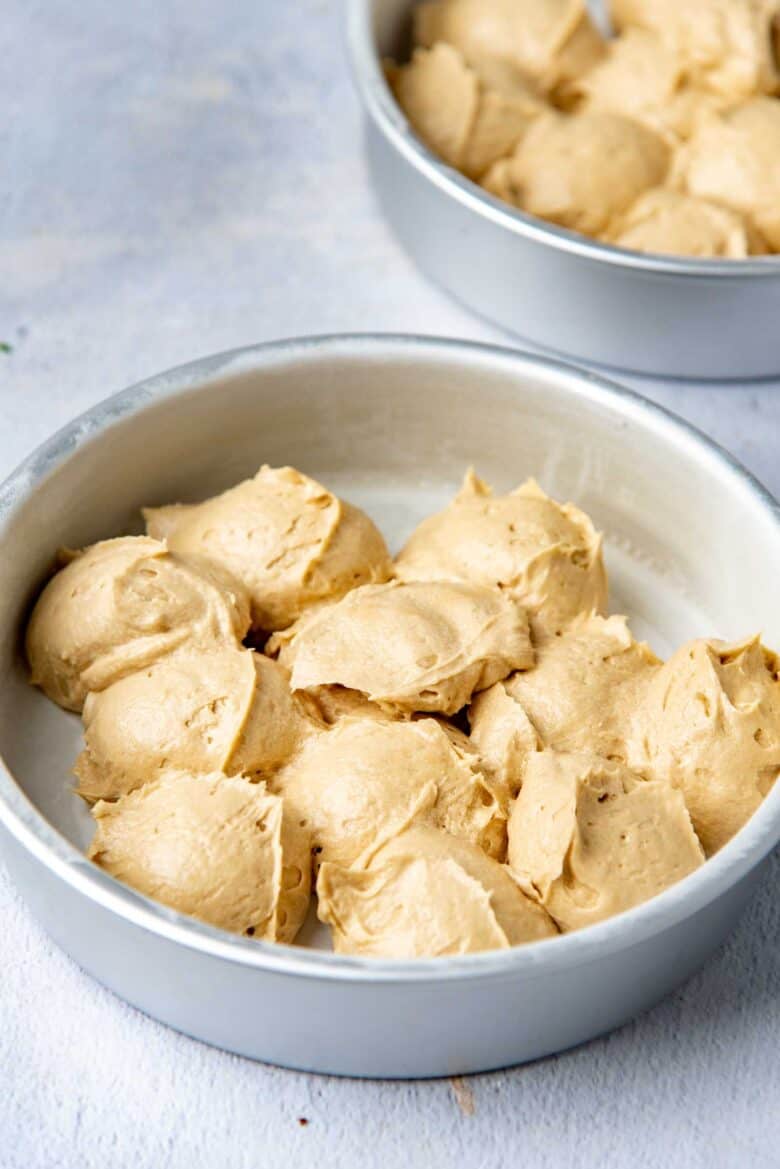
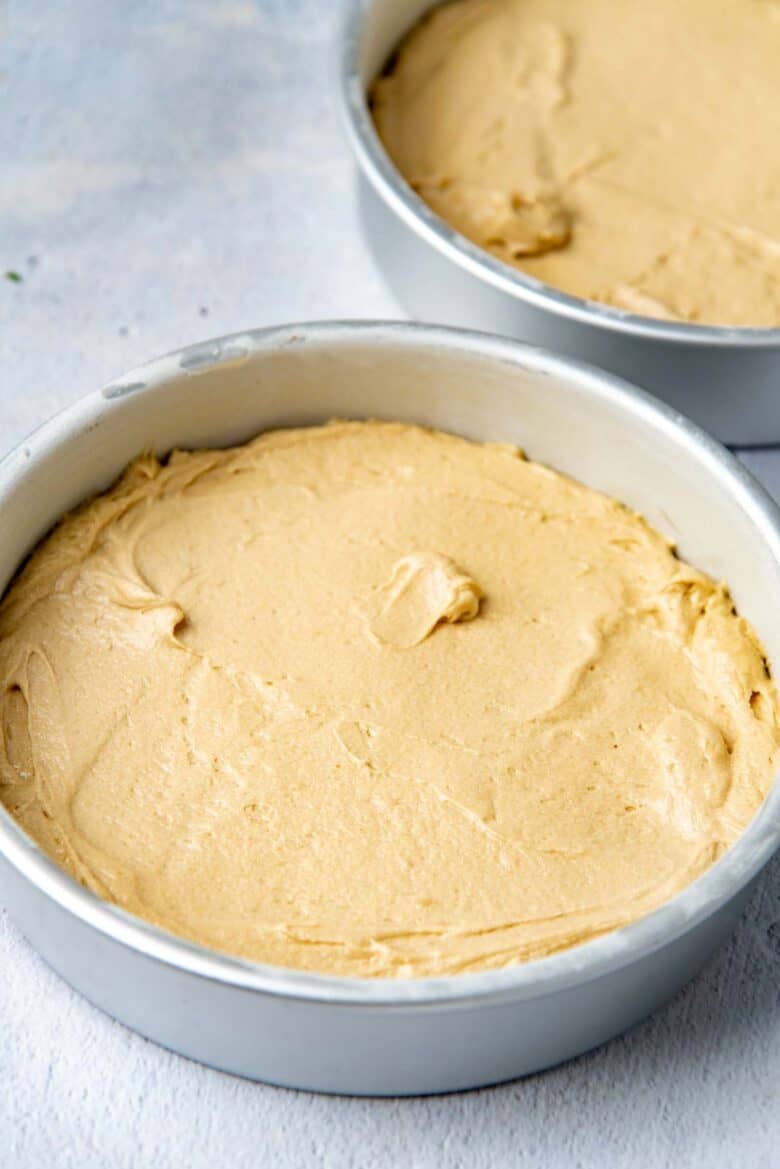
- Divide the batter into the two prepared cake pans. You can either weigh the batter and divide it equally by weight, OR use an ice cream scoop to evenly portion the batter into the cake pans. Spread the batter evenly in the pan using a small offset spatula or small rubber spatula.
- Knock the cake pans on your kitchen counter 3 – 4 times to flatten the batter and to remove any large gas pockets.
- Bake the cakes in the preheated oven for about 25 – 30 minutes, rotating the pan once halfway through the baking time.
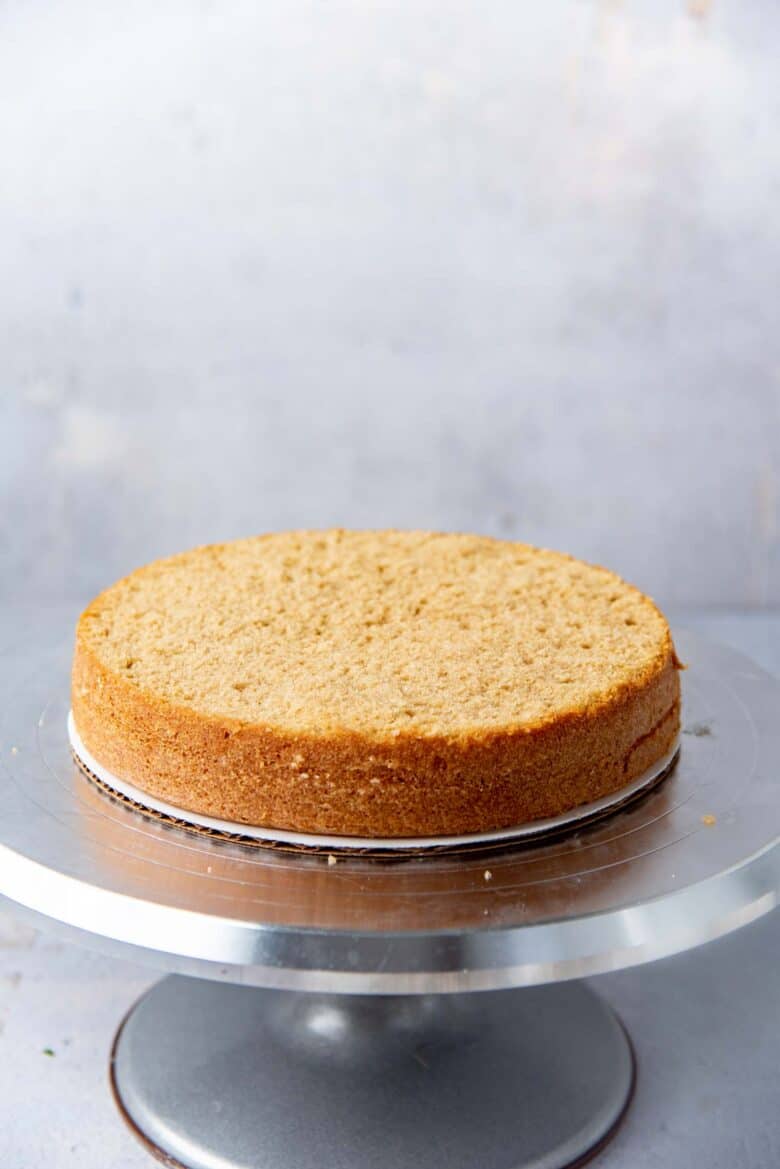
- The cake should be springy to the touch when done (when you gently poke the middle of the cake, it should spring back up). Remove the cake from the oven and let it cool slightly in the pan. While still warm, turn the cake out onto a wire rack and let it cool down completely.
- If you’re assembling the cake the following day, wrap the cooled cake layers in plastic wrap and leave them in the fridge or at room temperature.
Coffee buttercream
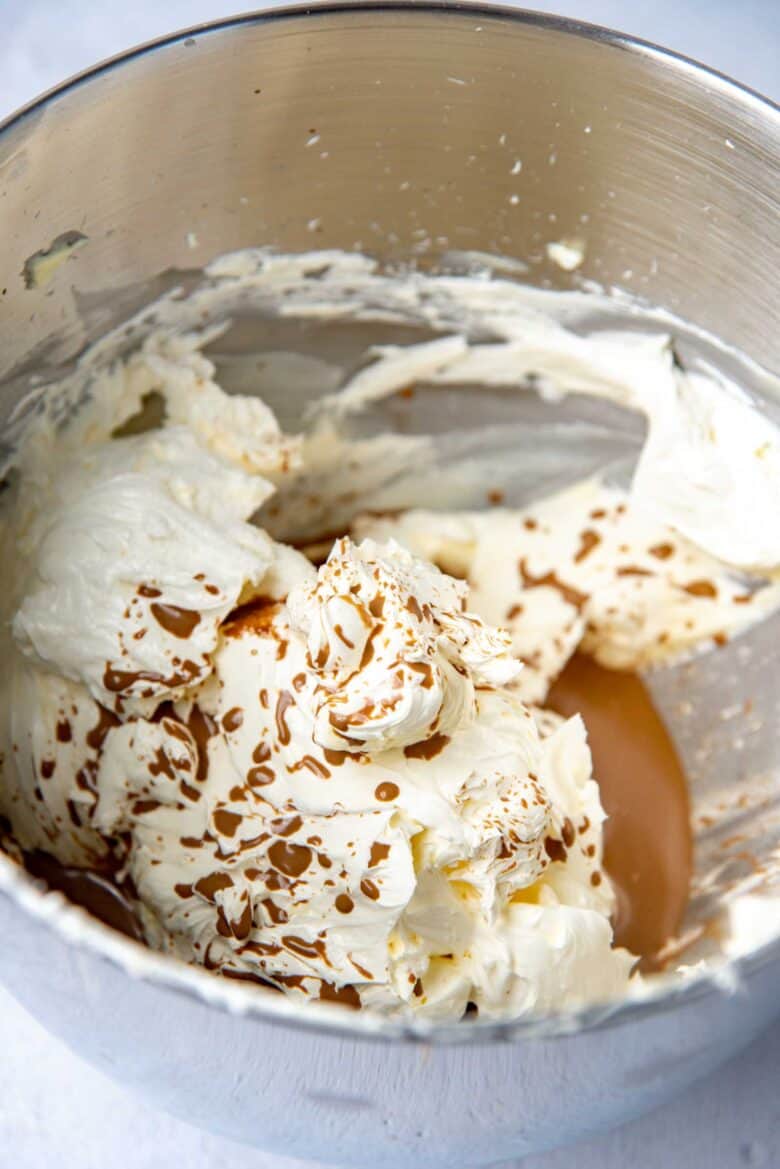
- Place the butter in the bowl of your stand mixer. With a whisk attachment, whip the butter until creamy and white in color – about 3 to 7 minutes on high speed (not maximum speed). Take as long as you need to make the butter very creamy.455 g unsalted butter
- Dissolve the instant coffee in 1 – 2 tbsp of water and stir it into the cream.4 – 6 tsp instant coffee granules, 80 mL cold whipping cream
- Add the salt, coffee cream, and vanilla into the butter, and whisk further until the butter-cream mix is light and fluffy (for a few minutes).½ tsp salt, 80 mL cold whipping cream, 4 – 6 tsp instant coffee granules, 1 tbsp vanilla extract
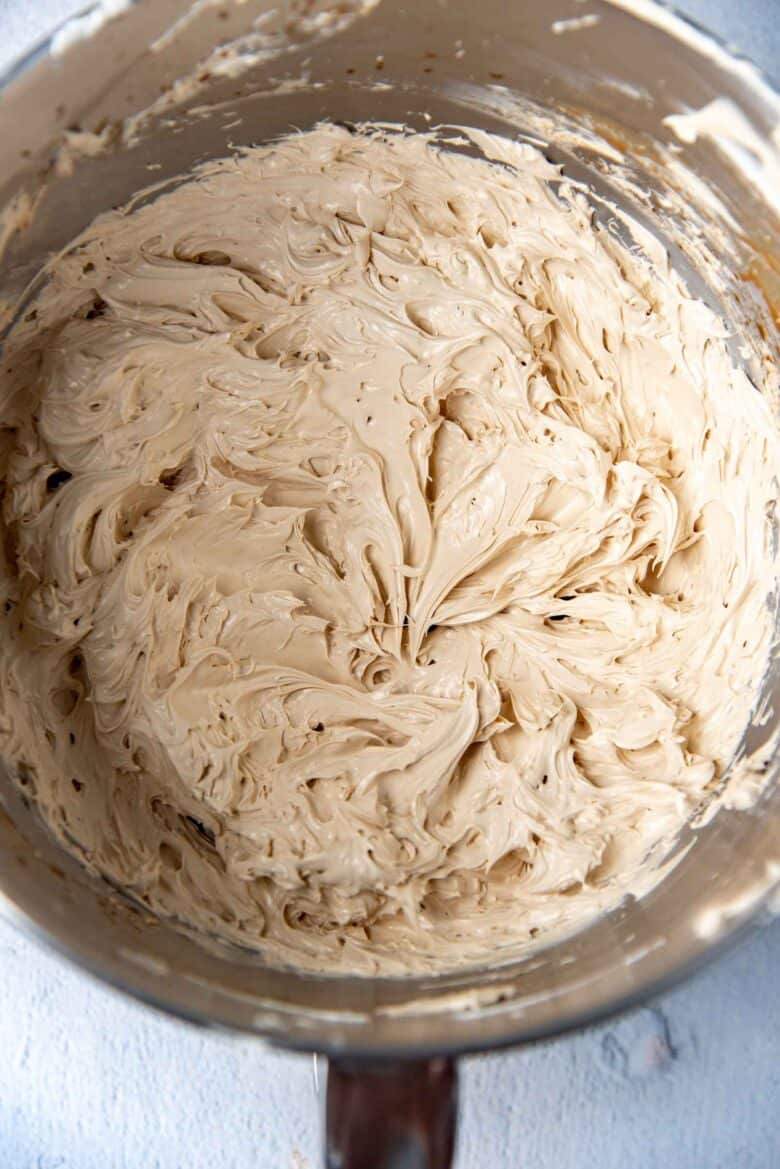
- Lower the speed and add 500 g (4 cups) of the confectioner’s sugar – a little at a time, and incorporate the confectioner's sugar into the butter. Make sure to scrape the sides of the bowl as you go.500 – 567 g confectioner’s sugar
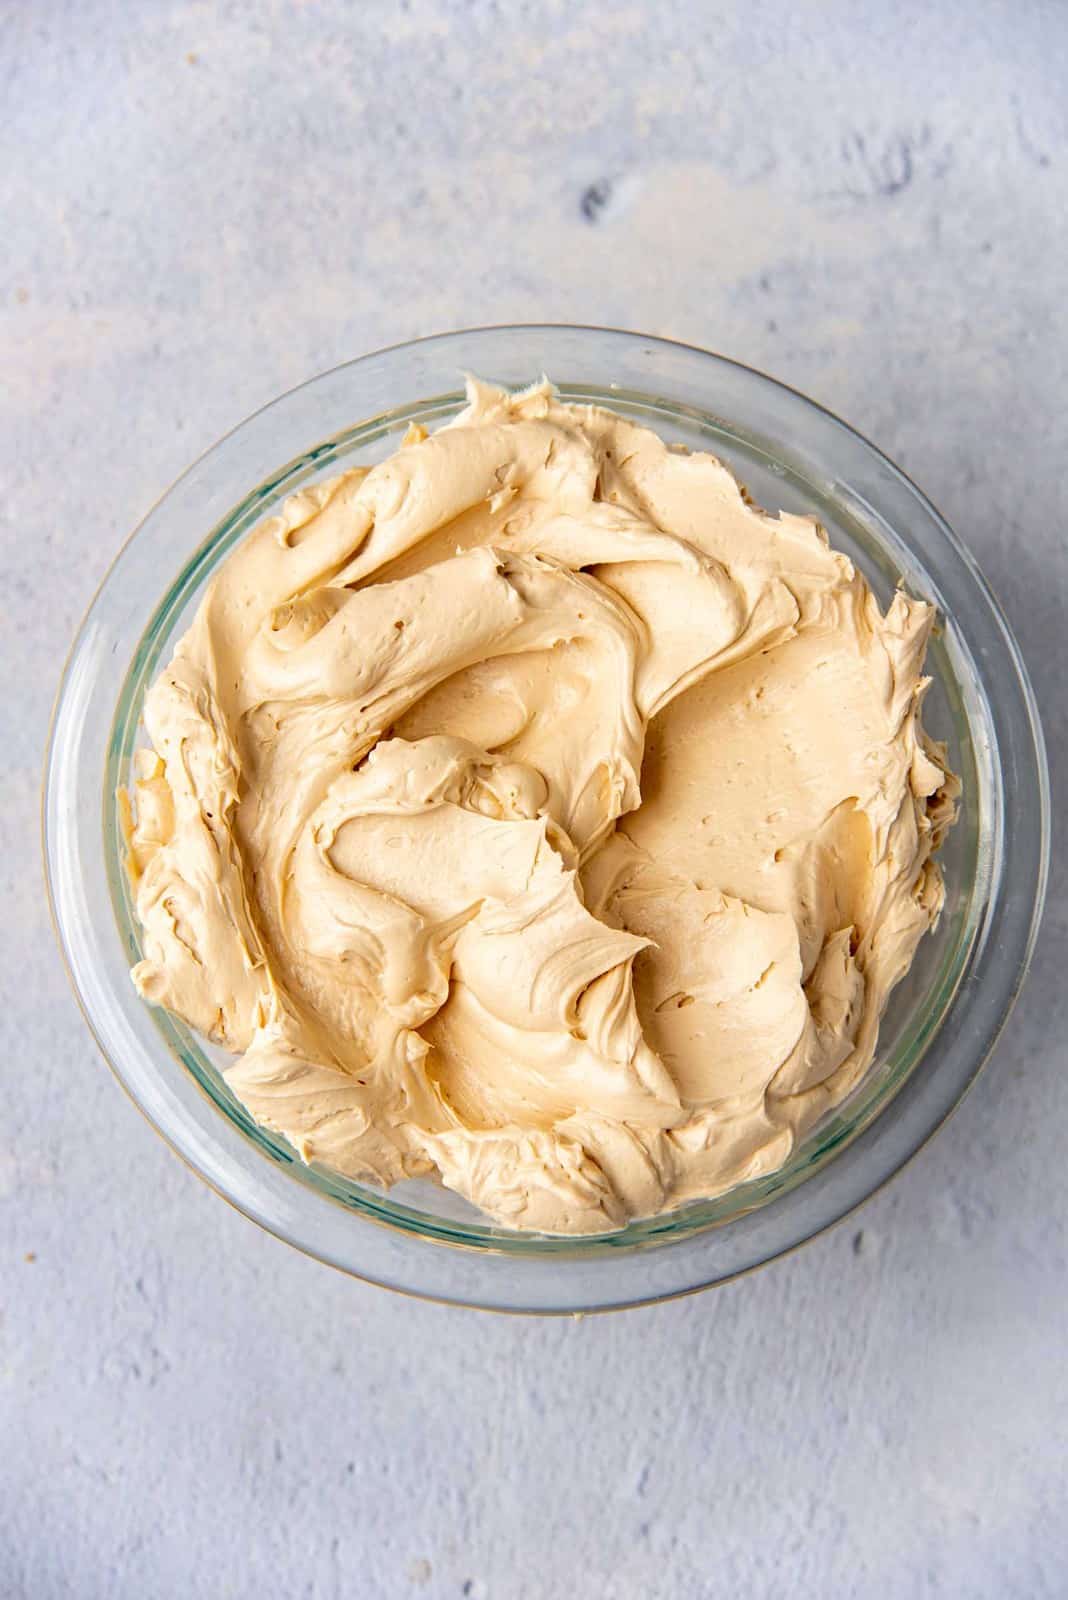
- Once the sugar is incorporated into the butter, increase the speed, and whisk on high for 1 – 3 minutes. Taste and add the rest of the confectioner’s sugar if you want a sweeter buttercream. Whisk for a further 2 – 3 minutes until you have a light, fluffy, soft, spreadable frosting.500 – 567 g confectioner’s sugar
- If the frosting is too stiff, you can add extra cream (1 tbsp at a time) to get an even softer buttercream. If you want the buttercream to have a stronger coffee flavor, you can also dissolve any extra coffee granules into 1 tbsp of water and whisk in that as well.
Assembling the cake
- Level the top of the cake layers (if they are domed).
- Place one cake layer on a cake serving plate or decorating plate. Make sure the bottom of the cake is facing down.
- Place about ¾ cup of the frosting on top of this cake layer and spread it evenly. You can add more or less of the frosting as you like.
- Now place the second cake layer on top. Make sure the bottom of the cake is facing up this time, so that you have a level surface on top to frost. Gently press the cake down to make sure the cake layer sticks to the buttercream below.
- Apply a thin coating of the frosting to completely cover the cake. This is the crumb coating. The crumb coating will help make the sides and top of the cake even, and make it easier to frost the final layer of buttercream.
- Allow the crumb coating to set in the fridge (or a cool place in your kitchen) for a few minutes.
- Evenly spread the rest of the frosting over the cake. Use an offset spatula to create swirls for an old fashioned cake look, OR use a bench scraper or spatula to smooth out the frosting.
Decoration
- Decorate the cake however you like. Here, I applied one strip of soft chocolate fudge sauce inside a pastry bag, and then filled the pastry bag with the coffee buttercream. This creates a chocolate marble effect in the buttercream when piped (as you can see in the pictures).Chocolate fudge sauce
- Alternatively, you can pipe a plain buttercream border, or use the sprinkles or crushed cookies to decorate the cake.Chocolate covered coffee beans, Chocolate sprinkles, Speculoos cookies
Tips & Tricks
Note about the coffee
I used coffee granules that dissolve in room temperature water. So you don’t need to heat the water to dissolve the coffee.If you’re using instant coffee powder, you will need to reduce the amount of coffee that you use.
Note about making the buttercream
The coffee cream mixture can be added to the whisked butter at the beginning. But it can also be added at the end after adding the confectioner’s sugar. There won’t be much of a difference between these two methods. Just make sure to mix everything well.Nutrition Information:
“This website provides approximate nutrition information for convenience and as a courtesy only. Nutrition data is gathered primarily from the USDA Food Composition Database, whenever available, or otherwise other online calculators.”
Mary Beech says
I want to use real coffee. Can I use 3/4 cup of coffee instead of 4 tsp of instant coffee in 3/4 cup of milk?
Dini says
Hi Mary
I’m not sure that 3/4 cup of coffee will be strong enough to give this cake a strong coffee flavor.
That is why I use instant coffee. 4 tsp of instant coffee is equal to the flavor of about 3 – 4 cups of coffee.
I hope that helps
Marina says
I made this recipe as a cake and as cupcakes, and both turned it beautifully and tasted delicious. I received lots of compliments!! I’ll definitely keep this recipe. Thank you so much for sharing it with us ❤️