
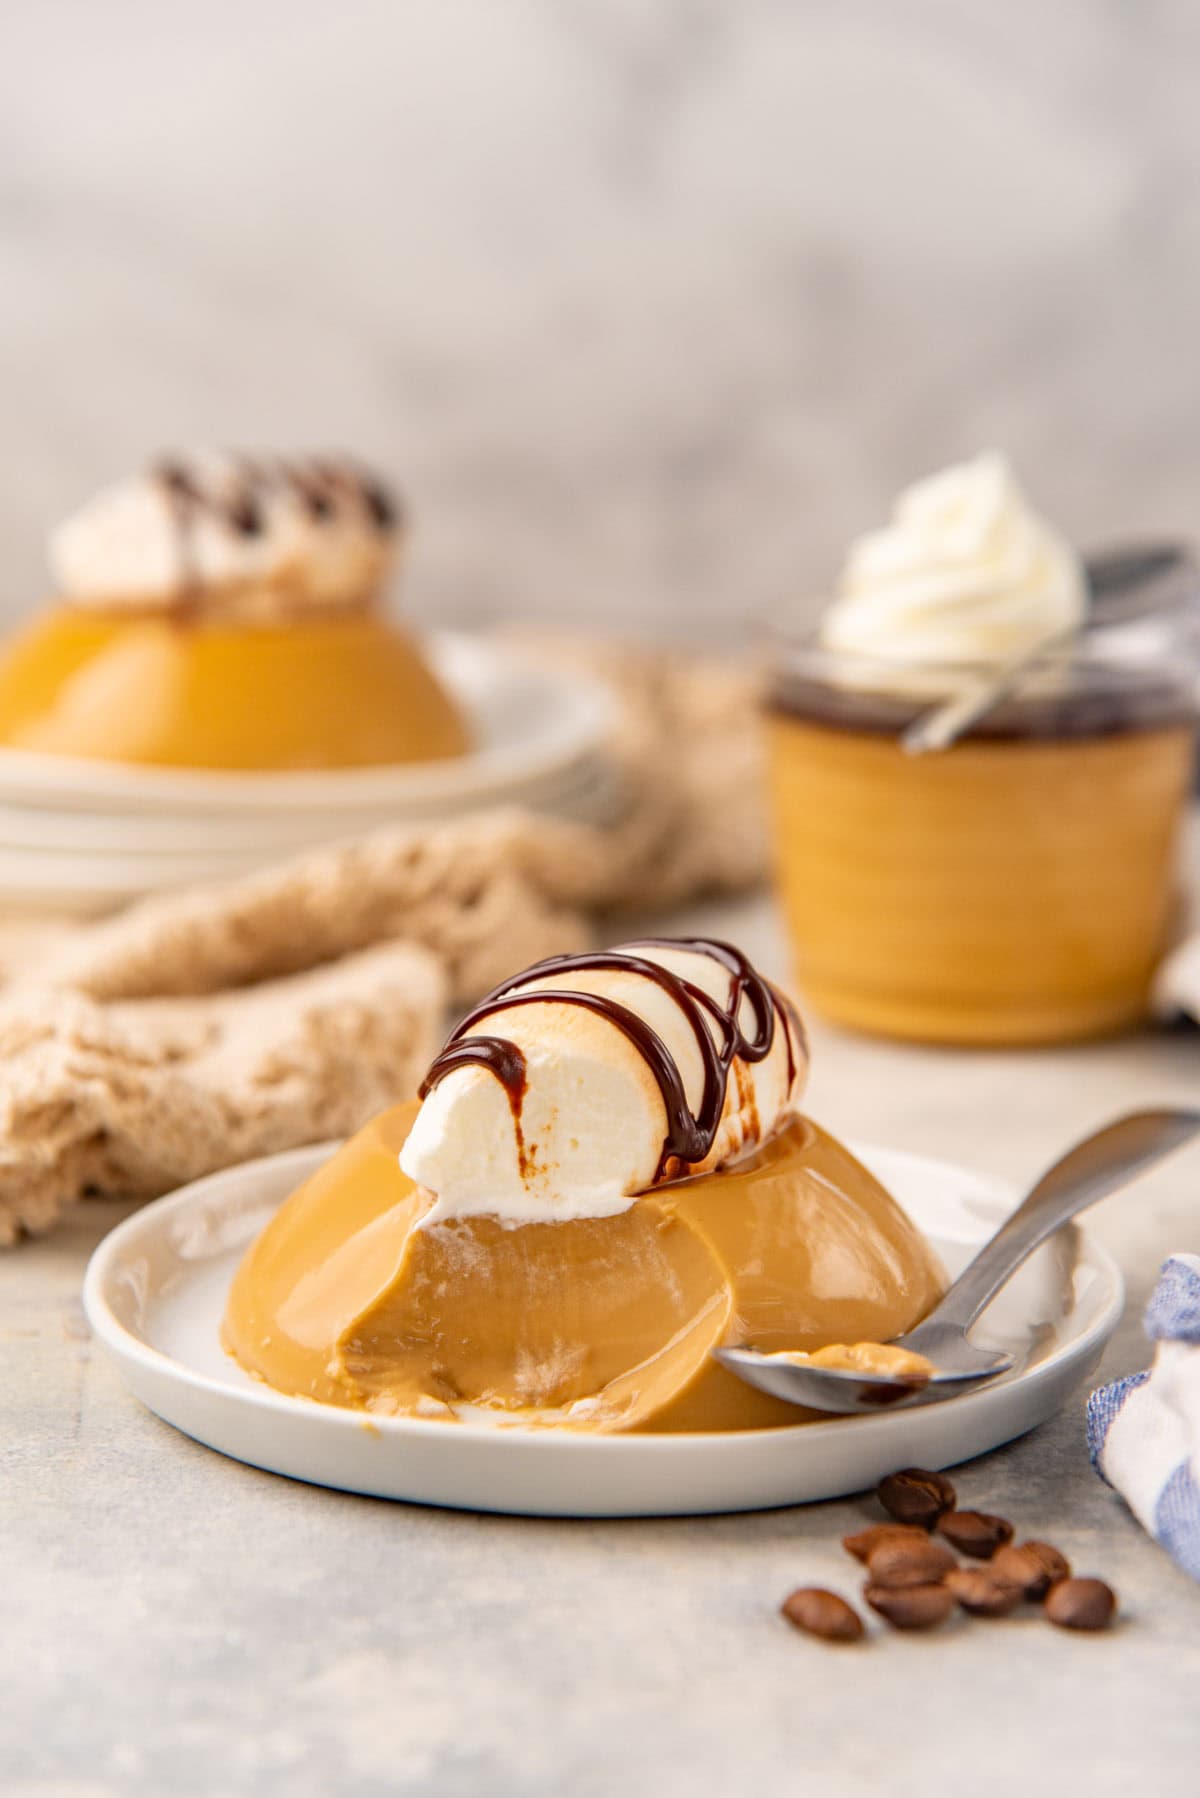
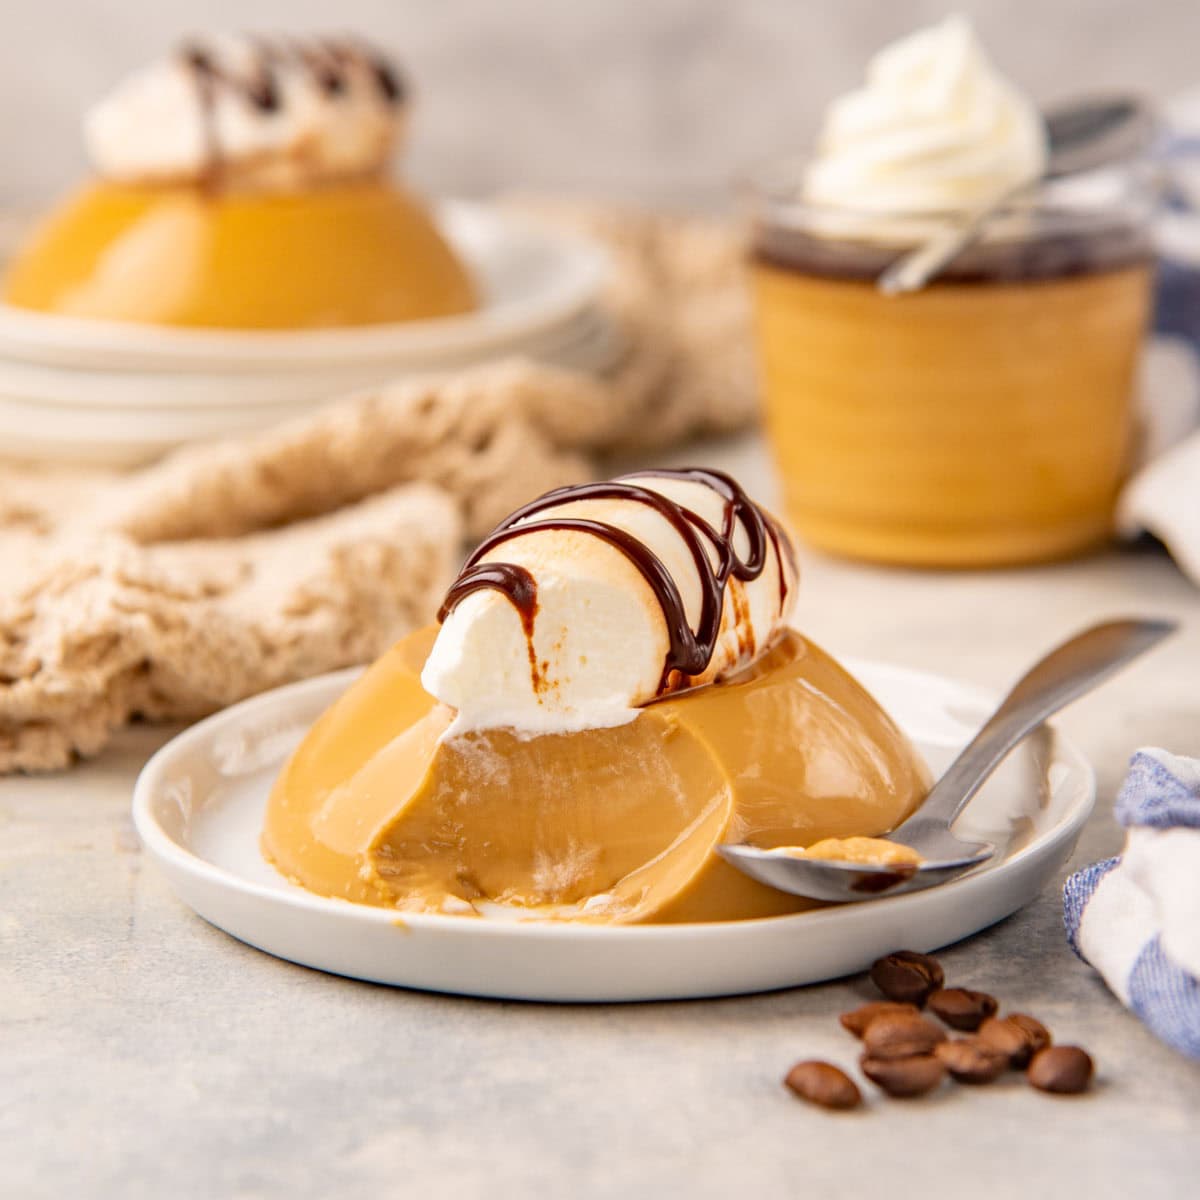
If you like coffee and a quick, easy dessert, then this coffee panna cotta (espresso panna cotta) has got to be at the top of your list! A sinfully creamy, melt in your mouth, jiggly, perfectly set “custard” dessert with a deep, robust coffee flavor, this panna cotta is simple yet looks and tastes rich and impressive! Perfect for parties, potlucks, and it’s always a crowd-favorite!
Panna cotta and I go all the way back to my university days when I wanted to make a simple, cheap, satisfying, and impressive dessert to make for myself AND serve my friends from time to time. And this delightful custard dessert ticked all those boxes!
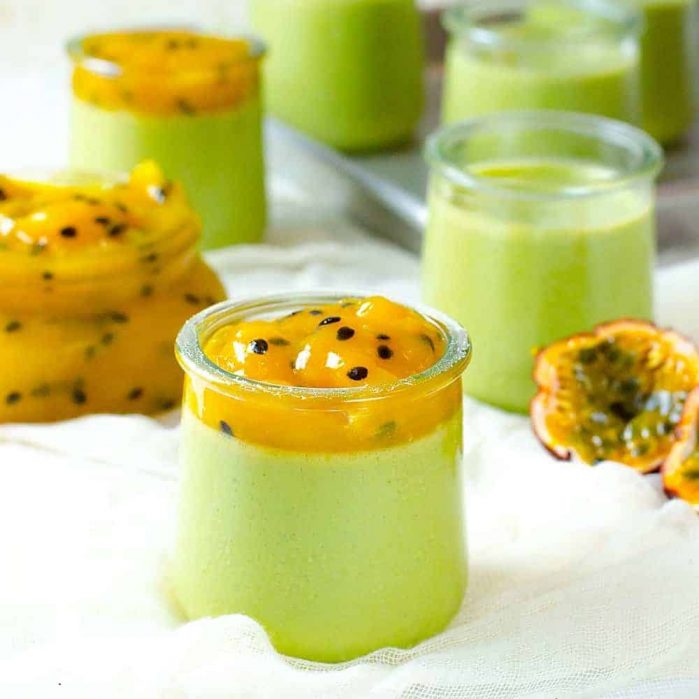
The perfect panna cotta with that characteristic jiggle is such a happy little dessert for me! And it’s such an amazing blank canvass on which to develop all kinds of different flavors.
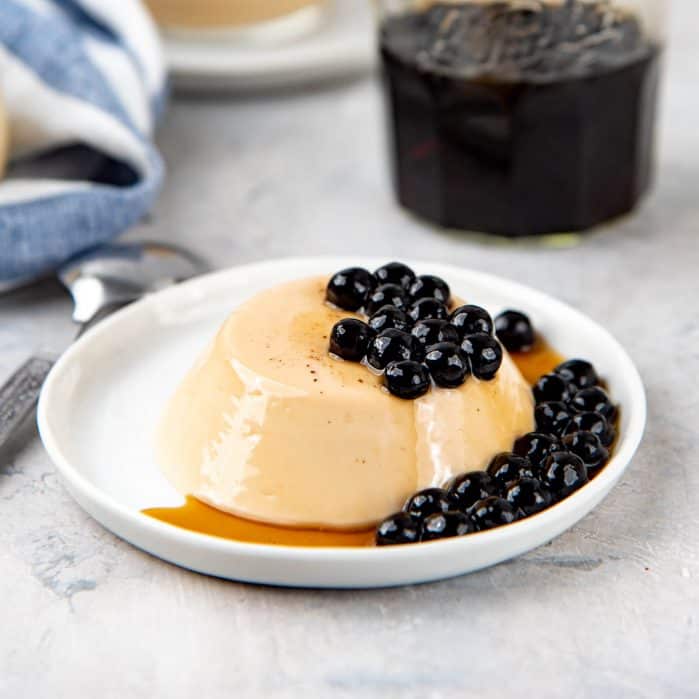
After sharing my recipes for classic panna cotta, coconut panna cotta, matcha panna cotta, bubble tea panna cotta, and even white chocolate panna cotta, I figured it’s time for their caffeinated cousin to share the spotlight!
Recipe highlights
- No matter the flavor, panna cotta is always a super simple and quick dessert to make.
- You can make this coffee panna cotta recipe with instant coffee, ground coffee, OR espresso shots.
- This recipe will guarantee a coffee panna cotta that is just set, jiggly, so creamy, and with a deep coffee flavor.
- This Italian “custard” dessert has the texture and creaminess of a true custard, but is made without any eggs! So it’s easy and cheap, but tastes high end and impressive!
- You can make this with powdered gelatin or leaf gelatin.
- It tastes rich but it’s still light, and the perfect ending to any dinner or party meal.
- I also share variations to elevate this dessert even further!
Ingredients you’ll need

- Milk
- Heavy cream
- Sugar
- Gelatin
- Vanilla and salt
- Coffee
- Instant coffee
- Espresso
- Ground coffee
Ingredient notes
Gelatin
You can use powdered gelatin OR leaf gelatin for this recipe. I’ve used powdered gelatin that has a 225 + bloom strength, and gold gelatin leaves (bloom strength 200).
1 gold gelatin sheet (about 2 g in weight) equals to 1.75 – 2 g of powdered gelatin. This recipe uses about 7 g of powdered gelatin, or 3.5 – 4 gold gelatin sheets.
It’s absolutely crucial to soften or bloom the gelatin in water. This will ensure the gelatin dissolves and disperses through the liquid properly.
Coffee
Instant coffee / espresso – Easy accessibility for anyone, super easy to use and adjust, and it’s the fastest way to add coffee flavor. I prefer to use instant coffee or instant espresso for this recipe. Even after making the panna cotta base, I can easily add more instant coffee (after dissolving it in a small amount of water) to increase the coffee flavor, if I want.
Espresso shots – Not as easily accessible and requires special equipment, but easy to substitute. Not everyone has a coffee machine to be able to produce espresso shots. The amount of espresso added will be subtracted from the milk, so that you can maintain the right amount of liquid for the recipe. However, I do find that using espresso is a waste for this recipe because the dessert is sweet and the espresso flavor notes get masked by the milk and sugar.
Ground coffee – More time consuming, and more adjustments needed to get the right consistency and flavor. If you use ground coffee, the milk will be infused with the coffee grounds to get the coffee flavor. The longer you infuse the coffee, the deeper the flavor. So, you will need to adjust the time that you let the milk infuse with the coffee grounds, to your liking. After infusing, the amount of milk that was absorbed by coffee grounds will need to be replaced as well.

How to make coffee panna cotta (step by step)
Step 1 – Soak / bloom the gelatin
It’s important to let the gelatin bloom in the water before using it. If you’re using gelatin powder, the powder is sprinkled into cold water to bloom (image 1). If you’re using gelatin sheets, the sheets are submerged in cold water to soften.

Step 2 – Heat the panna cotta base
Place half the milk, sugar, salt in a saucepan. Add the instant coffee to this as well and heat the mixture. This step is to dissolve the sugar and to infuse the milk (image 2). Heat and stir the mixture until the sugar is dissolved, and the milk is starting to steam. It’s not necessary to boil the milk.
When making a regular panna cotta, no other flavors (other than vanilla) are added to the base. But since we’re making a coffee panna cotta, this is when you add the coffee flavor. Instant coffee is the easiest way to flavor the base, but I’ll explain how to use other methods to infuse the panna cotta with coffee flavor as well.
Step 3 – Dissolve the gelatin
Once the mixture is steaming and the sugar is dissolved, you add the bloomed gelatin (image 3). The setting strength of the gelatin reduces when the gelatin is boiled in the liquid, so be careful not to boil the milk.
The steaming milk has enough heat to dissolve the gelatin while stirring the mixture. Once the gelatin is dissolved, remove the pot from the heat.
Step 4 – Mix remaining ingredients
Add the remaining milk to the coffee panna cotta base mixture. Stir to mix well. Then add the heavy cream and stir to mix the heavy cream mixture well too (images 4 – 5).
At this stage, you can taste the panna cotta mixture and add extra coffee to get a stronger flavor if you prefer.

How to prevent panna cotta from setting into separate layers
If the gelatin cools down too much while mixing in the remaining liquid, this can prevent the gelatin from properly dispersing through the liquid. If this happens, you can use a blender or stick blender to pulse the mixture to ensure that the dissolved gelatin mixes evenly with all the liquid.
Another reason why the panna cotta sets into two layers is because the liquid is too warm at the time it was poured into the containers / molds. Heat causes the mixture to lose its emulsification and set as two separate layers (the rich cream layer, and the thinner milk layer).
To prevent this from happening, cool down the mixture to room temperature before pouring it into molds. Ideally, whisk the mixture while it’s cooling down to “emulsify” the mixture, OR use a stick blender to blend the mixture when it has cooled down.
Step 5 – Pour into molds
You can either pour the coffee panna cotta into individual molds or dishes (image 6), or pour it into one large dish as well. If you’re planning to unmold the dessert before serving, make sure that you very lightly coat the inside of the molds with butter or coconut oil (image 7). I prefer to use silicone or metal molds if I’m unmolding the panna cotta, as it’s easier to get the custard out.
Divide the panna cotta mixture between the individual molds – about 130 – 140 mL per serving (image 8).
Step 6 – Refrigerate
Allow the panna cotta to set in the fridge (image 9). Smaller individual portions will only take about 3 hours to set, whereas, larger dishes might take longer. I always prefer to give the panna cotta more than enough time to set by making it the day before.

Step 7 – Serve
Unmold the set coffee panna cotta onto individual plates by warming the sides of the mold in hot water for a few seconds, or by using a kitchen torch. If you lightly greased the molds, it should come out easily. Just turn the mold onto a serving plate and give it a gentle shake. The panna cotta should make a light “pop” sound as it releases from the mold onto the plate (images 10 – 12).
You can also serve the panna cotta in the individual dishes that you poured them into! This is easy and less cumbersome. However, you can see the classic, quintessential jiggle of the panna cotta if you unmold it!
Top the panna cotta with your choice of garnish or topping. Here, I’ve topped the coffee panna cotta with whipped cream and a layer of mocha fudge sauce (which is my chocolate fudge sauce recipe with the addition of coffee), or chocolate shavings.


Now, for the real test – shake the plate gently to see if your coffee panna cotta does the happy panna cotta dance! How fun is that jiggle? ☺️
Tips for making the best panna cotta
- My formula for making perfectly jiggly panna cotta is 7 – 8 g of powdered gelatin for 720 – 840 mL (3 – 3 1/2 cups) of liquid (about 1% gelatin by weight).
- Adding coffee doesn’t change the consistency of the liquid, so the gelatin to liquid ratio doesn’t change.
- Make sure to bloom the gelatin before adding it to the hot milk. Bloomed gelatin will dissolve much better, and make a smoother mixture. Unbloomed gelatin can leave a grainy texture, as it takes longer to dissolve as well.
- Do not boil the milk after adding gelatin. Boiling will reduce the gelling strength of gelatin. However, I’ve noticed that if the gelatin does boil in the milk for just a few seconds, it’ll still work well. However, extended exposure to boiling temperatures can reduce the efficacy of the gelatin, so it’s best to avoid it.
- Instant coffee is the best option in this recipe for convenience and ease. You can easily add more instant coffee to adjust the flavor at any point in the recipe, provided the coffee is dissolved in a little warm water first.
- If you choose to make this recipe with espresso, you will need about 3 – 4 shots of espresso, which is about 90 – 120 mL of espresso. Remove an equal amount of milk from the recipe to keep the ratio of gelatin and liquid the same.
- I use a mixture of milk and cream to balance the richness of the dessert. Heavy cream is important for panna cotta, as it adds the richness and custardy texture. If you replace the cream with milk, the resulting dessert will be less creamy, and have a more jello-like texture, instead of a custard-like texture.
- Vegan options – Yes! You can substitute the milk with plant-based options. Replace the milk with oat milk and the cream with coconut milk. However, coconut milk does tend to separate and create layers in the panna cotta as well. Another option is to use stabilized coconut milk, or blended silken tofu. Replace the gelatin with agar agar, but only use about 4 – 5 g of agar agar instead of 7 – 8 g of gelatin.

Toppings
There are so many ways you can serve this coffee panna cotta! The key is to pick toppings that pair well with coffee.
- Which is why I topped my panna cotta with whipped cream and a chocolate fudge sauce here.
- A dollop of mascarpone or creme fraiche and a dusting of cocoa powder will transform this panna cotta into a tiramisu panna cotta!
- Serve with a shot of Kahlua on top to add a boozy twist and to add even more coffee flavor!
- Caramel sauce drizzled on top for a coffee caramel panna cotta.
- Crushed biscotti on top.
- Drizzle biscoff spread on top, or top with a mix of biscoff spread and whipped cream.
Flavor variations
You can also add additional flavor to the panna cotta along with coffee.
- Butterscotch coffee panna cotta – Swap the white sugar with brown sugar. This will add more depth of flavor because of the molasses from the brown sugar.
- Espresso martini panna cotta – Substitute some of the milk with brandy, rum, or whiskey. This will add a lovely boozy touch to the coffee panna cotta.
- Coffee caramel panna cotta – Caramelize the sugar in the recipe before adding the milk. Top the panna cotta with more caramel sauce to add more caramel flavor to the dessert.
- Chocolate coffee panna cotta or Mocha panna cotta – Add cocoa powder to the milk base. The cocoa powder will add a hint of chocolate along with the coffee flavor.
- Espresso panna cotta – If you want to make the flavor of espresso stand out even more in the recipe, then I recommend using espresso shots instead of instant coffee. You will need about 4 shots of espresso to replace the instant coffee in this recipe. Remove an equal amount of milk to keep the liquid amount the same. I also prefer to reduce the sugar in the recipe, so that the espresso flavor is very prominent.

Storing the panna cotta
Fridge – You can store the panna cotta in the fridge for up to 4 days. Since this dessert contains dairy, I don’t recommend leaving it in the fridge for more than a total of 5 days. Cover the dishes with plastic wrap or an airtight lid, and leave it in the fridge for up to 4 days (5 days including the overnight set time).
Freezer – Freezing panna cotta can be tricky. Desserts that are set with gelatin have to be thawed out in the fridge. The freezing and thawing can have an impact on the texture of the panna cotta, because it changes the protein molecule structure in the dairy and gelatin. This can lead to some excess moisture “weeping” from the panna cotta.
Commonly asked questions
Panna cotta is a classic Italian dessert! It has a custard-like texture, but it isn’t a true custard because it doesn’t contain any eggs. Instead of eggs, panna cotta relies on cream or other rich ingredients such as mascarpone mixed with milk to create the custard-like texture, and uses gelatin to thicken and set, instead of eggs.
The defining quality of panna cotta is that it contains JUST enough gelatin to set the liquid, so that it has a very jiggly, soft texture that melts in your mouth! If the panna cotta is set with too much gelatin, the rigid dessert won’t have that custard-like, melt in your mouth texture.
Panna cotta should set in one homogenous layer (UNLESS you purposely create different layers). This is when the panna cotta separates into a soft creamy layer and a milk jelly layer. The heavy cream floats to the top because of the higher fat content, and the milk sinks to the bottom.
Essentially, the panna cotta separates into two layers if the gelatin sets too quickly before dispersing evenly through the liquid.
OR, if the liquid was too warm when poured into the molds or serving dishes. The heat breaks the emulsification between the heavy cream and milk, and separates them into layers as it cools down, settles, and sets. In my recipe, I explain how to prevent this from happening in the recipe notes, and in the blog post as well.
Yes, you can use agar agar instead of gelatin. However, agar agar does have a different texture than gelatin when used to set desserts. However, to get the same soft gel texture, a smaller amount of agar agar must be used, and not a 1:1 substitution.
I would use about 55 – 60% of the weight of gelatin for the agar agar. The agar agar should be hydrated the same way that gelatin is hydrated too.
However, agar agar REQUIRES to be boiled to activate the setting properties, unlike gelatin. So I would add the agar agar to the hot milk and bring it to a boil to dissolve and activate the agar agar. Simmering the mixture for about 30 – 60 seconds would help with activating the agar agar.

More panna cotta and custard recipes you’ll love
- Classic panna cotta
- Coconut panna cotta
- Matcha panna cotta
- Bubble tea panna cotta
- Creme caramel
- Coffee creme caramel (coffee flan)
- Cinnamon creme caramel
- Creme brulee
- Sous vide creme brulee
Looking for more recipes?Sign up for my free recipe newsletter to get new recipes in your inbox each week! Find me sharing more inspiration on Pinterest and Instagram.
Coffee Panna Cotta (Espresso Panna Cotta)
Ingredients:
- 45 g water 3 tbsp
- 7 g powdered gelatin 1 packet OR 3.5 – 4 sheets of gold gelatin sheets (see recipe notes)
- 360 mL whole milk 1½ cups
- 360 mL heavy cream 1½ cups
- 4 tbsp instant coffee granules use less if you’re using espresso powder (see recipe notes)
- 75 g sugar white or brown sugar, generous ⅓ cup
- 2 tsp vanilla extract
- ¼ tsp sea salt
- Whipped cream (optional – to serve)
- Mocha fudge sauce add 1 tbsp of instant coffee to the chocolate fudge sauce recipe (optional – to serve)
Instructions:
- Bloom the gelatin – Place the water in a small bowl. Sprinkle the gelatin over the water and mix to saturate the gelatin with the water. Set it aside to bloom for 10 – 15 minutes (minimum).45 g water, 7 g powdered gelatin
- Make the panna cotta base – In a saucepan, place roughly half of the milk, the instant coffee, sugar, and salt. Heat over medium heat while stirring to dissolve the sugar and to heat the milk.360 mL whole milk, 4 tbsp instant coffee granules, 75 g sugar, ¼ tsp sea salt
- When the milk is steaming, or is just starting to simmer, lower the heat.
- Add the bloomed gelatin to the milk mixture. Whisk gently to dissolve the gelatin in the hot milk mixture, but do NOT allow the milk to come to a boil. The gelatin should dissolve in the residual heat, so you can turn off the stove at this point as well.
- There should be no granules visible in the milk mixture once the gelatin has completely dissolved. Add the vanilla and stir it in to mix.2 tsp vanilla extract
- Make the panna cotta mix – Pour the hot milk and gelatin mix into a jug or bowl. Add the remaining milk and whisk to mix it in. Then add the heavy cream and mix it in with the milk mixture.360 mL whole milk, 360 mL heavy cream
- Check how warm the panna cotta mixture is at this stage. If the coffee panna cotta mixture is warm, then allow the mixture to cool down to room temperature. You can also place the jug in a cold water bath and whisk the mixture to let it cool down.
- Once the mixture is cooled down, whisk it really well to make sure the panna cotta does not set into two separate layers. Or, optionally use a stick blender to pulse the mixture to mix well.
- Divide and set the coffee panna cotta – While the panna cotta is cooling down, prepare 6 individual dishes, each with a 150 – 160 mL capacity, to serve the panna cotta.
- You can choose to set the panna cotta in molds (like dariole molds made with metal, silicone, or plastic), so that the coffee panna cotta can be unmolded before serving. OR you can set the panna cotta in 150 – 160 mL capacity ramekins or coffee cups, if you want to serve the panna cotta directly in the dish without unmolding it.
- Lightly grease the molds (if using), if you want to unmold the panna cotta when serving.
- Divide the panna cotta mixture between the 6 dishes (about 130 – 140 mL each). Or pour the panna cotta in one large shallow dish (1 liter capacity) to serve as one dish.
- Refrigerate for at least 4 hours (preferably 8 hours / overnight) to set the panna cotta. Larger dishes will take longer to set.
- Serve – Once set, unmold the coffee panna cotta onto individual serving plates. Dip the molds in hot water for just 2 – 3 seconds to help loosen the panna cotta if needed. Place the mold upside down on a plate and gently tap on it to loosen and release the dessert onto the plate (see recipe notes below).
- Top the coffee panna cotta (molded or unmolded), with whipped cream and chocolate fudge sauce and / or chocolate shavings (or other toppings of your choice). Serve chilled.Whipped cream, Mocha fudge sauce
Mocha fudge sauce (optional)
- Make the chocolate fudge sauce according to the instructions in the linked recipe. But add 1 tbsp of instant coffee granules to the sauce to add coffee flavor. You can add more coffee for a deeper coffee flavor.
Tips & Tricks
Gelatin
Using gold gelatin sheets – Instead of 7 – 8 g of powdered gelatin, use 3.5 – 4 sheets of gold gelatin. To soften gelatin sheets, submerge the gelatin sheets in a bowl of cold water. Make sure the sheets are completely submerged in the water. Let it sit for 10-15 minutes and the gelatin sheets should transform from hard, brittle sheets to a soft, spongy mass. Take the softened gelatin sheets from the water and squeeze to remove excess water from the softened gelatin. Then add this to the warm milk and stir to dissolve.Coffee
The smaller the instant coffee granules, the less you will need to use (by volume). 1 tbsp of instant coffee is what’s needed to make 1 cup of coffee. This recipe uses enough coffee to make 4 cups of coffee. If you’re using an espresso powder (dissolves in water), use enough powder to make 4 cups of coffee. Once you make the panna cotta mixture, you can taste it to make sure the coffee flavor is strong enough for you. It should taste like a sweet latte. If the coffee flavor isn’t strong enough (this will depend on the type of instant coffee you use), dissolve extra coffee in a little bit of warm water, or a little of the panna cotta mix, and add it back to the panna cotta mixture.Unmolding the panna cotta
The key to a clean unmolding of panna cotta is to break the seal of the set panna cotta. You can use a thin blade to loosen the panna cotta, and then shake the mold and plate together to help slide the panna cotta out. The panna cotta doesn’t usually plop straight down. It’ll rather slide down at an angle. This will also help with breaking the seal, and you will hear a “pop” when this happens and the panna cotta will slide out of the mold onto the plate.Vegan substitutions
Use plant based milk such as oat milk, instead of regular milk. Use coconut cream or coconut milk instead of heavy cream. You can also blend silken tofu and use it instead of the coconut cream. Tofu is less likely to separate into layers than coconut milk/cream. Substitute the gelatin with about 5 g of agar agar. Bloom the agar agar with the water, and then add it to the hot oat milk. Continue to whisk and dissolve the agar agar in the milk mixture while heating, and bring the mixture to a boil. Whisk and let it simmer for about 30 – 60 seconds. This will help activate the agar agar. Then continue with the recipe as stated, using plant based substitutions.Nutrition Information:
“This website provides approximate nutrition information for convenience and as a courtesy only. Nutrition data is gathered primarily from the USDA Food Composition Database, whenever available, or otherwise other online calculators.”

Rachel says
This was a hit at my birthday dinner! Followed your recipe to the letter and the consistency was perfect! Really appreciate your tips of working with gelatin too.