
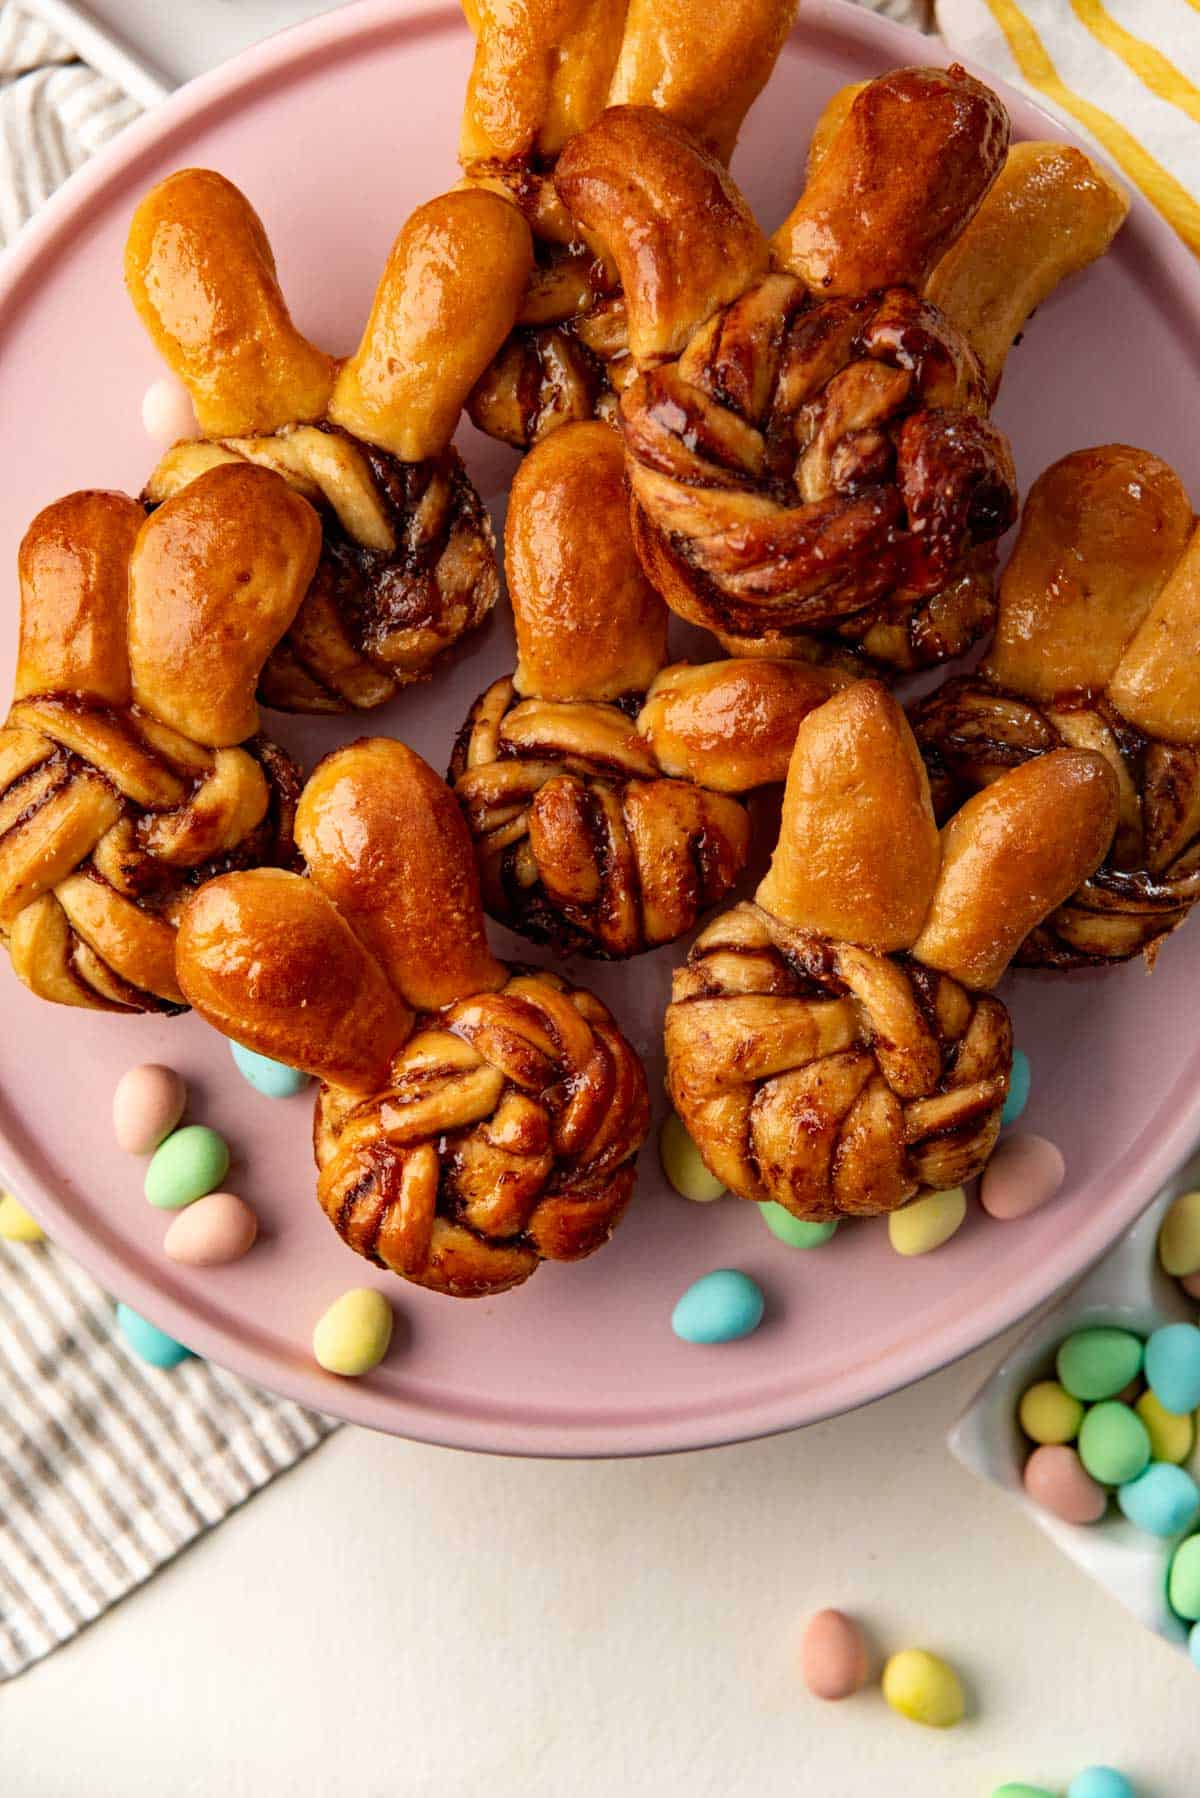
These bunny buns (Easter buns) are easily the most fun, cute, and delicious Easter bread rolls ever! Made in a muffin pan, super easy to make, and the bread is so soft, rich, and fluffy! You can use sweet or savory filling, and it’s very easy to make them vegan too.
My favorite Easter bread rolls!
- These are the cutest ever Easter themed bread rolls!
- These Easter bunny bread rolls are fun to make, and you can change the filling to make them sweet OR savory.
- A really creative way to make bunny shaped treats for Easter OR for anyone who likes bunnies (like my niece!).
- Made in a muffin pan. The bread is super simple to make and so is creating the bunny shaped bread rolls.
- I share detailed step by step instructions on how to shape these Easter bread rolls, with ingredient substitutions to make them vegan as well.
- A great alternative to classic hot cross buns and chocolate chip hot cross buns for Easter breakfast / brunch.
These Easter bunny buns were inspired by my niece. I recently came back from visiting family in New Zealand, where I met my beautiful niece for the first time in person.
I don’t think I’ve ever met anyone who is as obsessed with bunnies as much as her! She also loved to style her hair in buns and call them “bunny buns”.
Bunnies and hot cross buns are Easter mainstays, of course. These Easter bunny bread rolls are made with a spiced dough, and they are glazed like hot cross buns.

But, I wanted them to look like bunnies for Easter (and my niece) too. I tried various ways to create the bunny shape, and different adjustments to make sure that they have the best flavor, and are still incredibly soft and delicious!
These are super simple to make, but shaping them into bunny faces will take a little longer than making regular hot cross buns. But it’s so worth it, because they look absolutely adorable!
Ingredients (notes and substitutions)

For the dough
- Bread flour
- Yeast – Active dry or instant yeast can be used, but I use active dry yeast.
- Milk
- Sugar
- Spices – I use cinnamon and nutmeg.
- Butter
- Salt
- Vanilla – optional
For the filling
In this recipe, I use a combination of,
- Biscoff spread (cookie butter)
- Chocolate hazelnut spread (such as Nutella)
- But you can also use cinnamon butter that I use in my classic cinnamon rolls recipe and brioche cinnamon rolls as well. This will turn these bunny buns into Easter cinnamon rolls.
For the top
- Heavy cream – This is an optional ingredient, but it does make for softer buns! Especially when you want to serve them the next day.
- Jam or honey to brush on top – This gives the bunny buns a lovely sheen. You can skip this as well, since it’s purely for making the buns look more like hot cross buns.
Ingredient substitutions
If you don’t have bread flour, you can use AP flour instead, BUT the dough will be stickier and may need to be kneaded a little longer to get the right consistency.
Since AP flour has less gluten, it needs to be kneaded longer to get more gluten developed in the dough. Less gluten / protein also means that AP flour will absorb less liquid than bread flour, making the dough a little stickier.
Active dry yeast / instant yeast – You can use either in this recipe. However, instant yeast is more active than active dry yeast. This means that the dough may proof faster. Keep this in mind if you use instant yeast to make these Easter buns.

Vegan substitutions
This recipe can EASILY be made into a vegan recipe.
Substitute the milk and butter in the dough with plant-based milk and a good quality vegan butter (not margarine).
Make sure the chocolate hazelnut spread that you use is also vegan (like this homemade vegan Nutella). Biscoff spread is already vegan, so no need to substitute that.
The heavy cream can be substituted with coconut cream (not sweetened), and you can use jam instead of honey to brush on top.
How to make Easter bunny buns (step by step overview)
Making the dough
Step 1 – Activate the yeast
In the mixer bowl, place the lukewarm milk and about a tablespoon of sugar. Stir to dissolve the sugar. Make sure the milk is not too hot (about 90 F / 32 C). Sprinkle the yeast on top and stir to dissolve the yeast in the milk (image 1).
Let it sit for about 10 minutes to let the yeast activate. The yeast should become frothy and puffy on the surface of the milk.

Step 2 – Add the other ingredients and knead the dough
Add the remaining sugar, vanilla, flour, spices, and salt (image 2). Knead the dough in the stand mixer until a dough forms.
Once a dough forms, knead the dough for a further 5 minutes on speed 3 (on a kitchen aid mixer). The dough will start to look smoother than at the start (image 3).
Step 3 – Add the butter
Add the softened butter in 3 – 4 portions (image 4). Knead each portion of butter into the dough before adding the next portion. This can take about 2 – 4 minutes, depending on how soft the butter is when you add it. Make sure to scrape the bowl sides and bottom to ensure that the butter mixes well with the dough.

Step 4 – Final kneading
Knead the dough for a further 10 – 15 minutes. I prefer to knead the dough at speed 4, and lower it to 3 from time to time to ensure that the dough is developing gluten well. Do not leave your mixer unattended during this time.
The dough will be very sticky and soft, and have a very thick, cake batter consistency after adding the butter (image 5). It will also look rough and stick to the sides of the bowl. When trying to lift the dough out of the bowl with the hook, the hook will tear through the dough because it has very little structure.
However, after 10 – 15 minutes of kneading, the bowl will have little to no dough on the sides, and the dough will look smoother (image 6). When the dough is lifted out of the bowl with the dough hook, the dough comes out cleanly and stays on the hook without tearing. This is when the dough is done kneading!
The dough may not pass the window pane test at this stage, but that’s OK. The bulk fermentation and overnight proof will continue to help develop gluten and flavor, and help with the structure of the dough even further.
Step 5 – First proof
Once the dough has kneaded, let the dough proof in a warm place until it doubles in size (images 7 – 8). I prefer to turn the dough out onto a lightly floured surface and shape it into a ball before letting it proof. But you can skip that if you like.

Step 6 – Second overnight proof
Once the dough has proofed until doubled in size, turn out the dough onto a lightly floured surface and press the dough to remove the extra gas in it. Fold in the edges of the dough to form a tight dough ball, and then place it back in the bowl (image 9).
Cover and place the bowl in the fridge overnight, up to 24 hours (image 10).

Shaping the dough
Step 7 – Weighing and portioning the dough for bunny ears
Once the dough has fermented overnight, remove it from the fridge and gently release the excess gas in the dough (image 11). Weigh the dough and portion about 25 – 26 % of the dough (image 12). This smaller portion of dough will be used to make the ears for the easter bunny buns.
Place the larger dough portion back in the fridge, wrapped.
Portion the smaller piece of dough into 16 pieces – about 18 g per piece (image 13). Roll each portion into a baseball bat shape (narrow at one end, wide at the other) (image 14). Place them on a plate, covered with plastic wrap, and refrigerate until needed.

Step 8 – Roll out the dough for the buns
On a lightly floured surface, place the larger dough portion and roll it out into a rectangle. The rectangle should be about 20 inches in length, and about 16 inches in width (image 15). Make sure the dough isn’t sticking to the worktop, and roll out the dough on both sides as you go.
Tips to ensure the dough doesn’t shrink when rolling it out
The dough will shrink when the gluten has been overworked. Unfortunately, this is not a preventable issue. You will find that the dough will shrink as you try to roll it out (if it’s not sticking to the work surface). This will make it harder for you to roll out the dough as thinly as we want for this recipe.
To help with this, fold the dough in half and loosely wrap it with plastic wrap and refrigerate for about 1 hour, before continuing to roll it out again. Once the gluten relaxes, it will be easier to roll it out again.

Step 9 – Spread the filling
You can choose to use just chocolate spread, or just cookie butter, or spread both – like I do! The two fillings can be mixed in a bowl (image 16), or you can dollop each one on the dough to keep them separate too.
Spread the filling in a very thin, even layer all over the dough surface (image 17). Thicker filling is harder to manage, so I prefer to just spread a fairly thin layer.
Step 10 – Form the buns (bunny faces)
To form the buns, the dough must first be folded. Fold one third of the dough towards the middle of the dough rectangle (image 17), and then fold the other third of the dough over the folded portion (images 18 – 19). Now you will end up with a dough that is folded over to create 3 dough layers, and is about 20 inches long, and about 4 – 5 inches in width.
Trim off the edges of the rectangle (image 19). Then cut the remaining dough into 16 strips (image 20). The strips will be about 1.25 inches wide, but this can vary. The strips should be at least 1 inch wide though.

Shaping the bunny face – Place 1 strip in front of you so that the short end is facing you. Cut the strip lengthwise twice to form 3 portions that are still connected at one end (images 21 – 22). Separate and spread out the three portions of the dough, and then proceed to form a braid with the three sections (image 23). Once braided, press down on the edge to seal the three sections together (image 23).
Slightly stretch the braid and then roll it up starting from the sealed edge, with the uncut edge on the outside (image 24). Press / pinch to seal the edge (image 25). Since these buns will be baked in a muffin tin, the edges won’t unravel. But if they were to be baked on a baking sheet, the dough edge must be sealed on the bottom of the bun to prevent unravelling.
Place each braided bunny bun on a tray (image 26), cover with plastic wrap, and keep in the fridge.

Step 11 – Form the Easter bunny buns
Butter 2 muffin pans with butter in each cavity.
Shape the bunny ears – Remove the dough that was shaped into ears (baseball bat shape) from the fridge. Cut each “baseball bat shape” into two, lengthwise (image 27).
Using a little flour, shape each half into a bunny ear. One end is large and rounded, and the other end is narrow and thin. They should be about 2.5 – 3 inches long as well (image 28).
Place both pieces inside a buttered muffin cavity. Make sure the narrow end is placed on the bottom of the muffin pan cavity and the wide end comes out of the cavity. The dough can be stretched out slightly to accommodate this (image 29). Repeat with all the pieces of dough (image 30).

Form the bunny face – Then take each braided bun (bunny face), and place it inside each muffin pan cavity, making sure the buns are placed on top of the bunny ears. Repeat with all the braided buns (image 31).
Baking the buns
Step 12 – Proof and bake
Cover the muffin pan loosely with plastic wrap and allow the Easter bunny buns to proof until they are about 1.5 times the original size. The time will vary depending on the proofing temperature and the activity of the yeast as well. So keep an eye on the buns.

Once ready to bake, preheat the oven to 350 F / 180 C. Drizzle about 2 tsp of heavy cream (or coconut cream) on top of each bunny bun (image 32).
Bake in your preheated oven for about 20 – 25 minutes, or until the buns turn a golden color.
Step 13 – Glaze and cool down
Once the buns have baked, remove the tray from the oven. Brush the tops of the buns and ears with warm honey or warm apricot jam (image 33).
Let them sit for a few minutes, and then carefully remove the buns from the muffin tin and let them cool to room temperature on a wire rack.

Step 14 – Decorate (optional) and serve
The buns do not need to be decorated, but can be decorated if you like. Serve the buns slightly warm, but these can also be eaten at room temperature.
If where you live is very cold, the dough can harden the next day because of the butter and thin layers of bread dough. Warm them up for just a few seconds in the microwave before eating for the best flavor.

Recipe workflow
This recipe can be made over two days or three days. This is because there is an essential overnight proofing step, and you can also place the unbaked bunny buns in the muffin pan and store them overnight again (optional).
- Day 1
- Make the dough and first proof.
- Refrigerate for overnight proofing.
- Day 2
- Roll out dough and form the bunny faces.
- Shape the dough for the ears.
- Form the bunny buns in muffin pans, along with the ears and face.
- You can proof and bake the same day.
- OR refrigerate the muffin pans overnight again.
- Day 3
- Take the muffin pans from the fridge and proof.
- Bake and serve fresh out of the oven.

Recipe notes and tips
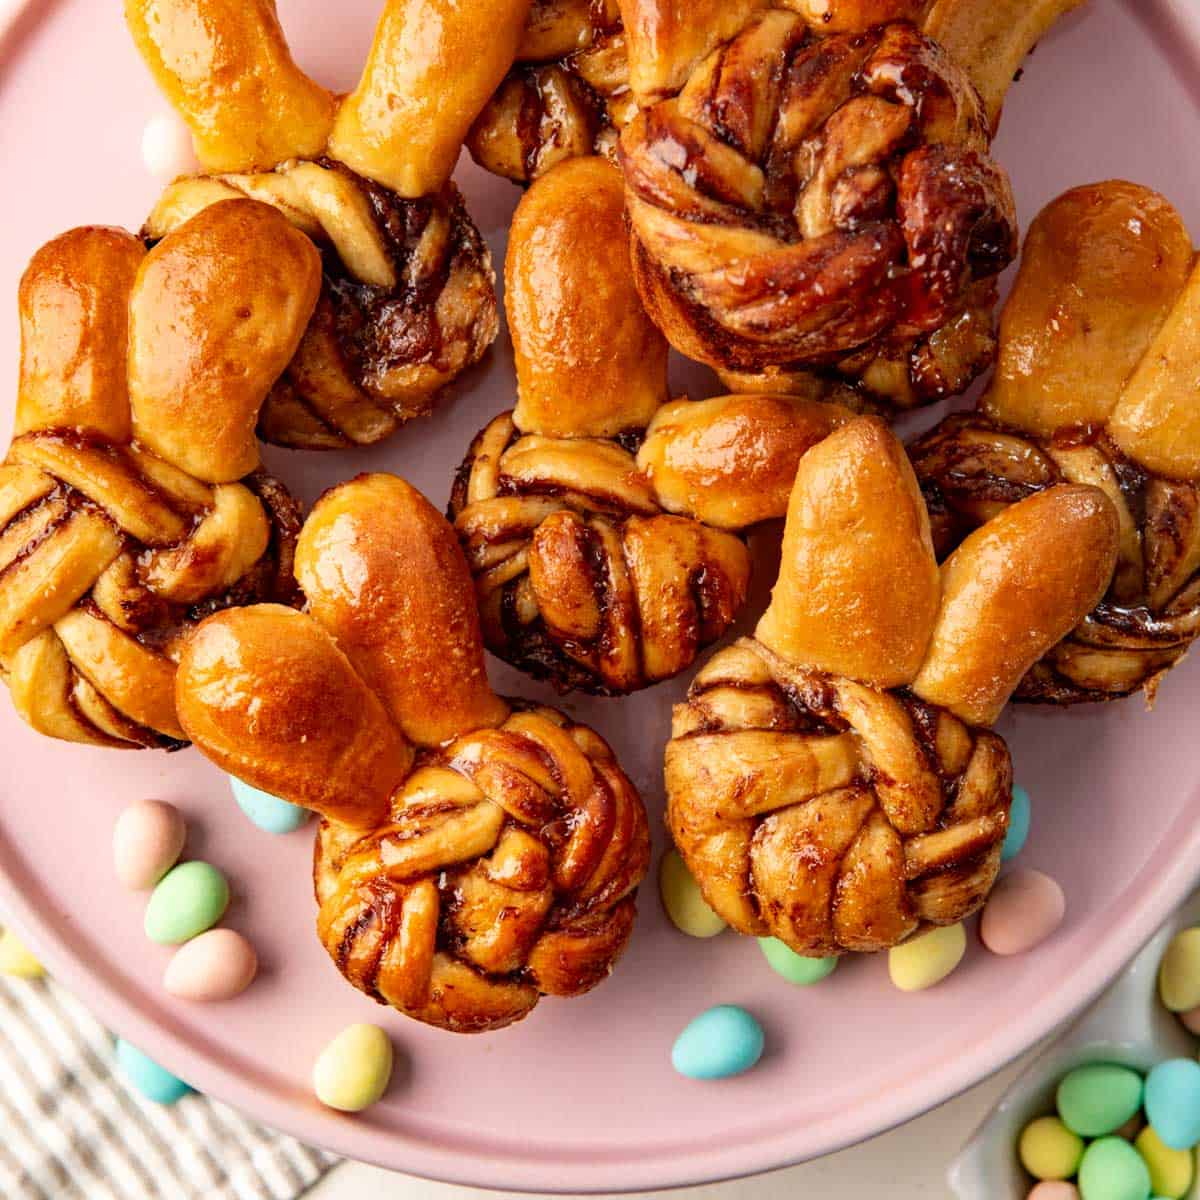
This recipe will make about 15 – 16 bunny shaped sweet buns. The layers of spiced bread and chocolate and biscoff spread create a delicious, chocolatey, sweet bread with a bit of warmth from the spices!
I especially love the alternating flavors from the hazelnut chocolate spread and the spiced biscoff spread! Plus, the bunny rolls are super cute too!
Here are my recipe tips to ensure the best results!
- Activate the yeast – Whether you use instant yeast or active dry yeast, I still like to activate the yeast to make sure the yeast is alive. If the yeast is brand new, I might skip this step, but if I’ve kept the yeast for longer than 2 weeks, then I always activate it before using.
- Make sure the dough has enough gluten developed, so that it can be picked up by the dough hook without tearing through. Otherwise, the dough may collapse during proofing and produce dense buns.
- Do not skip the overnight cold proof, as it makes the dough easier to manage AND helps to develop flavor too. Proofing helps with developing gluten structure, allowing the bread to be light and airy, and also helps to develop a better flavor when done slowly. So don’t skip proofing, and make sure the bread proofs properly.
- When the dough is being rolled out, it can be tricky to get it to the right size without overworking the dough. Overworking the gluten in the dough will cause shrinking. So be patient and let the dough rest in the fridge to make it easier to roll it out. Shrinking dough will make thicker buns, with less filling in the middle.
- This recipe is so flexible, and you can change the filling to your taste! I use pre-made biscoff spread or hazelnut spread, because it’s easier. But you can also make a cinnamon sugar mixture to make Easter cinnamon roll bunny buns as well! Do not use jam though, I’ve tried this, and the jam tends to leak out quite a bit.
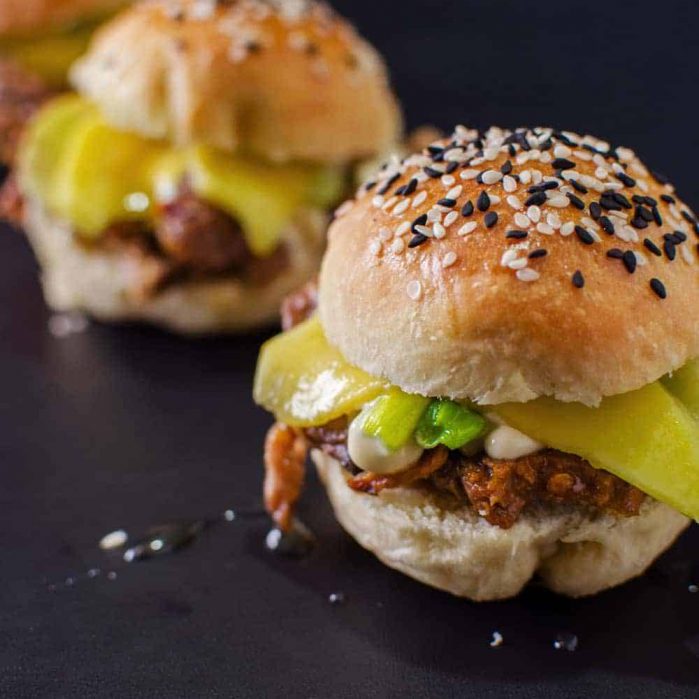
- Making a savory version – Yes, you can absolutely switch the sweet filling to make savory easter bunny buns too! Sprinkle cheese and cut up ham to make ham and cheese Easter bunny buns OR my favorite – marmite and cheese bunny buns!
- Make sure the bunny ear ends are at the bottom of the muffin pan, so that they are stuck well to the bottom and sides of each bunny bun. If they are adhering to the bunny bun well, then the ears will not break away and fall from the face portion.
- Adding heavy cream also helps to create a softer bread roll.
- Because the bunny buns are rolled out thinly, with filling in between, the final easter bunny bun can seem a little hard the next day. This is because of the thinner dough portions and the thick filling AND ambient temperature. This dough has a minimum of 72% hydration, and butter enrichment on top of this. So the bread dough is rich and soft!
- You can make this recipe WITHOUT the bunny ears too! Make sure not to divide the dough after overnight proofing, and to roll out the dough to about 28 inches in length, maintaining the same width.
Storage tips
The baked easter bunny buns should be stored in an airtight container, at room temperature. The cold temperature will cause the bread to harden. This is the same if your room temperature is cold – like it is in winter here in Canada.
Make sure the Easter buns are placed in an airtight container once they have cooled down to room temperature, or only just slightly warm.
They will last about 3 days at room temperature, and about 5 days in the fridge. If the buns are very cold, they must be warmed up slightly in the microwave before eating.
These buns can also be stored in the freezer for about 3 months. Just make sure they are stored in an airtight container to prevent freezer burn. Frozen easter bunny buns must be warmed up in the oven before eating.
If you do end up with stale leftover bunny buns, you could make a variation of this hot cross bun bread and butter pudding as a great way to transform those leftovers.

Frequently asked questions
The dough can become dense if too much flour is added to the dough. The dough should have 72% hydration, plus more enrichment from the butter (when ingredients are weighed). If you use volume measurements, and it was inaccurately measured, you could have accidentally added too much flour, leading to a drier, denser result.
If the bread rolls are dense the same day they were baked, then it’s because the bread was not proofed properly before baking, OR it was over-proofed and then collapsed as it baked. This bread dough has a 72% hydration level and increased richness from the butter, so the actual dough is incredibly soft.
If the bunny bread is dense the next day, it could be because the ambient temperature is cold, and hardened the thinner dough layers. This is completely normal, because the dough layers are thin and layered with spread that hardens at cold temperatures as well. If that’s the case, simply warm them up in the microwave for a few seconds before eating.
You can decorate the easter bunny bread buns any way you like! I kept it plain here, but you can also create bunny faces on the buns.
These can be created using pipeable royal icing, thick chocolate ganache, or melted chocolate.
Pipe two big circles for the eyes. A triangle underneath for a nose, and a curved “w” as the mouth below the nose. You can also stick M&M’s on the buns for eyes as well.
Yes, you can!
However, if you want to make these buns in a muffin pan, you can only make 16 (with ears), or 22 (without ears). If you cut fewer portions of the dough (larger portions), they may not fit in the muffin pan properly.
However, you can make larger buns on a baking sheet easily! Just place the ear portions like a “V” and place the braided bun on top of the ears, making sure that the ears are sticking out from the bunny faces. To prevent the buns from unravelling, make sure the edge of the braid is tucked under the bun.

More Easter favorites
- Easter egg cake (vanilla chai cake)
- Pastel Easter sheet cake
- Carrot cake
- Asian deviled eggs
- Spiced banana cupcakes (Easter cupcakes)
- Classic hot cross buns
- Chocolate chip hot cross buns
Looking for more recipes?Sign up for my free recipe newsletter to get new recipes in your inbox each week! Find me sharing more inspiration on Pinterest and Instagram.
Easter Bunny Buns
What You Need:
- Weighing scale
- 2 Standard muffin pans
- 1 Stand mixer I've used a standard KitchenAid mixer and an Ankarsrum mixer to make this
- Pastry brush
- Sharp knives
Ingredients:
For the dough
- 7 g active dry yeast or instant yeast 2 ¼ tsp
- 360 mL full-fat milk 1 ½ cups, lukewarm (about 90 – 95°F / 32 – 35°C)
- 100 g sugar you can use white or brown sugar, about ½ cup
- 1 tsp vanilla extract 5 mL
- 500 g bread flour 4 cups (spooned and leveled)
- 1 tsp ground cinnamon
- ½ tsp ground nutmeg
- 1 tsp fine sea salt about 5 g
- 150 g unsalted butter softened
For the filling
- 200 g hazelnut chocolate spread / biscoff spread OR 50 : 50 of each
For topping
- 160 ml heavy cream ⅔ cup
- Apricot jam or honey to brush on top optional
Instructions:
Making the dough
- Measure out all the ingredients needed for the dough and have them ready.
- Place the milk in the mixing bowl of your stand mixer and add about 1 tbsp of the sugar. Whisk to dissolve.360 mL full-fat milk
- Sprinkle in the yeast and whisk to dissolve it in the milk. Set it aside for about 10 minutes to activate the yeast. When the milk-yeast mixture forms a foam on top, the yeast is activated.7 g active dry yeast or instant yeast
- To the activated yeast, add the sugar, vanilla, bread flour, spices, and salt (any order is fine, but the salt must be added AFTER the flour).100 g sugar, 1 tsp vanilla extract, 500 g bread flour, 1 tsp ground cinnamon, ½ tsp ground nutmeg, 1 tsp fine sea salt
- Place the bowl in your stand mixer with the kneading hook. Start mixing the dough on speed 3, until the ingredients mix well and come together. Scrape the sides and bottom of the bowl to ensure nothing is sticking to the bowl.
- Knead the dough for a further 5 minutes until the dough starts to look fairly smooth.
- Next, add the butter in 3 – 4 portions, making sure each portion gets mixed in relatively well before adding the next one. Do this at speed 3 or 4 on your kitchenaid mixer, while briefly stopping to scrape the sides and bottom of the bowl to ensure proper mixing. Adding the butter should only take about a maximum of 2 minutes.150 g unsalted butter
- If you try to lift the dough out of the bowl with the dough hook, the hook will tear through the dough at this stage.
- Now knead the dough for a further 10 – 15 minutes on speed 4. Reduce the speed to 2 or 3 for about 1 minute, in 3 – 4 minute intervals. The goal is to knead the dough at a higher speed to encourage proper gluten development. (Since the dough has a high hydration and enrichment level, the dough is loose and can be kneaded at a higher speed.)
- How to tell when the dough has kneaded enough – The dough should go from looking like a rough, thick batter to a smooth, shiny dough. At about 10 minutes of kneading, the dough should no longer be sticking to the sides, and look shiny. When you use the dough hook to lift it out of the bowl, it should come out cleanly with little to no dough left in the bowl. The dough will also stay on the hook without tearing. This shows that the dough has developed enough gluten for good structure.
First proof
- Turn the dough out onto a lightly floured surface. Fold in the edges of the dough towards the middle to form a tight ball of dough. Flip the dough over so that the seam side down, and the dough should have a tight surface on top. Now place the dough back in the mixing bowl.
- Cover the mixing bowl with plastic wrap and keep it in a warm place to proof. I like to keep it in my oven with the oven light OR the proof setting on. Let it proof for about 45 – 60 minutes, OR until the dough doubles in size. The time will depend on the ambient temperature.
- Once proofed, turn the proofed dough out onto a lightly floured surface and gently press to release excess air. Then shape the dough again to form a tight dough ball.
Overnight slow proof
- Place the shaped dough ball back in the mixing bowl and cover loosely with plastic wrap. Place the bowl in the fridge overnight (8 hours) or up to 24 hours. This step helps to develop the gluten further and to enhance the flavor of the dough.
Dividing the dough
- After the dough has chilled overnight, turn the dough out onto a lightly floured surface the following day.
- Press the dough gently to release any extra gas. Weigh the dough on a weighing scale. The dough should weigh between 1000 – 1100 g.
- Portion a piece of dough that is about 285 –300 g. You should now have two portions of dough. I.e. a small portion that's about 300 g, and another bigger portion about 800 g. Wrap the larger portion of dough in plastic wrap or in a ziploc bag and return to the fridge.
- Portion the small dough into about 16 pieces (about 18 g each). Shape each portion into a baseball bat shape (narrow at one end, wide at the other end). Place each portion on a plate or tray. Cover with plastic wrap and place in the fridge until needed. These will be used as the bunny ears.
Making the bunny faces
Roll out the dough
- Place the larger portion of dough on a lightly floured work surface. Shape the dough into a rough rectangle and start to roll it out. Maintain a rectangle shape to make it easier to portion the dough. Make sure to flip the dough over to make it easier to roll out evenly. Lightly flour as you go to prevent the dough from sticking to the work surface.
- The final dough should be about 20 – 21 inches long and about 16 inches wide.
- If the dough is shrinking a lot when you roll it out, fold over the dough in half (if needed) and wrap it in plastic wrap and transfer to the fridge. Let the dough rest in the fridge for about 30 – 60 minutes. This will allow the gluten to rest and make it easier to roll it out.
Spread the filling
- Once the dough has been rolled out to a rectangle that is about 21 x 16 inches, spread the filling on the surface of the dough.
- You can choose to use only biscoff spread or chocolate hazelnut spread, or mix both together and spread on top.200 g hazelnut chocolate spread / biscoff spread
- Dollop each of the filling on top of the dough and then use an offset spatula to spread the filling in a thin layer all over the surface.
Fold the dough
- Once the filling is spread, fold one third of the dough over itself (along the long edge – see pictures in the post for reference) towards the middle. Next, fold the opposite end over the already folded dough.
- You should end up with a dough that's about 21 inches long, and about 5 inches wide, with three layers of dough, and with filling in between.
- Trim off the edges of the folded rectangle to get straight edges.
Shaping the bunny bun faces
- Next, cut the rectangle into about 16 strips. The strips should be about 1 ¼ inches wide.
- Take 1 strip and place it on a lightly floured surface. Using a sharp knife, make two cuts lengthwise, while leaving one end intact. See pictures in the post for reference. You should end up with a strip of dough that has three long strands that are still connected at one end.
- Braid the three long strands to create a plait. Press the ends together to seal.
- Gently stretch out the plait and roll it up on itself, starting from the end of the plait to the beginning. Pinch the end of the dough to seal the roll.
- Place the braided bun on a parchment paper-lined baking tray. Scrape off any excess filling that might be on your work surface
- Repeat with the remaining dough strips (16 total).
- Once all the bunny buns have been shaped and placed on the tray, cover the tray with plastic wrap and transfer to the fridge.
Assembling the bunny buns
- Butter 2 x standard muffin pans (or butter only 16 cavities).
- Take the baseball bat shaped dough portions from the fridge. Cut each portion in half lengthwise. Using slightly floured fingers, shape the dough to look like bunny ears. Rounded and wide at one end, and narrow and small at the other end, and about 2 ½ – 3 inches long. See pictures in the post for reference.
- Place the two ears in the muffin pan. The narrow ends should be at the bottom of the cavity and then go up the sides and the wider ends should be placed outside the muffin pan cavity. Make sure the wide ends are placed in a V shape to look like bunny ears once baked.
- Repeat with the remaining bunny ear portions. Make sure there is minimal overlap of the ears.
- Next, place the shaped braided bunny buns in each cavity, on top of the bunny ears inside the muffin pan cavities.
Final proofing and baking
- Loosely cover each muffin pan and let the buns proof in a warm place until doubled in size.
- When the bunny buns are almost done proofing, preheat the oven to 350°F / 180°C.
- Drizzle about 2 tsp / 10 mL of heavy cream over each proofed bun. This helps to make the bunny bread rolls even softer and richer.160 ml heavy cream
- Bake in the preheated oven for about 20 minutes, or until the buns are golden brown on top.
- When buns have baked, remove from the oven.
- Place the jam or honey in a microwave-safe bowl and heat till the mixture is warm. Use a pastry brush to brush the warm jam / honey on the freshly baked, warm bunny buns.Apricot jam or honey to brush on top
- Let the buns cool down slightly and then carefully remove them from the muffin pan and place them on a wire rack to cool down further.
- Serve at room temperature.
Video:
Tips & Tricks
Vegan substitutions for the recipe
- Replace the milk with any plant-based milk.
- Replace the butter with any plant-based butter (not margarine).
- Replace the heavy cream with unsweetened coconut cream.
- Use a vegan chocolate hazelnut spread for the filling.
Workflow for this recipe
- Day 1
- Make the dough and first proof.
- Refrigerate for overnight proofing.
- Day 2
- Roll out dough and form the bunny faces.
- Shape the dough for the ears.
- Form the bunny buns in muffin pans, along with the ears and face.
- You can proof and bake the same day.
- OR refrigerate the muffin pans overnight again.
- Day 3
- Take the muffin pans from the fridge and proof.
- Bake and serve fresh out of the oven.
Nutrition Information:
“This website provides approximate nutrition information for convenience and as a courtesy only. Nutrition data is gathered primarily from the USDA Food Composition Database, whenever available, or otherwise other online calculators.”
Jo says
Ooooh – I’m going to be seeing friends on Easter Saturday – these look perfect for taking along! Quick question – as we’re going to be playing board games for the evening – how sticky does the glaze make the bunnies? (My normal hot cross bun glaze does make the buns sticky, but I could be doing it wrong….) I don’t want people having sticky fingers while playing 😀
Dini says
Hi Jo!
The glaze does make it a little sticky, quite like hot cross buns! But you can absolutely brush them with an egg wash before baking, and they should have a lovely sheen on them too! Plus they won’t be sticky either 🙂
Let me know how they come out! This recipe was so much fun to create!
Jo says
I’m having problems 🙁 I’ve just finished the Step 5 15 minutes kneading, and if anything the dough is more ‘liquid’ than it was at the start. When I checked at the 10 minute mark, a little bit lifted with the hook, but most of it slid through. At the 15 minute mark it poured off the hook without even sticking, and it is ”puddling’ at the bottom of the mixer. I weighed the ingredients rather than trusting to cup sizes, so I know the proportions were right. I’m adding extra HG flour to see if that works, but I’m not sure why it is so different to your pictures.
What am I doing wrong?
Dini says
Hi Jo
I’ve made this dough for different recipes multiple times and have never encountered this issue! I’ll try to see if I can replicate it next time…
Is the dough ripping through the hook or just flowing off the hook? If it’s not ripping off then it’s safe to be used.
It could also be that the dough is very warm after kneading and is more fluid?
If the dough isn’t ripping, then I would just recommend refrigerating the dough to firm up. Adding more flour will make it dry and crumbly.
Let me know how they turned out?
Jennifer says
Great recipe! These were really fun to make with my kids and the dough came out perfect. On popular demand, I’ll be making these a few more times before Easter!
Natascha says
Wow they look so cute. I think I have to make those for easter. By the way, I have your book and I love the recipes. I just made last week the dulce de leche “schokotorta” and received raving reviews :). I
Dini says
Yay, I’m so happy to hear that, thank you so much Natascha! And yes, these buns are actually pretty fun to make too! 🙂