
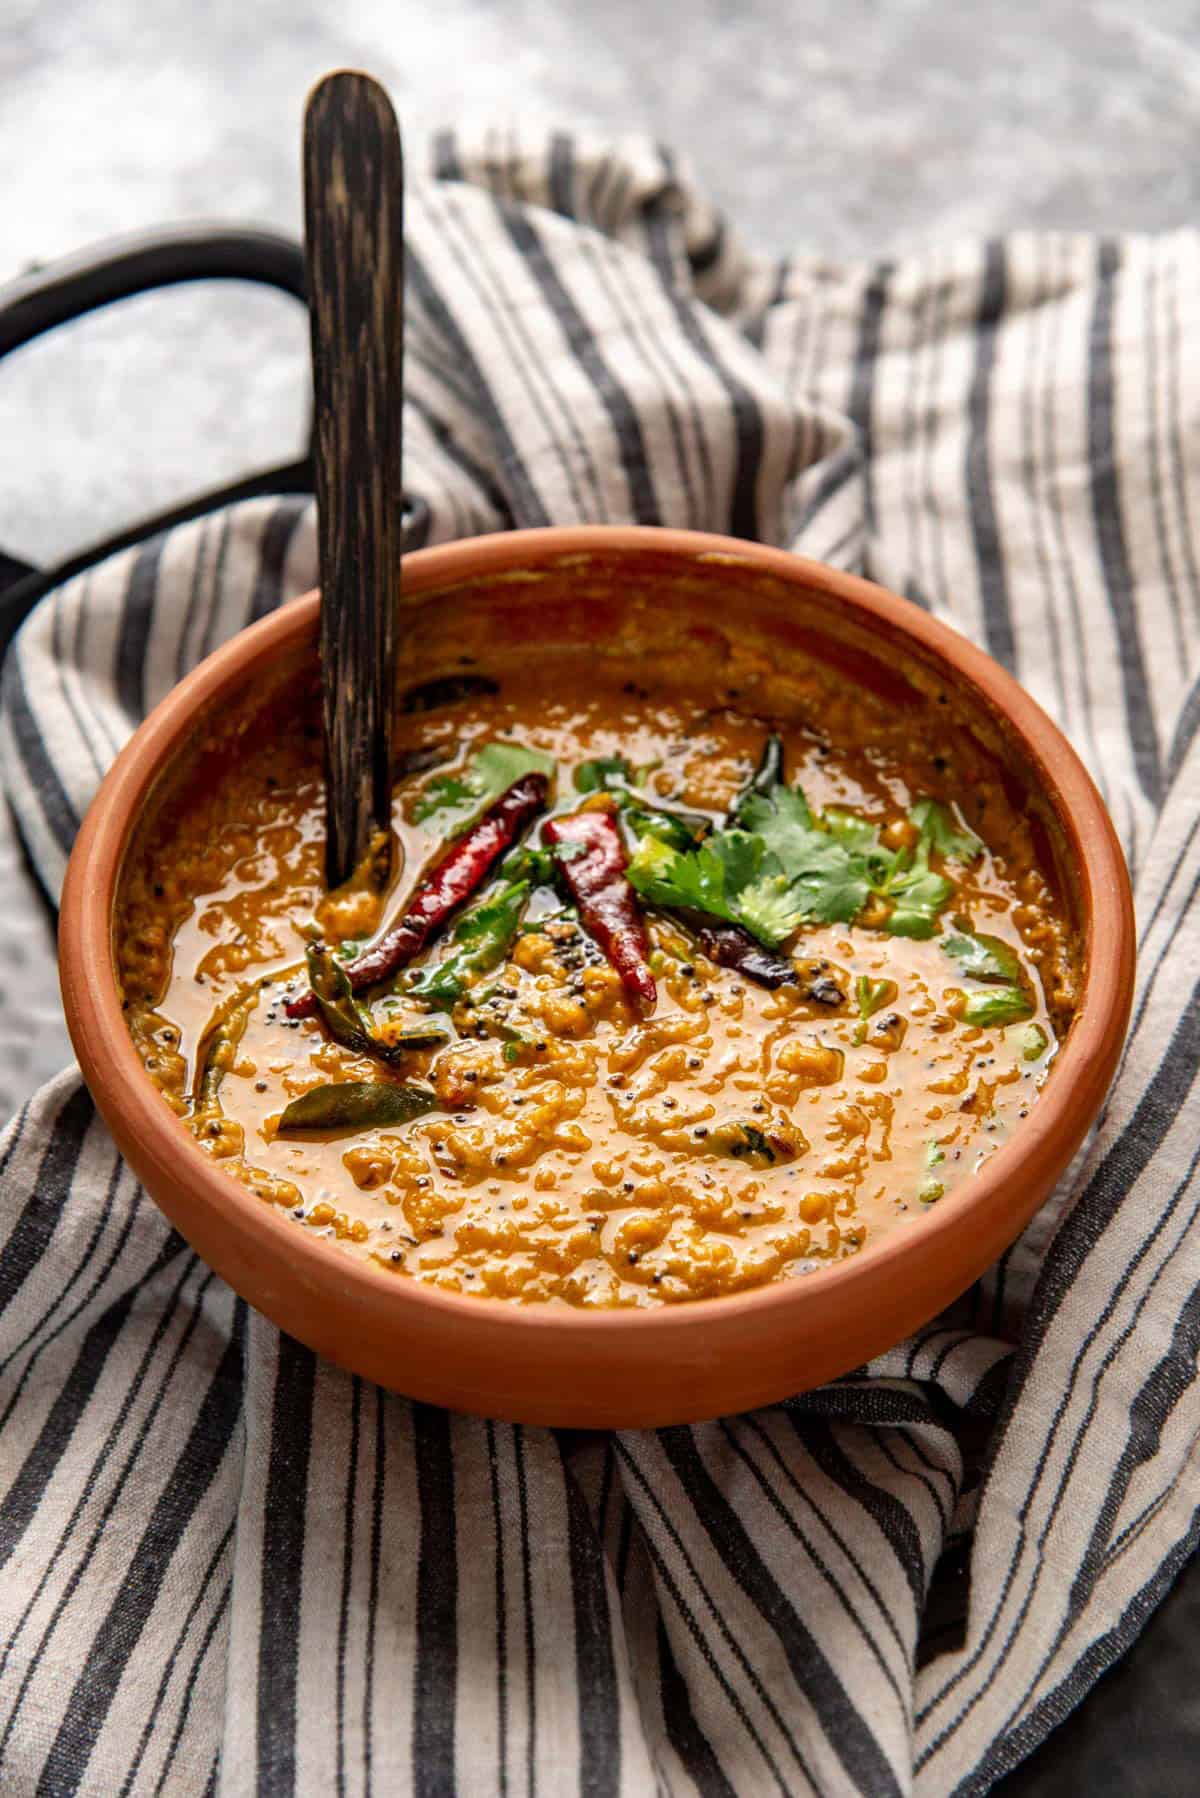
An unforgettable red lentil curry (dhal curry) that coaxes out layers of incredible flavor, while also being so easy and quick to cook!
Make it mild or spicy, make it creamier if you like, add extra spice and flavor if you prefer, or extra vegetables or greens for even more nutritional value. I give you all the tips and variations for the best red lentil curry that you’ll ever have!
What makes this red lentil curry SO flavorful and comforting
- This dhal curry recipe is so easy to make, and comes together super quickly.
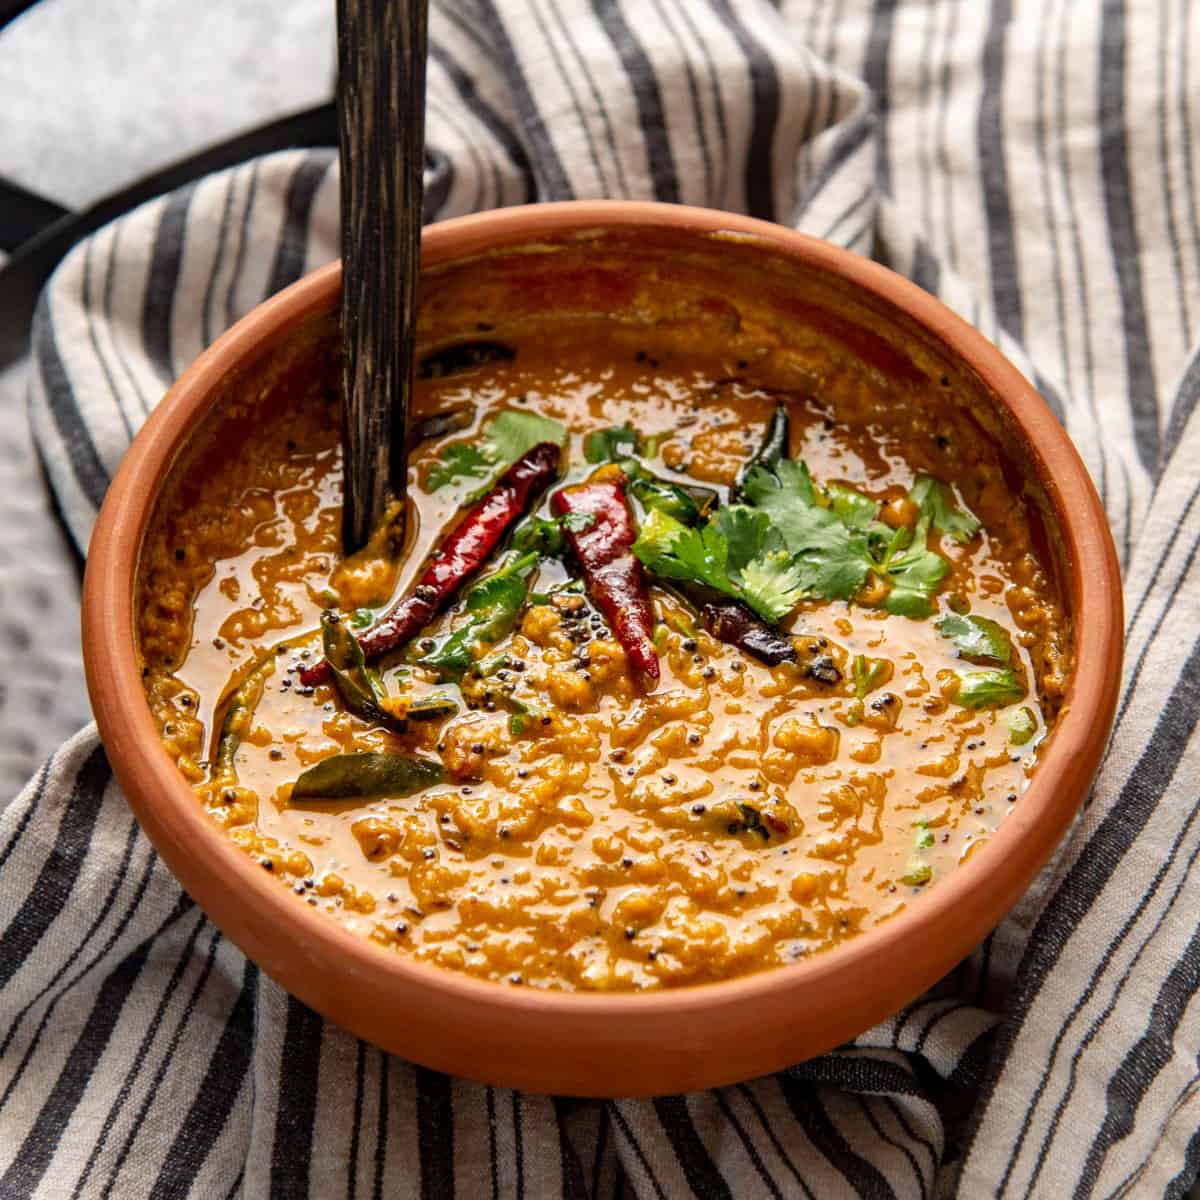
- Tempering is optional, but makes it taste SO MUCH better! We are talking unparalleled flavor.
- This Sri Lankan lentil curry is super creamy because of the coconut milk, and all the spices added to it.
- You even have the option of adding other ingredients to boost the nutritional value of this curry.
- Make it mild or spicy!
- Warming spices such as cinnamon add a little sweetness to the lentil curry.
- I like to make this as a “soupy” curry, so that it’s half way between a curry and soup, so it’s so very comforting to eat with rice.
- Pair this vegan curry recipe with rice for a perfect, nutritious meal, or with bread.

What’s in a name? What is dhal curry?
You’ll find that this curry is often spelled differently in different regions. Dhal curry, daal curry, dal curry, or even dahl curry generally refer to this red lentil curry.
The “dh” signifies the emphasis put on the d sound. But in Sri Lanka and South India, this red lentil curry is also known as parippu (or paruppu in Tamil).
The red lentils used in this recipe are sold as red lentils in the grocery store, but are known as masoor dhal as well.
Ingredients for red lentil curry

For the base lentil curry
Red lentils – This type of lentil cooks very quickly, so it’s such a popular legume in South Asian cuisine. You can also use green lentils or brown lentils instead in this recipe. However, the cook times will be slightly longer for those lentils, plus the husk of the lentils will be more visible with green or brown lentils.
Onions – You can use any type of general purpose onion. I use yellow onions, but white or red onions work as well. Shallots are also fine.
Green chili – We use green chili for flavor and heat. If you don’t want it spicy, then I recommend using jalapeno, OR removing the seeds in the chili before adding it. You can also omit the green chili altogether, but I do recommend adding some, if possible.
Garlic – Optional, but adds flavor.
Salt and a touch of sugar – For seasoning. If you want your lentils to hold their shape, add the salt AFTER cooking. But I like to add it at the start because the lentils are seasoned well as they cook, and the salt also helps to soften the lentils further.
Spices – These are the ground spices I use for my standard lentil curry that I make weekly at home. You can also substitute the cumin and coriander with my Sri Lankan curry powder, or even use garam masala if you like.
- Cumin – Adds a smoky flavor.
- Cinnamon – Adds sweetness.
- Coriander – Earthy flavor.
- Turmeric – Color and adds earthy warmth.
- Chili powder – Kashmiri chili powder or cayenne pepper works. Make sure it’s not the Mexican chili powder spice mix.
- Hing – Also known as asafoetida. This is South Asian “MSG”. It adds a savory flavor that is honestly hard to describe! Hing also aids with digestion which is very helpful for some people. But if you don’t have it, you can leave it out.
- Fenugreek – An optional ingredient. A bitter, pungent flavor. Just a little fenugreek goes a long way! I prefer using fenugreek leaves (methi leaves). Be careful not to use too much, especially if you have never had it before. It does have a very pronounced bitter flavor if you use too much.
Coconut milk – Adds a lovely nutty creaminess to the lentil curry! This ingredient is what makes this incredible lentil curry an authentic Sri Lankan parippu curry (or dal curry). Most Indian dhal curries (excluding South India), and even Bangladeshi dhal curries do not add coconut milk. But Sri Lankans tend to add full-fat coconut milk to theirs. I absolutely love the flavor that it yields!
Lime juice and fresh cilantro – These are only added at the end, and they are also optional.
Tempering mixture
Tempering spices in oil is a popular technique in authentic curry recipes in South Asia. This technique allows the full extraction of flavors from the spices while toasting them. Adding this to the curry is a fantastic way to introduce smoky, spiced flavor in an instant.
This is an optional step. Growing up, we didn’t add tempered spices to our dhal curry that we regularly ate at home, but only for “special” occasions, or when we had some extra time. However, I absolutely love the explosion of flavor that it adds, so I temper my lentil curry almost always now!
- Coconut oil or any other neutral oil
- Thinly sliced onions – optional
- Mustard
- Whole cumin seeds
- Curry leaves
- Dried chili
How to make dhal curry (step by step instructions)

Step one – Prep all the ingredients for the lentil curry. The red lentils must first be washed to remove excess starch. Wash the lentils 2 – 4 times until the water runs fairly clear.

Step two – Start cooking the lentils. To do this, place the washed lentils in a saucepan, along with water, salt, garlic, and spices. Cook the lentils over medium heat.
First bring the water to a boil, while frequently stirring the lentils. Then lower the heat and simmer the curry until the lentils have softened.
You can simmer the dhal curry with or without the lid on, but keep an eye on the water level and add more hot water if the water evaporates too much. This can take about 10 – 15 minutes. Make sure to frequently stir the curry.


Step three – Add the coconut milk. When the lentils have softened, add the coconut milk to the curry and stir it in to mix. Heat until the dhal curry simmers for a minute or two.
You can add more water if the dal curry is too thick, or leave it as is. Taste and add more salt if needed.
Now, the lentil curry can be eaten just as is! This is the parippu curry we used to eat almost daily as kids. However, if you want to take the flavor to a whole other level, then you can also temper the dhal curry. This is step four, which is optional but recommended!

Step four (optional step) – Temper the lentil curry. For this final step of tempering, heat the oil in a small pot or pan. If you’re using onions, then add the onion to the oil before it gets too hot.
Sauté the onion until the onions start to turn a light golden color. Then add the mustard seeds and cumin seeds and keep sautéing until the mustard seeds start to pop.
Immediately add the dried chili and curry leaves and let it fry for about 30 seconds. Then add the tempered spices to the hot dal curry and stir to combine.

Before serving, sprinkle some chopped cilantro on top, OR stir it into the red lentil curry. You can also stir in a squeeze of fresh lime juice to your taste, but this is optional.
That’s it! How easy was that? That’s why this lentil curry is such a staple in our meals!
Step five (optional step) – This is another optional addition to my lentil curry that I make at home. That is to add some leafy greens. Spinach is my choice. Just add the spinach and stir it into the curry (while on medium heat) until the spinach wilts into the dhal curry.

My tips and secrets for the best red lentil curry
- Wash the red lentil very well! You have to wash away the extra starch before cooking, or the curry will be too thick and starchy.
- The longer you cook your curry, the more the red lentils will break down. So you can adjust the cooking time to your liking. If you want the lentils to retain their shape, then cook them a little less. If you want the lentils to break down and make a smoother curry, then cook for longer.
- You can use brown or green lentils to make this curry as well, but the cook time will be longer, and it might need a little extra water as well.
- Use a good quality coconut milk for the curry! A full fat creamy coconut milk will make the curry creamier and richer in taste, while a lite coconut cream will be less creamy.
- Adjust the heat from the chili to your preference. The heat from chili powder and dried chili will vary greatly between different types of chili used to make the powder, as well as the brand. For the dried chili, remove the seeds before tempering the chili to reduce the heat as well. While I’ve added 6 chilies, you may want to start with just one if you don’t know your spice tolerance level.
- If you can’t find fresh curry leaves, you can use dried curry leaves instead. I’m so happy that dried curry leaves can be bought online now, so they are readily available to a lot more people than they used to be. But if you can’t find it, you can leave it out.

Recipe variations
Spinach and lentil curry – This is my absolute favorite variation, because it’s one of the very first dishes that I cooked with my grandmother, using spinach that we grew in the garden together.
Just add washed spinach during the last few minutes of cook time, and allow the heat in the curry to wilt the spinach as you mix it in. It only takes about 2 – 3 minutes.
Instead of spinach, you can also use swiss chard, collard greens, or other leafy greens that you like to eat. Larger leafy greens should be cut into smaller pieces.
Sweet potato and lentil curry – I love this combination too! The sweetness from the sweet potato is delicious with lentils. Cut the sweet potatoes into smaller cubes, and add them to the water and cook partially BEFORE adding the lentils. The amount of water may need to be increased, as well as the spices.
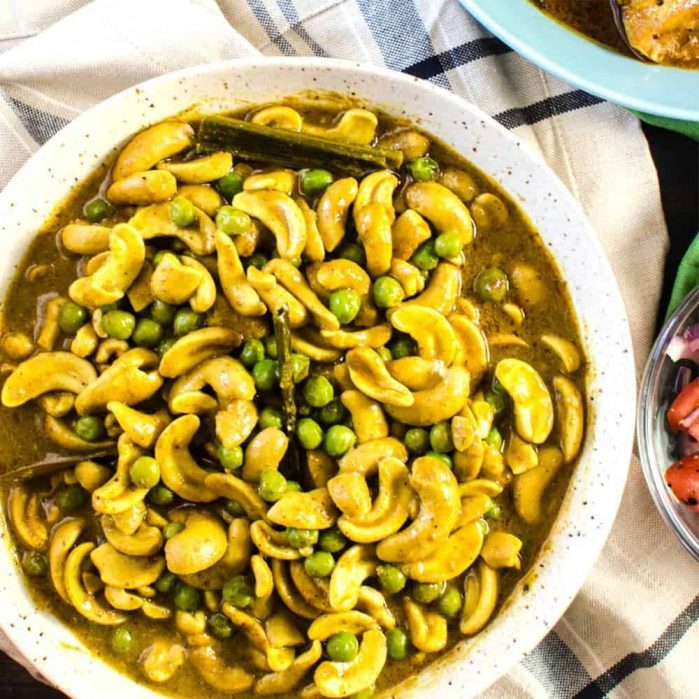
Chickpea and lentil curry – Chickpeas are a great way to add extra protein to your red lentil curry. Add drained and rinsed canned chickpeas to the dal curry about 5 minutes before the lentils are cooked, to allow the chickpeas to absorb the flavor.
Pumpkin lentil curry (or squash) – You can add pumpkin the same way you add sweet potatoes to the curry. Let the pumpkin pieces cook first, before you add and cook the lentils.
Other vegetables you can add to dal curry,
- Cauliflower lentil curry – Add cauliflower (cut into 1 inch pieces) along with the lentils.
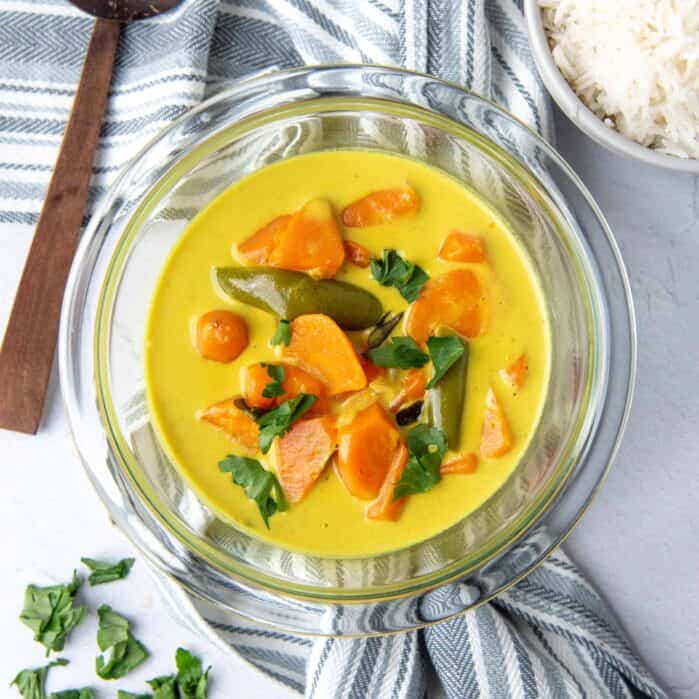
- Carrot lentil curry – Cut the carrots into 1 inch pieces and cook it along with the lentils. It’s important that the carrots and lentils cook at the same time.
- Tomato lentil curry – Some lentil curries add tomatoes for extra flavor, but you can also make tomatoes the star alongside the lentils!

Spice and flavor variations
To make a very mild lentil curry that is easy on tummies and perfect for kids and babies, only add turmeric, cinnamon, and a little coriander. The creaminess of the coconut milk will make a protein rich, nutty, and slightly sweet curry that’s perfect for anyone who cannot handle spice, or needs something that’s easy on the gut.
To add a little tartness, add a tomato to the lentil curry. The tomato will add additional flavor to the dal.
For a more savory lentil curry, you can make it with chicken broth (or vegetable broth), like I served here with roti canai. In this dhal curry, I also used a stick blender to blend the lentils to make a creamier, thicker curry to go with the roti canai.

What to serve with lentil curry
We usually eat this vegan lentil curry with rice (white rice, basmati rice, brown rice etc.). Just this red lentil curry and rice together are a fantastic meal! However, this lentil curry will go splendidly with so many other curries too! Such as,
- Chicken curry
- Mutton curry (lamb curry)
- Beef curry
- Fish curry
- Apple curry
- Mango curry
- Prawn curry (shrimp curry)
But the dhal curry can also be served with,
- Bread (like regular white bread)
- Pol roti (coconut roti)
- Roti canai
- Roast paan
- Indiappam
- Aappam
Storage
Can you make this ahead of time?
What I love about this lentil curry is that it can be made ahead of time, and in fact tastes even better the next day (just like my Sri Lankan chicken curry!). Plus, it freezes well and is perfect for meal-planning.
Refrigeration and freezing
Dhal curry (in an airtight container) will last in the fridge for about 4 days, and in the freezer for up to 6 months. When reheating, consider adding just a splash of water to compensate for the water that evaporates as it reheats. This prevents the dal from drying out during the reheating process.
If you’re reheating this curry from frozen, make sure to reheat the curry at about 50% power for a longer time until the dal thaws.
Then you can reheat at 100% power until it’s properly heated. This ensures more even reheating of the lentils. Alternatively, you can allow the dal curry to thaw in the fridge for 12 – 24 hours, and then reheat in the microwave or on the stove.

Commonly asked questions
Yes, you can! But since red lentils cook so quickly, the instant pot will only shave off a few minutes. Plus, I personally prefer stove cooking which allows me to regulate the amount of liquid in my lentil curry.
Red lentils require about 4 – 5 minutes on high pressure. Up to 8 minutes if you want very soft lentils (perfect for lentil soup).
For the instant pot, I do recommend using brown or green lentils that are still in their husk, since these legumes will hold their shape better than red lentils, and won’t disintegrate as easily (if you prefer that). The cook time for these will be about 5 – 6 minutes on high pressure.
Absolutely!
Red lentils are “de-husked” and split legumes. The outer skin of the lentil has been removed, and that’s why red lentils cook much faster and also have a tendency to lose their shape as they cook.
Brown and green lentils still have the husk attached, so will keep their shape better, but they are very similar to red lentils. So you can absolutely use them instead of red lentils (also known as masoor dal).
The only difference is that you may need more water and more time to cook the brown and green lentils.
Absolutely! I like making a big batch of lentil curry, portion it, and then freeze for later. We often use lentil curry as part of our meal prepping and portion it out along with rice and vegetables, and freeze individual portions for later.
It’s perfect as individual meal pack prepping, or as bulk food prepping too, since it’s such a great protein source, while being inexpensive too.
Looking for more recipes?Sign up for my free recipe newsletter to get new recipes in your inbox each week! Find me sharing more inspiration on Pinterest and Instagram.
Easy Red Lentil Curry (Sri Lankan Dhal Curry)
Ingredients:
Spiced red lentil curry
- 150 g red lentils ¾ cup
- 600 mL water 2.5 cups
- ½ tsp sea salt
- 2 – 3 green chili use jalapeno for a mild version, OR de-seed the green chili before using. OR omit for a very mild version (but I do recommend some green chili at least).
- ¼ yellow onion sliced
- 1 garlic clove minced
- ½ tsp sugar
- 120 – 180 mL canned coconut milk ½ – ¾ cup, full fat preferably.
Spice mix for the curry
- ¼ tsp ground turmeric
- ½ tsp ground cinnamon
- ½ tsp ground cumin
- ¼ tsp ground coriander
- ¼ tsp Kashmiri chili or cayenne pepper use less if you prefer (we use 1 tsp as we do like it spicier).
- ⅛ tsp hing / asafoetida optional, but recommended
- 8 fenugreek seeds ground, optional
For tempering
- 2 – 3 tbsp vegetable oil or coconut oil
- ¼ onion very thinly sliced
- 1 dried red chili adjust to suit your spice tolerance, or use more if you like more heat.
- ½ tsp black mustard seeds
- ½ tsp cumin seeds
- 6 – 10 curry leaves
- ¼ cup cilantro chopped
- Lime for lime juice, optional
Instructions:
Spiced red lentil curry
- Place the lentils in a fine sieve or colander. Wash the lentils very well until the water runs clear.150 g red lentils
- In a medium pot (about 3 qt), add the washed lentils, water, salt, green chili, onion, minced garlic, sugar, and the spice mix. Make sure the fenugreek seeds are ground before you add it, otherwise it'll be bitter if you bite into whole seeds.150 g red lentils, 600 mL water, ½ tsp sea salt, 2 – 3 green chili, ¼ yellow onion, 1 garlic clove, ½ tsp sugar, ¼ tsp ground turmeric, ½ tsp ground cinnamon, ½ tsp ground cumin, ¼ tsp ground coriander, ¼ tsp Kashmiri chili or cayenne pepper, ⅛ tsp hing / asafoetida, 8 fenugreek seeds
- Over medium high heat, bring the water to a boil. Then lower the heat and simmer the red lentils for about 10 – 15 minutes until the lentils are just cooked through. You can have the pot partially covered or uncovered for this, but do add some hot water if too much water evaporates. I prefer to have the lentil curry partially covered.
- The longer the red lentils are simmered, the more they will lose their shape. If you prefer your red lentils to better hold their shape, simmer only until the lentils are mostly cooked through. If you prefer a creamier texture, you can allow the lentils to simmer until fully cooked through.
- When the lentils have simmered, stir in the coconut milk. You can also add a little extra water to get the consistency you like. I like my red lentil curry to be creamy, but have a looser texture (between a thick curry and soup).120 – 180 mL canned coconut milk
- Heat the dhal while stirring until it starts to simmer, and then allow to simmer for about 2 minutes. Taste and adjust salt to your taste.
- The curry can be served as is at this point, with some chopped cilantro on top and a squeeze of lime juice. But you can also temper the curry (instructions below) for a big flavor boost!
Tempering dhal curry
- Break the dried chili in half, or into larger pieces. You can use more than one for a spicier curry.1 dried red chili
- Heat the oil over medium heat in a small pot.2 – 3 tbsp vegetable oil
- When the oil starts to heat up, add the thinly sliced onions. Sauté to sweat the onions while heating the oil.¼ onion
- When the onions start to turn a light golden color, add the mustard seeds and cumin. Keep stirring the mixture until the mustard seeds start to pop, and the onions are more golden in color.½ tsp black mustard seeds, ½ tsp cumin seeds
- When the mustard seeds start popping, add the dried chili and curry leaves, and mix for about 30 seconds to let the curry leaves and chili toast. But do NOT let them burn.6 – 10 curry leaves, 1 dried red chili
- Immediately add these tempered spices to the hot lentil curry, and stir in to mix.
- The dhal curry is now ready to be served.
- OPTIONAL – You can add about 100 g of leafy greens while heating the lentil curry until the greens wilt and mix into the curry. This will take a further 2 – 4 minutes, depending on how much you add. Spinach is common and a favorite.
- Before serving, stir in chopped cilantro (or simply sprinkle some on top), along with a squeeze of lime juice.¼ cup cilantro, Lime
Tips & Tricks
Storage
This dhal curry can be made ahead of time, and will in fact taste better the next day. However, the curry will thicken the longer it’s stored, so you may need to add a little extra liquid as you reheat the curry. Dhal curry will last in the fridge for about 4 days, and in the freezer for up to 6 months. If you’re reheating this curry from frozen, make sure to reheat the curry at about 50% power (in your microwave) for a longer time until the curry thaws. Then you can reheat at 100% power until it’s properly heated. This ensures more even reheating of the lentils. Alternatively, you can allow the dal curry to thaw in the fridge for 12 – 24 hours, and then reheat in the microwave or on the stove.Note about the spices and chili
Adjust the cayenne pepper / kashmiri chili powder to your preference. Or leave it out if you don’t like spicy food, or if you’re serving this to kids.Nutrition Information:
“This website provides approximate nutrition information for convenience and as a courtesy only. Nutrition data is gathered primarily from the USDA Food Composition Database, whenever available, or otherwise other online calculators.”

Isabella says
Most delicious dhal I’ve made. The temper is so worth it! Sharing this recipe with all my friends
Dini says
I’m so glad to hear Isabella, thank you! And I agree, tempering really gives it that extra flavor boost! 🙂
Lydia says
Hi Dini,
I love your recipes, especially the lentil curry and the chicken curry. Both turned out perfect. Thank you.
Amy says
I’m so glad you posted this! I am going to try and make it even though I don’t have curry leaves on hand… any tips for this recipe specifically for substitutes?
Dini says
Hi Amy
You can skip using the curry leaves if you don’t have them! But you can also use 1 -2 bay leaves. However, add the bayleaves to the curry and not to the tempered spices.
If you do like using curry leaves, you can also buy dried curry leaves as well, that keep really well in the pantry or the freezer.
I hope that helps!
jane righter says
Did you mean to cook the red lentils for 10 min? Your recipe just says “cook for 10.” Is that enough time for the lentils to get done?
Dini says
Hi Jane
Yes I did mean minutes! The last bit of that sentence got cut off for some reason, but I have fixed it now!
Usually for me 10 minutes of simmering is more than enough for red lentils because they are split and so small, so they cook very easily. But I only cook them until they are JUST cooked through, so they retain their shape a little better. Remember that the curry will simmered further after adding coconut milk, so they do get cooked longer afterwards.
However, if you use a very small pot or if you want the lentils to be softer, the cook time will change accordingly.
I hope that helps!
Richard says
Ha, I’ve been waiting for this lentil curry, thank you Dini! The tempered spices look very flavourful,