
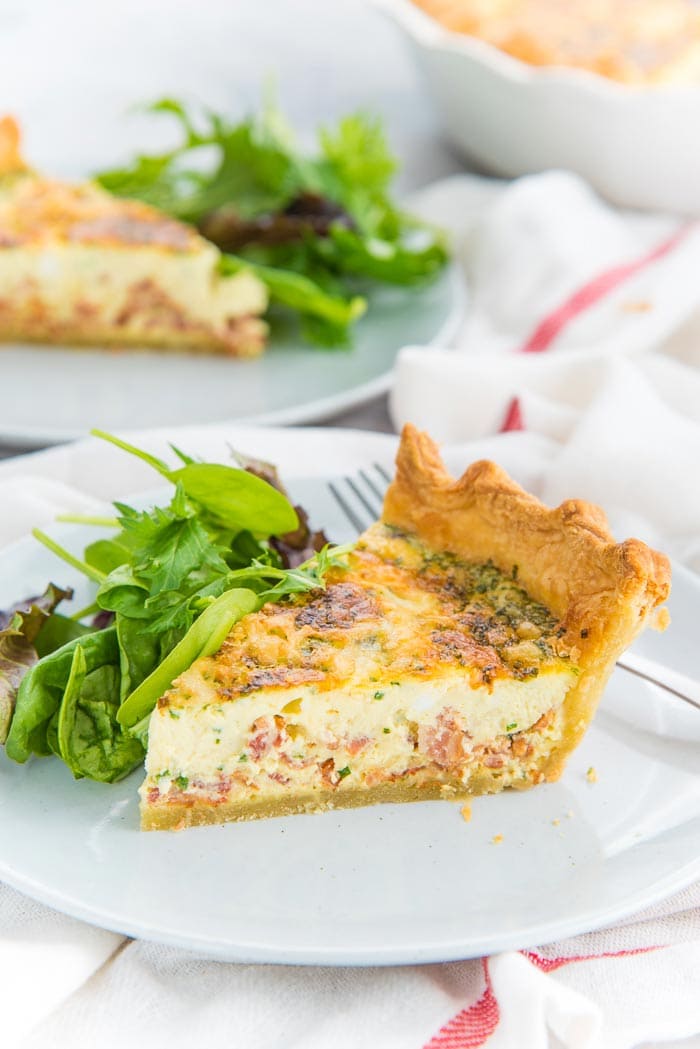
This Classic Quiche Lorraine is packed with bacon, chives, cheese, and eggs, and baked in a flaky, buttery crust that is so easy to make! It’s rich, creamy, and full of incredible flavor! Can be made ahead and frozen for later too.
This quiche lorraine is one of our favorite breakfast recipes, and it’s also perfect for brunch, lunch, or to serve a crowd.

A while back, I used to work in an indie movie theater in Christchurch, NZ. This was where my affection for coffee and tea drinks was further honed and nurtured.
But it was also where I ate the most perfect Classic Quiche Lorraine! There was a cafe downstairs that served slices of quiche (along with savory French toast and classic French toast), and they were nothing but creamy, cheesy, bacony, eggy indulgence.
Quiche Lorraine recipe highlights
- Quiche lorraine is perfect for breakfast, brunch, lunch, or even as a light dinner with a side salad.
- This recipe is also great for making ahead and meal prepping. I often make it on weekends, so I can freeze the slices to eat for breakfast throughout the week.
- This is also perfect to serve a crowd.
- This quiche lorraine features my comprehensive pie crust recipe, that makes the most flaky, buttery crust.
- Plus, you can adapt the quiche recipe to incorporate whatever you have left in the fridge, helping you reduce food wastage.
- So, it’s a very versatile recipe (much like a breakfast fried rice, where you can re-purpose leftovers in an even more flavorful way!).
What is in quiche lorraine?
Here are the ingredients for the best quiche Lorraine.

Crust ingredients
- All purpose flour
- Unsalted butter – Chilled. This helps to keep the pie crust tender, crumbly and flaky.
- Salt
- Egg yolk / egg (optional) – The purpose of eggs in this crust is to help with binding, but they are not necessary.
- Iced water

Filling ingredients
- Eggs
- Cream and milk
- Bacon
- Cheese
- Chives or herbs
- Garlic (optional)
- Black pepper (optional)
How to make quiche Lorraine
Quiche lorraine can seem intimidating for a first-timer, but I assure you, it’s easy!
A shortcrust pie crust is traditional for a quiche lorraine. This is made with butter cut into the flour to form a coarse sandy texture that creates that delicious crumbly pie crust.
Water is added to bring the dough together, but the addition of egg helps to bind the dough together more easily.
With my very comprehensive guide on how to make pie crust, you can make a deliciously buttery, crumbly pie crust or a flaky pie crust as well.
Here I show you how to make the most perfect homemade crust, with tips on how to avoid shrinking, how to blind bake perfectly, and how to get that golden brown crust.
I also share secrets on how to get a creamy, delicious and flavorful filling!
The result is the perfect quiche, with the most irresistible crust and creamy filling every time!

Crust
You can make this crust in the food processor or by hand. I have done both, and while I do prefer making it by hand, the food processor is faster.
Make sure the butter is cubed and chilled, OR grate the butter and freeze it.
If you choose to use the egg yolk, whisk the egg yolks with ice water and keep it in the fridge until you need it (image 1).

Place the flour and salt together and whisk (or pulse) to mix (image 2).
Next, add the butter and toss to coat the butter pieces (image 3). If you have cubed butter, use a pastry cutter to cut the butter into smaller pieces.
Or, pulse the flour and butter together to cut the butter into smaller pieces while mixing with the flour.
The flour and butter should look like coarse wet sand at this stage (image 4).
Add the egg yolk and water mixture to the flour and butter mixture while mixing it in (or pulsing in the food processor). Add more ice water (i.e. just enough water) to bring the dough together.
However, the dough should still be on the drier side, because adding too much water can contribute to the dough shrinking when baking. The dough has enough water when the flour mixture forms a ball when you squeeze it together, but still has some dry spots (image 5).

Turn the dough out onto a parchment paper and use the parchment paper to bring the dough together. Form it into a rough disc and refrigerate for about 30 minutes or more (images 6, 7 and 8).
Once the dough is rested in the fridge, roll it out into a circle that is about 3 mm thick (image 9). Having a thin crust will ensure that you have a wonderfully flaky crust when the quiche is baked through.

Line a 9-inch deep pie dish, or a 9.5 inch deep tart pan with the rolled out dough. Do not stretch the dough to fit the pie pan. Instead, lift and gently rest the dough in the pan along the edges to line the pan (image 10).
Cut the excess dough (image 11). Leave a border if you’re using a pie dish, so that you can roll the pie crust edge to form a slightly thicker pie crust when baked (image 12). Then flute or crimp the edge if you like (image 13).
With tart pans, this is not necessary, and the excess can be cut off.
Refrigerate for about 1 hour or freeze for about 30 minutes while the oven is preheating.

Blind-baking the pie crust
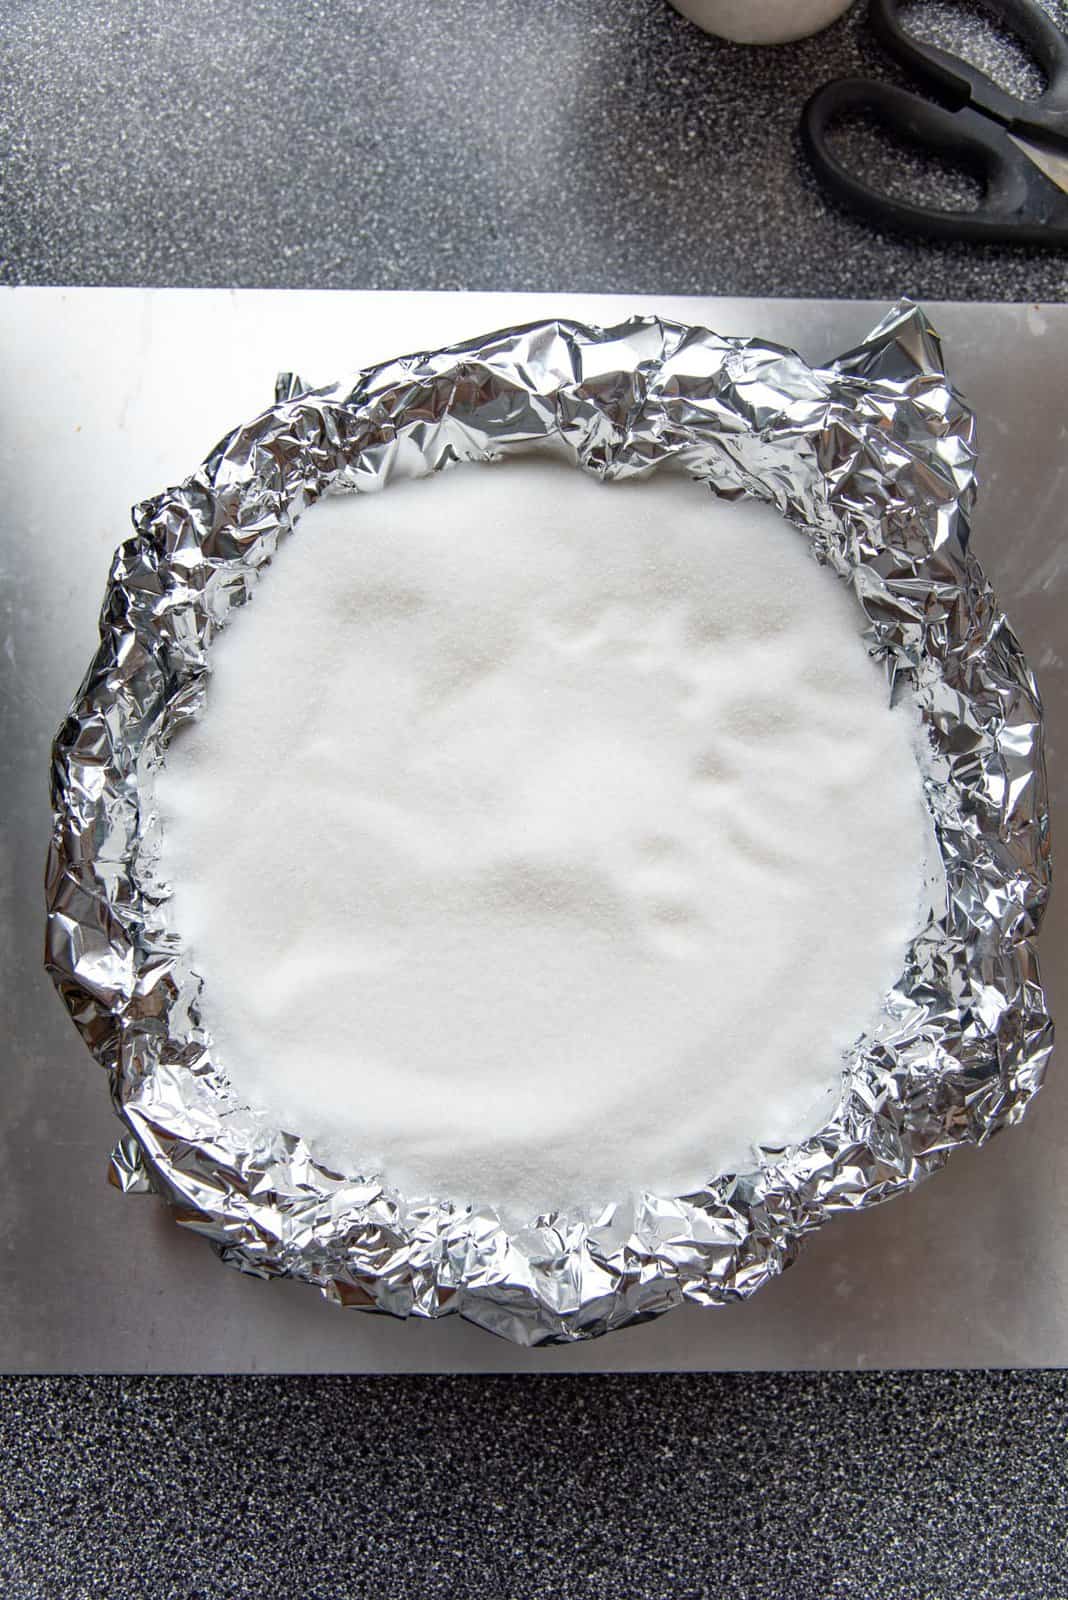
Once the oven is preheated, line the chilled quiche crust with 1 – 2 pieces of foil. Making sure that the entire surface of the crust is covered by foil.
Fill the foil liner with pie weights. I like to use sugar or rice, because the smaller grains do a better job of covering a bigger surface area.

Bake the crust in the oven for about 45 – 50 minutes until the crust has started to turn darker in color. Next, remove the weights, prick the bottom of the crust, and bake in the oven for a further 5 – 10 minutes until the bottom of the crust is dried out and is just starting to color.
Remove from the oven and let it cool down. You can make the crust the day before if you like, but you can also fill the crust when it’s a little warm.
Make the filling and bake

The filling is very easy to make with this classic recipe!
The first step is to cut the bacon into pieces and cook it over medium heat until the bacon is a little caramelized (image 14). Drain the excess fat, and set the bacon aside.
Place the eggs and cream in a bowl and whisk very well to combine (image 15). Set a little bacon aside for the top of the quiche, and add the rest of the bacon to the bowl with the eggs (image 16). Followed by the cheese and chives, and then mix with a spatula (image 17).

Add a little bit of salt as well, but make sure not to add too much. The bacon and cheese will also add salt to the filling.
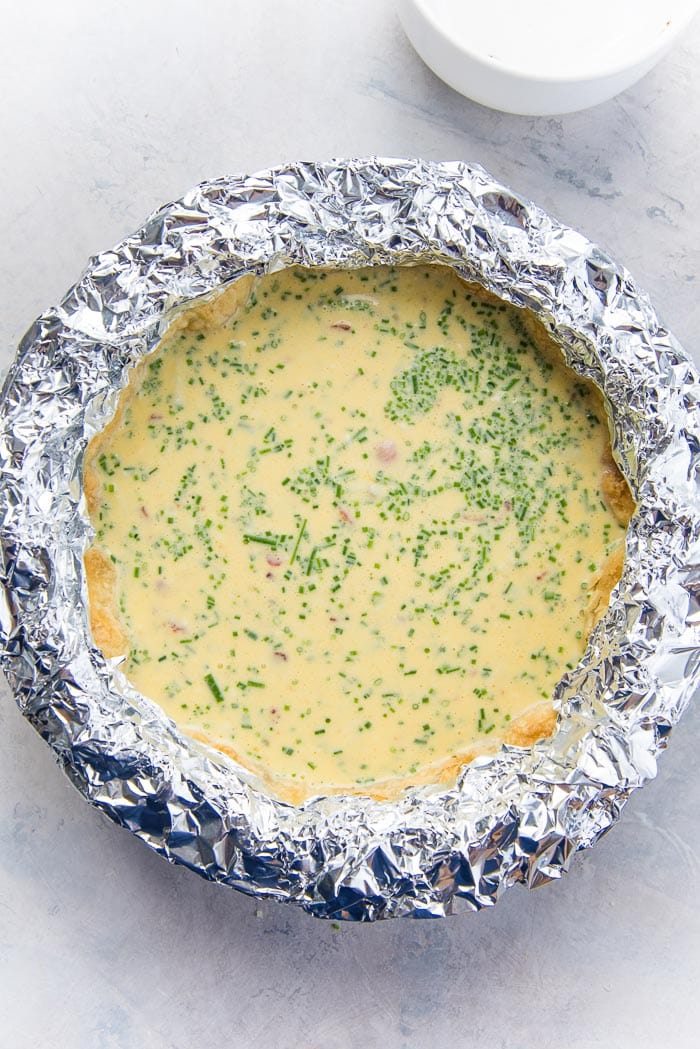
Pour the egg mixture into the blind-baked crust. Gently stir to ensure all of the filling is evenly distributed (image 19).
OPTIONAL – Dot the top of the quiche with some goat cheese or cream cheese.
Sprinkle the extra bacon on top (image 20).
Return the quiche to the oven and bake until the filling is baked through and the crust is golden brown (image 21).
For a prettier crust, brush the crust with some egg wash, so that the crust has a beautiful golden brown sheen. If the crust is browning too fast, use a crust shield to cover the crust as it bakes.
Let the quiche cool down slightly and serve while still warm.
Pro tips to make a perfect crust for your quiche lorraine
- Start with chilled ingredients – All the ingredients for the crust need to be chilled before you start; butter, flour, egg, and water. This will ensure an incredibly delicious, flaky crust.
- Never overwork the dough – You must knead the dough to bring it together. However, I prefer to use a gentle fold-and-turn method to knead the dough. The folding action will also create buttery, flaky layers, while making sure you don’t overwork the gluten (which can cause the crust to shrink). If you use your food processor, make sure to pulse the mixture until the ingredients are just mixed through. The final step of bringing the dough together must be done by hand.
- REST the dough – This is so important! I let it rest in the fridge for at least 1 hour. The gluten will relax and help prevent crust shrinkage.
- Roll the dough freely – Make sure your work surface is lightly floured so that the dough doesn’t stick. Flip the dough, so you roll it out on both sides, while applying equal pressure, so that you roll out the dough to an even thickness.
- Do not stretch the dough – When placing the dough in the pie/quiche dish, make sure not to stretch the dough in the pan. If there are bubbles under the crust, or the crust hasn’t quite gotten into the edges of the pan, do not push the dough in and stretch it out. Instead, gently lift the dough, and replace it in the pan without bubbles or gaps.
- Dock the crust – I like to dock the crust before baking, but I also dock the crust during the blind baking process as well. This helps the crust retain its shape as it blind bakes and cools.
- Bake low and slow – Usually blind baking is done at a high temperature for a short time. This is still an option, but I prefer baking at 350 F for a longer time. This ensures that the crust keeps its shape, there is less shrinkage, and less chance of the crust slipping down. The filling should definitely be baked at a low temperature so that the custard filling doesn’t overbake and become dry.
- Use cornstarch or Instant ClearJel (modified cornstarch) – This will help to keep the filling smooth and creamy. Using cream in the filling mixture also helps to create a creamy filling.

Should I blind bake the crust or not?
I prefer to blind bake the crust. This lets the crust become crisp and turn golden brown, reducing any chances of the dough being under-cooked and stodgy.
If you add the filling to the raw crust and bake it, the egg custard will keep the crust soggy and not bake through. OR if you bake the crust till it’s golden brown, the egg filling will overcook.
With blind baking, my crust is ALWAYS golden and flaky on the sides and on the bottom, and not a soft, soggy mess.
So, I recommend always blind baking. I used to use ceramic pie weights or dry beans, but since making hundreds of pies (check out my breakfast pie recipes and dessert pie recipes for a full archive), I have switched to using rice or sugar.
Another tip to make blind baking easier is to line the pie crust with foil before placing the pie weights inside.
This way you can easily remove the pie weights when the time is right, and there’s nothing sticking to the quiche crust.

How to upgrade your quiche Lorraine (my favorite additions)
You can add even more flavor to your quiche lorraine filling with these additions.
- Minced onion
- Finely chopped spring onions
- Caramelized onions (my favorite addition)
- Chives or garlic chives (here, I’ve used chives because I love the specks of green in that creamy quiche lorraine)
- Minced garlic or garlic powder
- Thyme, rosemary or other herbs such as basil, parsley, dill
- Fresh chili (sliced or chopped)
- Goat cheese or cream cheese for some tangy creamy texture in the quiche
- Other types of cheese such as cheddar, mozzarella, feta, monterey jack, gruyere cheese etc. Gruyere cheese is a lovely pairing with eggs, like these eggs en cocotte (baked eggs).
You can also add other ingredients. But if these ingredients have a higher water content, it’s important to either remove the excess water OR add some cornstarch to help absorb that extra liquid. For example,
- Sauteed mushrooms
- Sauteed spinach
- Kale or other leafy greens (sauteed to add more flavor)
- Sauteed or roasted vegetables
- Sliced potatoes or sweet potatoes
- Tomatoes
- Leeks
- Leftover meat – rotisserie chicken, cooked ground beef, ham
- Breakfast sausages
What to serve with quiche Lorraine
I prefer serving this warm, or at room temperature.
I also like to keep the sides simple. A green salad with a simple vinaigrette is my idea of the perfect side dish, since this quiche Lorraine is really quite rich and flavorful.
You can also serve it just as is, or even with a dollop of crème fraîche.
Since I make this often for summer brunch, I usually pair this with a pitcher of my galaxy lemonade, or my ginger rose fizz drink. They are the perfect summer drinks to complement this easy quiche recipe.
Storage and make ahead tips
This quiche lorraine can be made ahead of time too!
The crust can also be made the day before you need to bake the quiche. Just bake the crust and leave it in the fridge overnight.
Once the filling is baked, the quiche can be stored in an airtight container in the fridge for up to 5 days. Although, it’s best served the on the day you bake it, or the next day.
Tools I use for this recipe
- Silicone pastry mat – Makes it much easier to roll out the pastry, but you can use a smooth countertop as well.
- Rolling pin – A heavy rolling pin ensures evenly rolled out pastry dough. You can use a wooden or plastic or steel.
- 9 inch deep pie dish or 9 inch deep quiche pan – I like using a deep pie dish so that I can add more of the filling, plus this is so beautiful that the quiche can be served right in this dish.
- Pie weights – I just use raw rice or white sugar.

Commonly asked questions
A perfectly baked filling is obviously a must. Bake it too long and the quiche will be too dry. Bake it too short and you end up with a soggy, unappetizing mess.
The best way to know that your quiche is done is to take it out while the middle is still a little jiggly like jello, but it’s not raw or liquid-y.
At this stage, if you insert a sharp knife or cake tester into the quiche about one and half inches from the crust, it should come out clean. Then remove the pie from the oven and let it continue to cook in the residual heat.
Yes, you can! Just wrap the quiche with plastic wrap really well, followed by aluminum foil. Then freeze the quiche.
When you want to serve it, let the quiche thaw out in the fridge overnight and reheat in the oven until heated through.
If you’re meal planning, you can even cut the quiche into slices and then individually wrap the sliced and freeze them.
Then you can take only as many slices as you want, and reheat them as needed.
Quiche is a baked savory egg custard tart with crust on the bottom, and vegetables, cheese, and meat in the filling. You can use many different types of ingredients for the filling.
Quiche Lorraine is when bacon is used in the filling! The very basic Quiche Lorraine is made with an egg custard base, with bacon and cheese, and then baked in a crust.
I like to reheat quiche by preheating the oven to 250 F and then placing the quiche until it’s heated through. The time will depend on how big the quiche is (usually about 20 – 25 minutes for a whole quiche).
Smaller slices will heat through much faster than a whole tart.
The good news is that quiche Lorraine can be served cold too!
Yes! A crustless quiche is a frittata (like this sausage frittata). So, you can absolutely make a crustless quiche too.
Yes! Use the crust to line muffin pan cavities and then bake the quiches in muffin pans to make mini quiches (like these tuna melt mini quiches).
Absolutely! You can purchase ready-made pie crust, and line a deep pie dish or a deep quiche pan to make this recipe. A deep pie dish has a depth of 1.5 – 2 inches. A deep quiche pan also has a depth of about 2 inches.
If you use pie crust that is already lined in a foil pan, you will only be using some of the filling. This is because lined pie dishes are shallow and not as deep.
More delicious brunch recipes you’ll love
- Bacon and egg pie
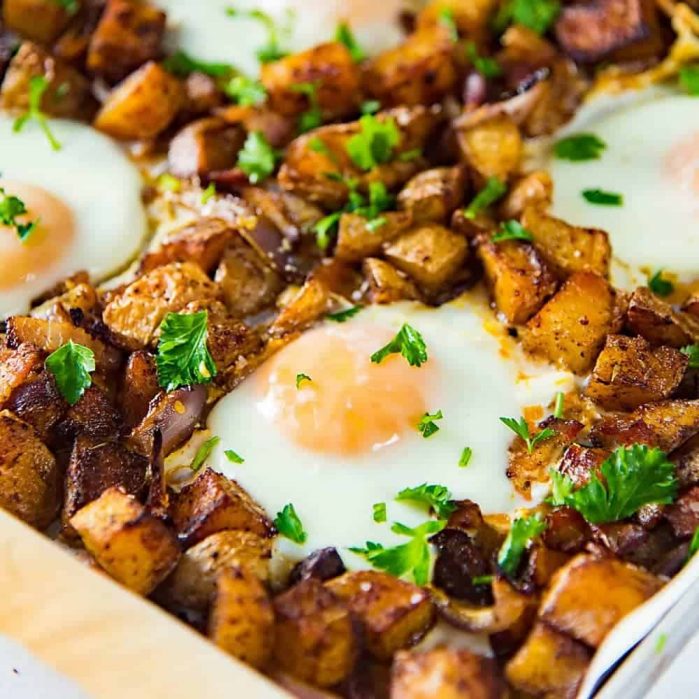
- Oven roasted breakfast potato hash
- Cinnamon rolls
- Pizza egg muffins
- Sausage frittata
- Mushroom, bacon, egg breakfast pie
- Brioche cinnamon rolls
- Overnight yeasted waffles
Looking for more recipes?Sign up for my free recipe newsletter to get new recipes in your inbox each week! Find me sharing more inspiration on Pinterest and Instagram.

Quiche Lorraine
What You Need:
- 9 inch deep Pie Dish or Quiche Pan 1.5 – 2 inches deep
- Pie weights – raw rice or sugar
- Foil
- Rolling Pin
- Pastry mat for easy rolling optional
Ingredients:
Quiche crust
- 250 g AP flour 2 cups (spooned and leveled)
- ¾ tsp sea salt
- 200 g unsalted butter 1 ⅔ sticks / 13 tbsp (cubed and chilled or grated and frozen)
- 1 egg yolk optional
- 30 mL chilled water 2 – 4 tbsp
- 60 mL chilled water may not use the whole amount
- 1 large egg for egg wash
Quiche Lorraine
- 300 g bacon about 12 slices (sliced into smaller pieces)
- 100 g gruyere cheese about 1 cup (OR Swiss cheese)
- 30 g goat cheese optional
- 3 tbsp finely chopped chives
- 5 large eggs
- 180 mL half and half ¾ cup (full cream milk can be used as well)
- 180 mL heavy cream ¾ cup (at least 35% fat cream)
- ½ tsp sea salt add to your taste
Instructions:
Quiche crust
To make the dough by hand
- Place the flour and salt in a large bowl, and mix to combine.250 g AP flour, ¾ tsp sea salt
- Add the cubed butter or grated butter. Using a pastry cutter or your fingers, cut the butter into the flour. The flour-butter mix should mostly resemble coarse bread crumbs or coarse wet sand, with some larger chunks.200 g unsalted butter
- In a small bowl, beat the egg yolk with the 30 mL chilled water.1 egg yolk, 30 mL chilled water
- Add the egg mix to the flour, and mix it into the flour using a fork or floured hands. Mix the dough gently to bring the flour together to form dough clumps.
- Add more iced water, one tablespoon at a time while mixing, until you get the right consistency. That is, a dough that looks dry, but when squeezed in your palm, it should form a clump of dough. If you did not use an egg yolk, you may need to add more water.60 mL chilled water
To make the dough with a food processor
- Pulse the flour and salt mixture to mix. Add the butter mixture and pulse a few times until you get a mixture that resembles coarse sand, with some larger pieces of butter.
- Stream the egg-water mixture, while pulsing. Add more water, a tablespoon at a time, and check to see if the mixture forms a clump of dough when squeezed in your palm.
For both methods of making the dough
- Turn the crumbly dough out onto a parchment paper, and use the paper to press the dough together to form a dough disc. Be careful not to overhandle the dough at this point. The dough disc should have some dry spots. If the dough is really wet, sprinkle more flour on top.
- Place the dough in a ziploc bag (or wrap in plastic wrap), and refrigerate for a minimum of 1 hour.
Lining pie dish with the pie crust
- Flour a work surface (or pastry mat), and roll out the dough into a circle that is about 3 mm in thickness.
- For even smoothness and to ensure that the dough does not shrink, turn the dough a quarter turn as you roll it out from the middle AND also flip the dough so that you roll it out on both sides. Also make sure that the dough doesn't stick to the surface by lightly flouring the dough as you go. If the dough starts to shrink as you roll it out, cover it with plastic wrap and let it rest in the fridge for about 30 – 60 minutes.
- Carefully place the rolled out dough in the pie dish, without over-stretching the dough. To do so, gently lift the dough and guide it to fit into the corners of the bottom of the pan.
- Trim the excess crust, while leaving a small overhang. Make sure the crust at the bottom is still fairly thin. Fold the overhang and create a fluted crust edge (using a fork or your fingers). Dock the base of the pie crust and refrigerate the crust for at least 30 minutes while you preheat the oven.
- When ready to bake, preheat the oven to 350°F / 180°C.
- Before baking, take a large piece of aluminum foil and line the inside of the pie crust. If the foil piece is not big enough, line two pieces at 90 degrees to cover the entire inside of the crust. Make sure it lays flat against the crust. Next, fill the pie plate with sugar or rice up to ¾ full to be used as pie weights.
- Bind bake the pie crust for 40 – 50 minutes, until it turns a light blonde color.
- Remove from the oven and then very carefully remove the sugar and foil. Carefully dock the crust again, and return to the oven to be baked for a further 5 – 10 minutes, until the bottom of the crust looks dry and isjust starting to turn golden. Baking at the lower temperature will ensure that your quiche crust will hold its shape better and not shrink.
- Remove from the oven and let it cool while you make the filling. The crust can also be made the day before.
Quiche Lorraine
- Preheat the oven to 325°F / 162°C.
- Cut the bacon into small pieces and cook them in a pan over medium heat until the pieces are just a little crispy at the edges, but not crispy throughout. Drain the fat and set aside.300 g bacon
- In a large bowl, place the 5 eggs and whisk well.5 large eggs
- Add the cream and half and half / milk and whisk very well to combine.180 mL half and half, 180 mL heavy cream
- Set aside a handful of the cooked bacon. Add the rest of the bacon to the whisked eggs.300 g bacon
- Add the salt, gruyere cheese, and chopped chives to the egg mix. Whisk to mix well. Set aside.100 g gruyere cheese, 3 tbsp finely chopped chives, ½ tsp sea salt
- Carefully pour the filling into the par-baked crust. Use a spoon to gently move the cheese and bacon around so that it's evenly spread inside the quiche crust. If using goat cheese, dot the cheese over the surface of the quiche. Sprinkle the cooked bacon that you set aside on top as well.30 g goat cheese
- Bake the quiche in the preheated oven for about 40 – 50 minutes. During the bake time, periodically check the quiche until the crust is a golden color.
- When the crust is golden in color, carefully brush the crust with some egg wash. Continue to bake until the filling is baked through – the middle should still be just a little jiggly, but not runny.1 large egg
- If the crust is darkening too much or burning, use a crust cover (foil or silicone) to cover the crust. However, I do not find that I need to use this because the quiche is baked at a lower temperature throughout here.
- Once the quiche is baked, remove from the oven and let it sit for about 15 minutes. Ideally, let it rest for about 30 minutes before serving, to allow for the egg custard to properly set.
- Serve the quiche while still warm or at room temperature with a side salad.
Tips & Tricks
Storage and make ahead instructions
The crust can also be made the day before you need to bake the quiche. Just bake the crust and leave it in the fridge overnight. Fridge Once the filling is baked, the quiche can be stored in an airtight container in the fridge for up to 5 days. However, it’s best served the on the day you bake it, or the next day. Freezer Just wrap the quiche with plastic wrap really well, followed by aluminum foil. Then freeze the quiche. When you want to serve it, let the quiche thaw out in the fridge overnight and reheat in the oven until heated through. You can also precut the quiche before freezing, so you can reheat only as many pieces you need.Reheating instructions for quiche
I like to reheat the quiche by preheating the oven to 250 F, and then heating the quiche until heated through. The time will depend on how big the quiche is (usually about 20 – 25 minutes for a whole quiche). Smaller slices will heat through much faster than a whole tart. The good news is that quiche Lorraine can be served cold too!Nutrition Information:
“This website provides approximate nutrition information for convenience and as a courtesy only. Nutrition data is gathered primarily from the USDA Food Composition Database, whenever available, or otherwise other online calculators.”


Leila says
I made this amazing quiche today for a ladies birthday brunch. To say that it was well received would be an understatement. Everyone LOVED it! I followed the recipe almost exactly. My only additions were a pinch of nutmeg, a tbsp of fresh rosemary, and on top some torn fresh dill weed from my herb garden. I purchased regular, original style Oscar Mayor bacon and just used the whole package. I baked it the night before and reheated it at 350 for 20 minutes just before my guests arrived. It is better than anything I’ve ever eaten in a restaurant and has a very rustic look with the additions of the herbs. I served it with a mixed green salad with apples, toasted pecans, blue cheese crumbles, and raspberry vinaigrette. The contrast of the savory quiche and sweet/tart of the salad was perfect. I also served some good bakery croissants that I warmed in the oven, and mimosas that were heavy on the champagne. But there’s no question that the quiche was the star of the show. Everyone at the brunch was taking pictures of the plated food. And so many compliments!!! Thank you for this recipe. It will be my go-to for every brunch I host. I’m so happy I found this going into the holiday season!!
Martha says
Came out so well! Your step by step instructions and photos were very helpful!
Erin says
I love your detailed instructions for everything! I’ve always struggled with pie crust – any reason this wouldn’t work for a fruit pie?
David Barnes says
Your detailed recipe has solved the issues I have had wirh making one of my favorite meals…..Thankyou.
Sandra Dufoe says
The recipe looks amazing I will be trying it out when everyone his visiting over the holidays.